
Our new (cozy) attic space
Attic renovation in 3 weeks!
I’m so excited to be sharing this space today. When we first bought our new (old) house we knew we would need to renovate the attic for our son when he’s home from college on holidays. We had a small window of time to complete the work before the first holiday break. Three weeks to be exact. And we did it! Thanks to our contractor Jason DeVivo and quick decision making on our part.
Figuring out the space & making it work
The house was built in 1922, so when renovations were done about 15 years ago, the air conditioning was installed in the attic. At this point they must not have considered renovating the attic as living space because they weren’t exactly efficient with the location of the unit and duct work. After careful consideration (a five minute conversation with Jason) we decided to work around it in an effort to save time and money.
The Challenges
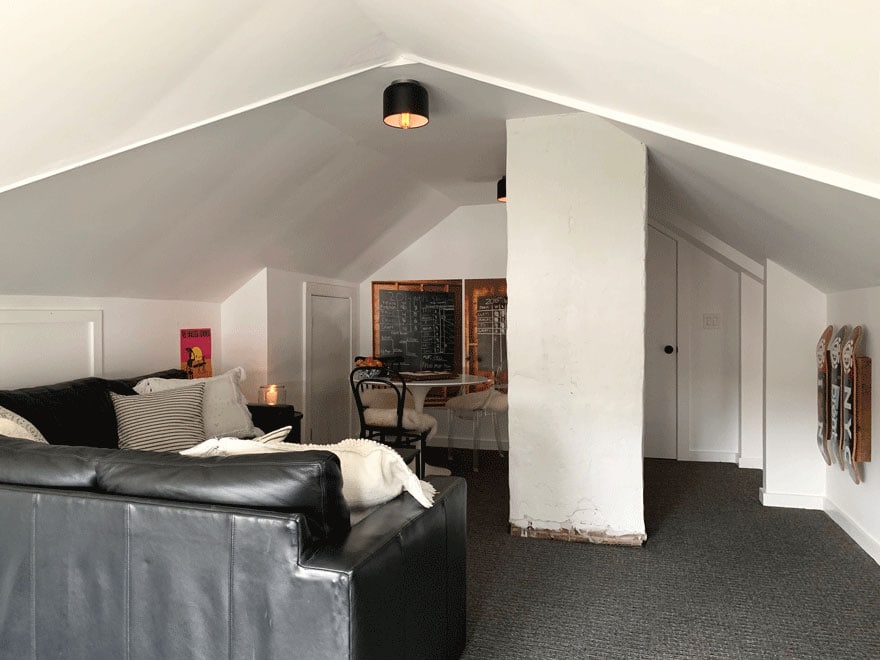
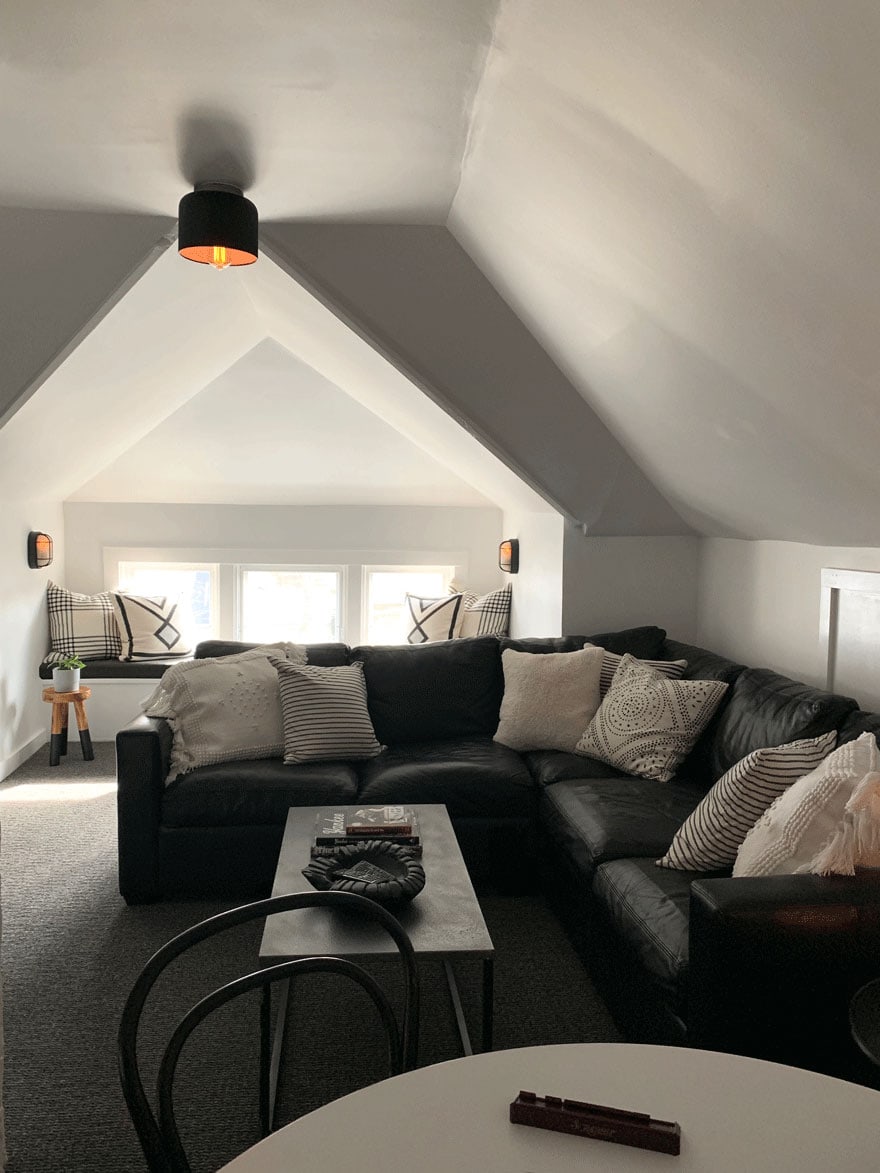
Our big goal was to be able to use our sectional from the previous attic. It’s comfortable and perfect for the space, but would it fit? Another obstacle (literally) that we were dealing with was a chimney located in the middle of the room. At some point the brick had been covered with cement or some kind of stucco. Jason took a brick and smoothed it out and gave it a fresh coat of paint. I don’t hate it…
Window seat with custom cushion from Patio Lane
The best part of the entire space is the window seat. Under the three windows a seat or ledge was created by covering duct work. It was the perfect place for additional seating. We used a single cushion from Patio Lane to complete the space. Patio Lane has wonderful tools to create the exact custom cushion you need for your space. Using the Custom Indoor/Outdoor Cushion Builder you will start by selecting what type of cushion you need. I chose the bench/window. From there you add in your dimensions and select the thickness of the foam. Our window seat is wider than the recommend width for one cushion. I still opted to use one cushion and am completely happy with it. In the next step, you select your fabric from the large selection of Sunbrella fabrics. We chose the Essential Coal. You can order up to 10 fabric samples. When the cushion arrived, I immediately took it up to the attic and was absolutely thrilled with the look and quality. I have always loved a built-in bench or window seat and now that I’ve used Patio Lane, I can’t imagine going anywhere else. Check out my Pinterest board just for Banquettes & Built-in-Benches.
Patio Lane is offering MLT readers a 15% discount on any order by using the code MOSTLOVELY (Good through 3/31/19).

Lighting
For lighting we added two sconces by the window seat and two flush mount light fixtures from CB2. They are the perfect solution to overhead lighting. They are all on a dimmer. For the flooring we decided on a commercial grade carpet from Home Depot.
Furniture
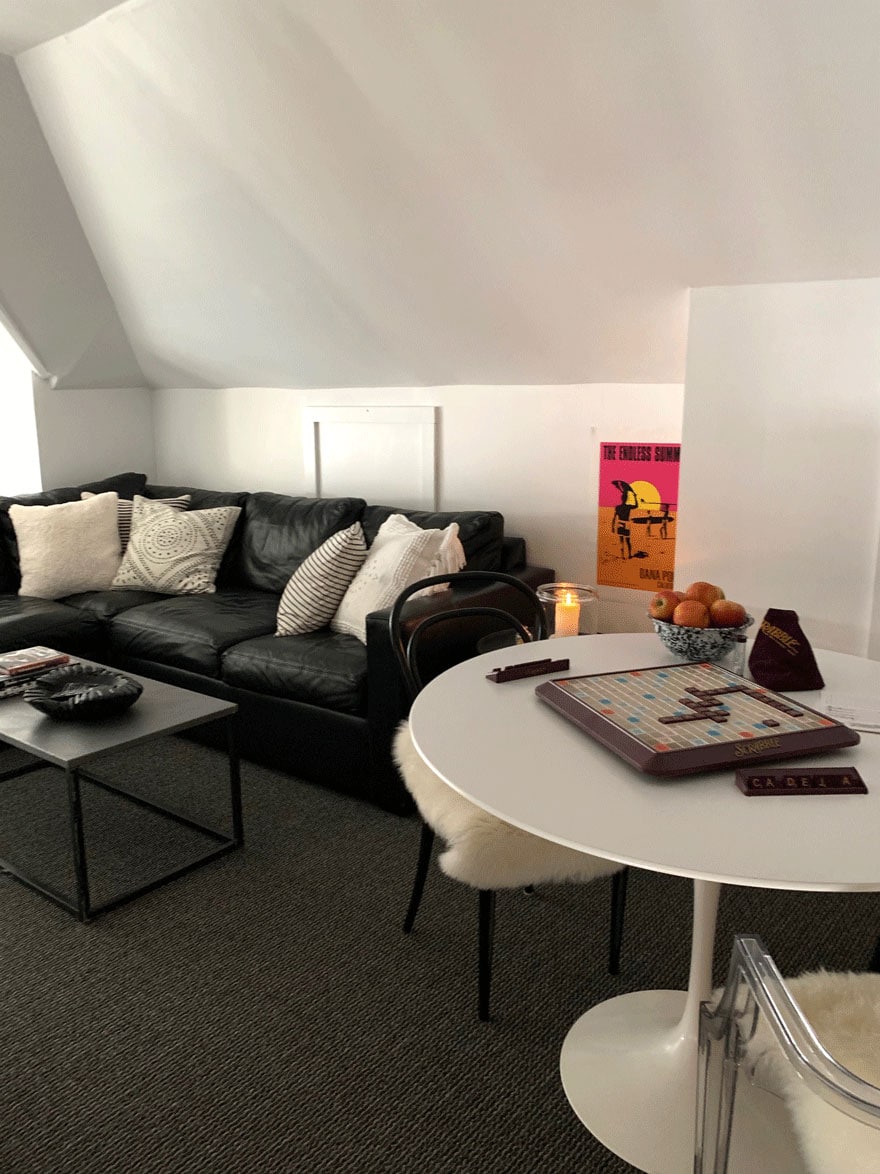
The furniture for this space was entirely from our previous homes. The leather sectional from the attic space, the Saarinen table from our eat-in-kitchen, the chairs from the dining room, the stools from various spots in the house, and the coffee table from the patio (this will need to be replaced once warm weather arrives). We are considering this one or maybe this one.

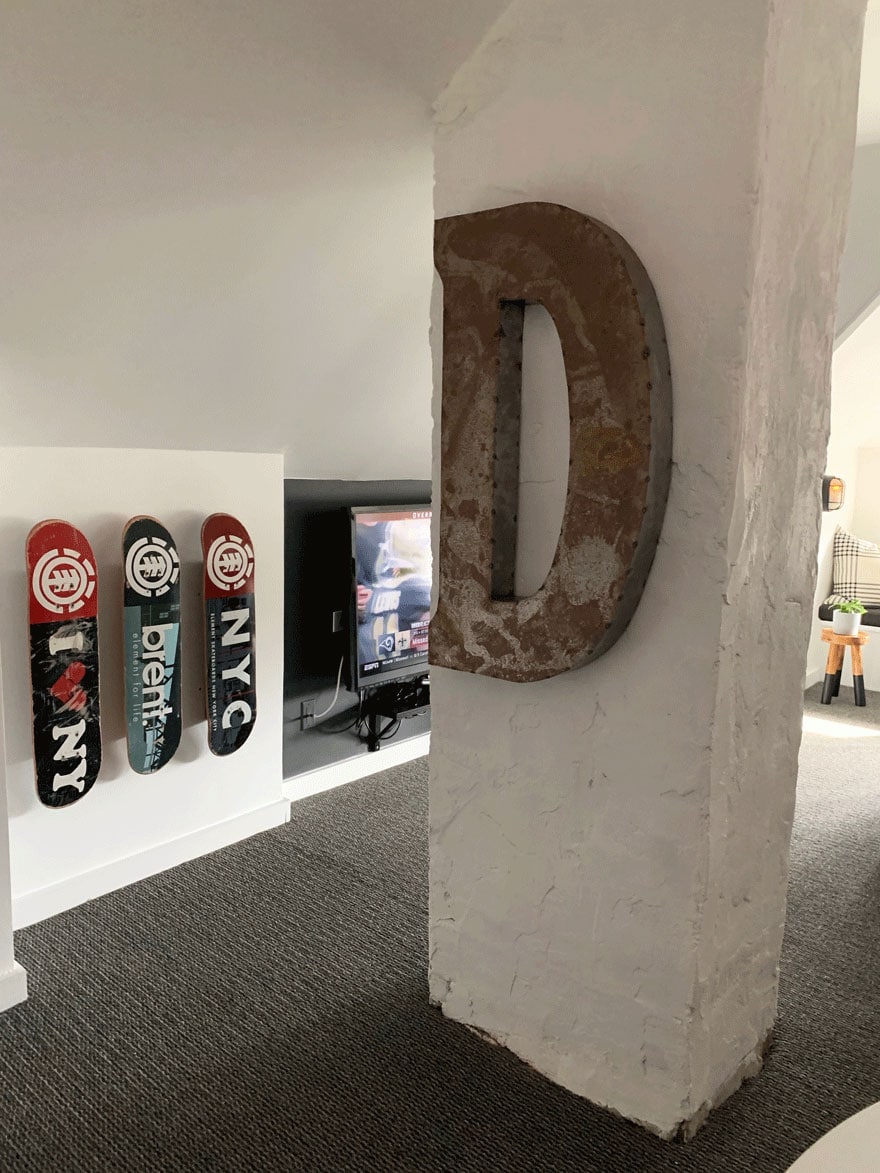
Art
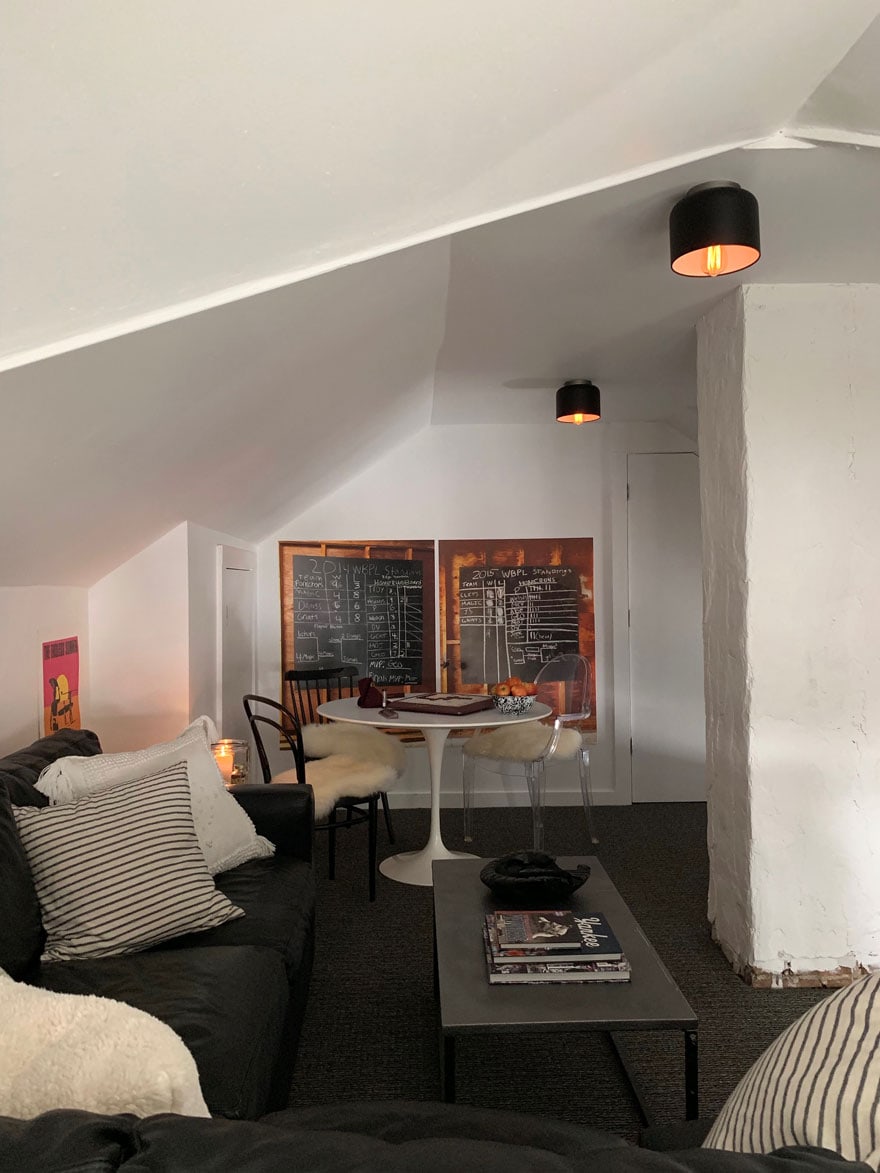
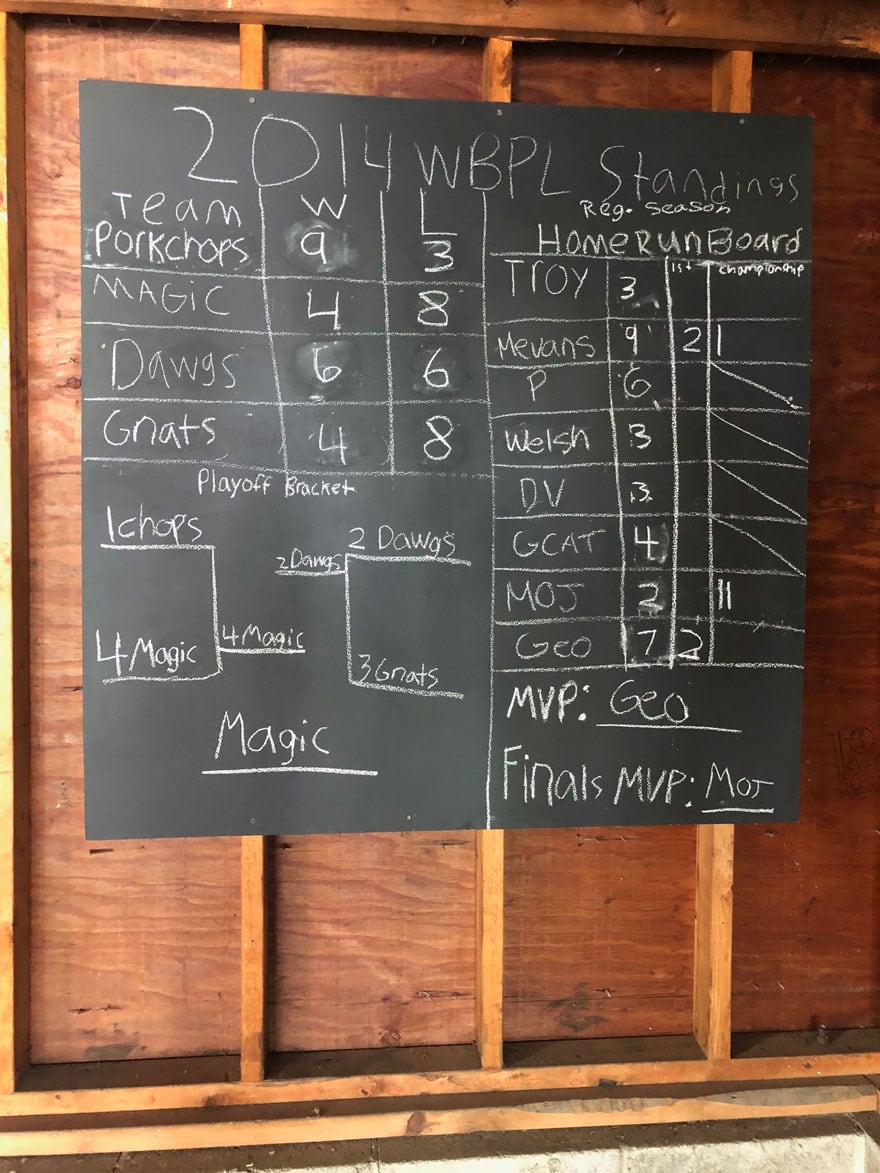
Once the space was completely renovated and carpet was in, it still lacked warmth. It needed something on the walls. I took cues from Patrick’s comment when we moved into this home. He asked if his room could look like his old room. So I thought why not re-create this new attic space with a little bit of the look and feel from our former home. When we moved to New Canaan, Patrick was going into eighth grade. We lived just couple of blocks from town so it was common for kids to get dropped off in town and then make their way to our house for the entire weekend. They played wiffle ball in the yard and hung out between the garage and the attic, which they referred to as “the gra” and “the tic.” The garage had two large plywood boards that had been painted with chalkboard paint where they could keep score for the summer season of wiffle ball. They took it very seriously. We never had the heart to erase the boards. When we were walking through the house on the last day before handing over the keys, I took photos of everything. Even the scoreboards in the garage. I loved how they looked against the natural wood of the old garage. I once again used engineer prints from Staples to create very inexpensive art. I went with color blueprints and selected the largest size and made two for around $20. Color Blueprints or Engineering Prints from Staples are great for inexpensive art, birthday party decor, graduation or gift wrap. Brent hung the skateboard decks from the old garage. He mounted two pieces of wood behind each so they have the floating effect on the wall. We hung the large letter D from Brooklyn Flea on the chimney giving it even more of an industrial look.
The Budget
When we penciled out a budget (me on a legal pad with a sharp pencil and Brent using an Excel spreadsheet),we hoped $10,000 would cover the costs of the attic renovation. Surprisingly, we came in well under budget at around $8,000. That includes the building materials, the contractor, the dry waller, the painter, the electrician, carpet, lighting, and paint. If you live in the Fairfield County, CT or Westchester, NY area and need a contractor for a project, contact me and I can put you in touch with Jason.
Emtek Hardware
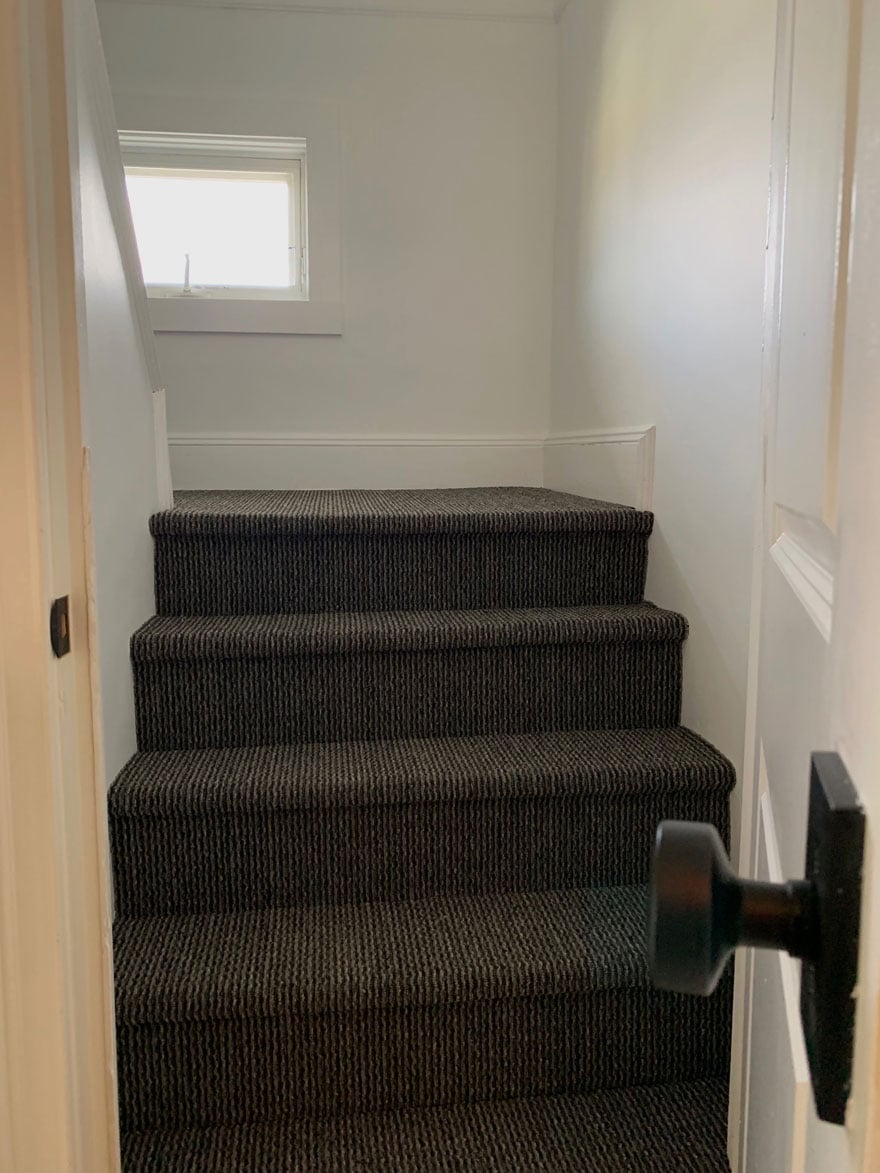
We used Emtek Hardware throughout the house for all interior and exterior doors. We love the flat black and the modern look and feel. We chose the Laurent knob with the rectangular modern rosette.
Shop the Look


Wonderful, Annie!
You are such a dynamo, Annie. It looks awesome and thoughtful and unique!!
Thank you Mary Ann!
What a great space! Love all the thoughtful details.
Thanks Lisa! Let’s catch up soon with a phone call! Miss you!
Love it all, but especially the blue prints. What a great idea! Are they in frames? How did you hang them? I can’t tell. They are so amazing. What great memories for your son…and you!
Hi Jodi-I didn’t even trim them…they have a small white border and I just hung them using 3m poster strips. So easy and super inexpensive. Great for a kids playroom, bedroom.
HI Anna! Love the carpet. Can you source it for me? Thanks! What a cool room!
Hi Jennifer-The carpet is from Home Depot. We love it! I was looking at something similar, but it was so expensive and then one day I was walking through Home Depot and this caught my eye. It’s commercial grade and cheap! Here’s a link https://rstyle.me/n/df8hx4b49sx or if this doesn’t work for some reason, it’s linked in the post. Thanks for reading!