
Design and Create an Attic Hangout and Guest Space

Design and create an attic hangout and guest space in your home.
A few years ago, I participated in the One Room Challenge contest. For those of you not familiar with the One Room Room Challenge, it’s a project that was started by Linda Weinstein back in 2011 as a way of staying focused on one room and finishing it in a set time.
She and a few online friends set a goal to finish one room, calling it the One Room Challenge™. Today the event takes place twice a year, in April and October, showcasing twenty designers selected by the ORC Team. In addition to the featured designers posting for six consecutive Wednesdays beginning the first Wednesday in April and October, anyone with an online presence is invited to join in posting on Thursdays for six weeks as guest participants.
I was one of those participants in a series of posts. Since then, my attic space makeover has continued to be one of my most visited posts even today. So I thought I’d compile the series into one post and show how I transformed a semi-finished attic into one of my favorite all-time spaces.
Some background
When we purchased this home I did not see it until a year later when we were moving in. We bought it and immediately rented it while we were still living in California with plans to move back to Connecticut.
On an east coast baseball trip with our son, my husband saw the house and we bought it. It checked all the boxes; it was right in town, walking distance to the train station, and it was old house (built in 1900). He said with some work, the attic could be the perfect place for our kids and their teen friends. The photos from the listing were not that promising, but I trusted his vision for the space and we purchased the home.
Goal of the project: Light, bright attic space
Our attic hangout/guest space was one of the first areas that I wanted to make more inviting. It was a blank canvas so to speak, but with every wall, cieling and the floor painted white, it’s difficult to know where to begin. This space is where our teenage son and his friends would hang out and we also wanted it to serve as a guest room when the kids bring friends home from college. So in addition to a comfortable place to hang out, it needed to have extra guest space too.
I had been saving images for inspiration on my Pinterest board titled Cozy Spaces. I also just created a new one titled Attic Spaces. We weren’t looking to spend a ton of money, but wanted it to also be a place that could also serve as a part-time home office for me.
The images below are ones that I kept coming back to when I thought of our attic space. Clean, simple, but multi-purpose.
Inspiration for attic space
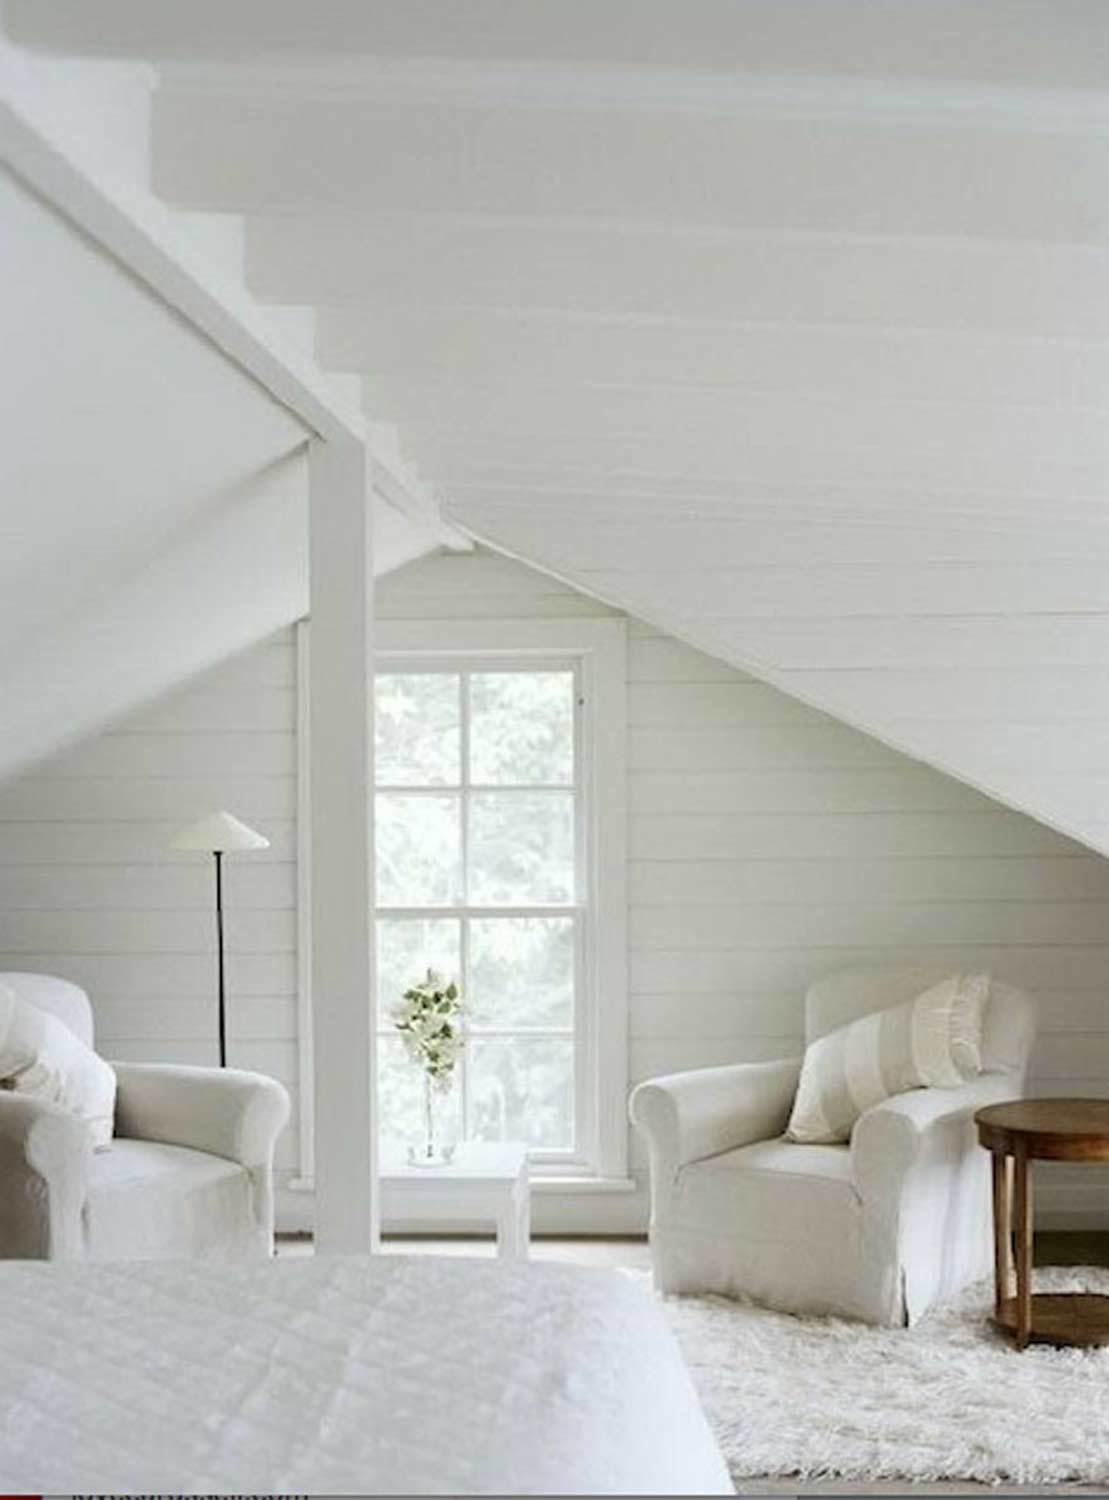
I was looking for attic room ideas and discovered some great inspirational designs. I love this landing space in the 1850’s home of Theresa and Michael Drapkin of Kingston, New York. While they don’t have the challenges of slanted walls in an attic, I love that everything is painted white except the bannister.

Photo Credit: Country Living
This room may be all white, but the textures with the shag rug, white denim slipcovers and planked walls make it anything but boring.
This attic room has so much natural light and the simple beams break up the white walls and ceiling. Painted floors covered with old rugs makes it cozy.
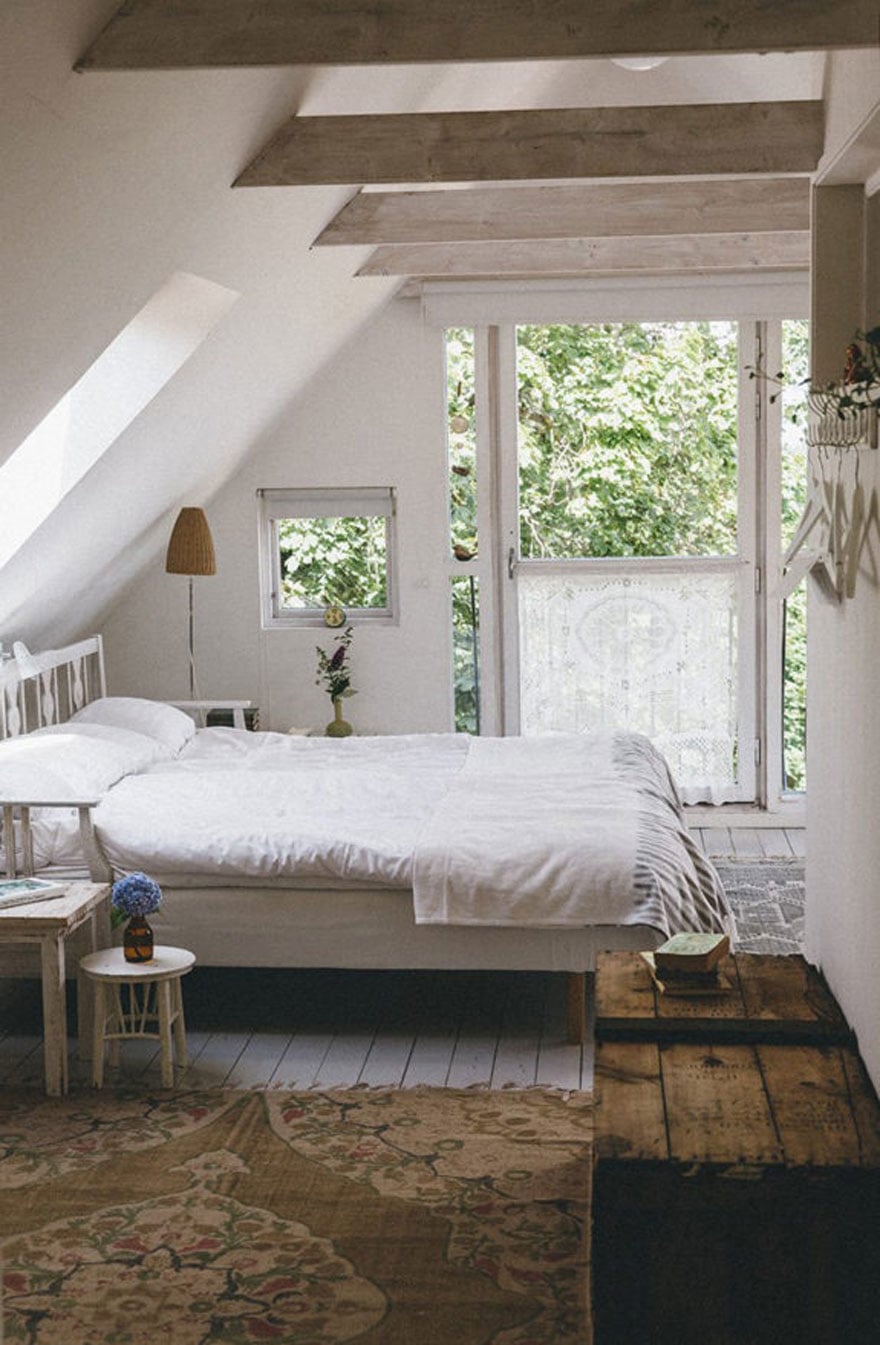
Photo Credit: SfGirl
Our attic space – before
As you can see from the “before” photo (taken from the real estate listing), almost anything was Attgoing to be an improvement. We couldn’t wait to remove the carpeting and get started.
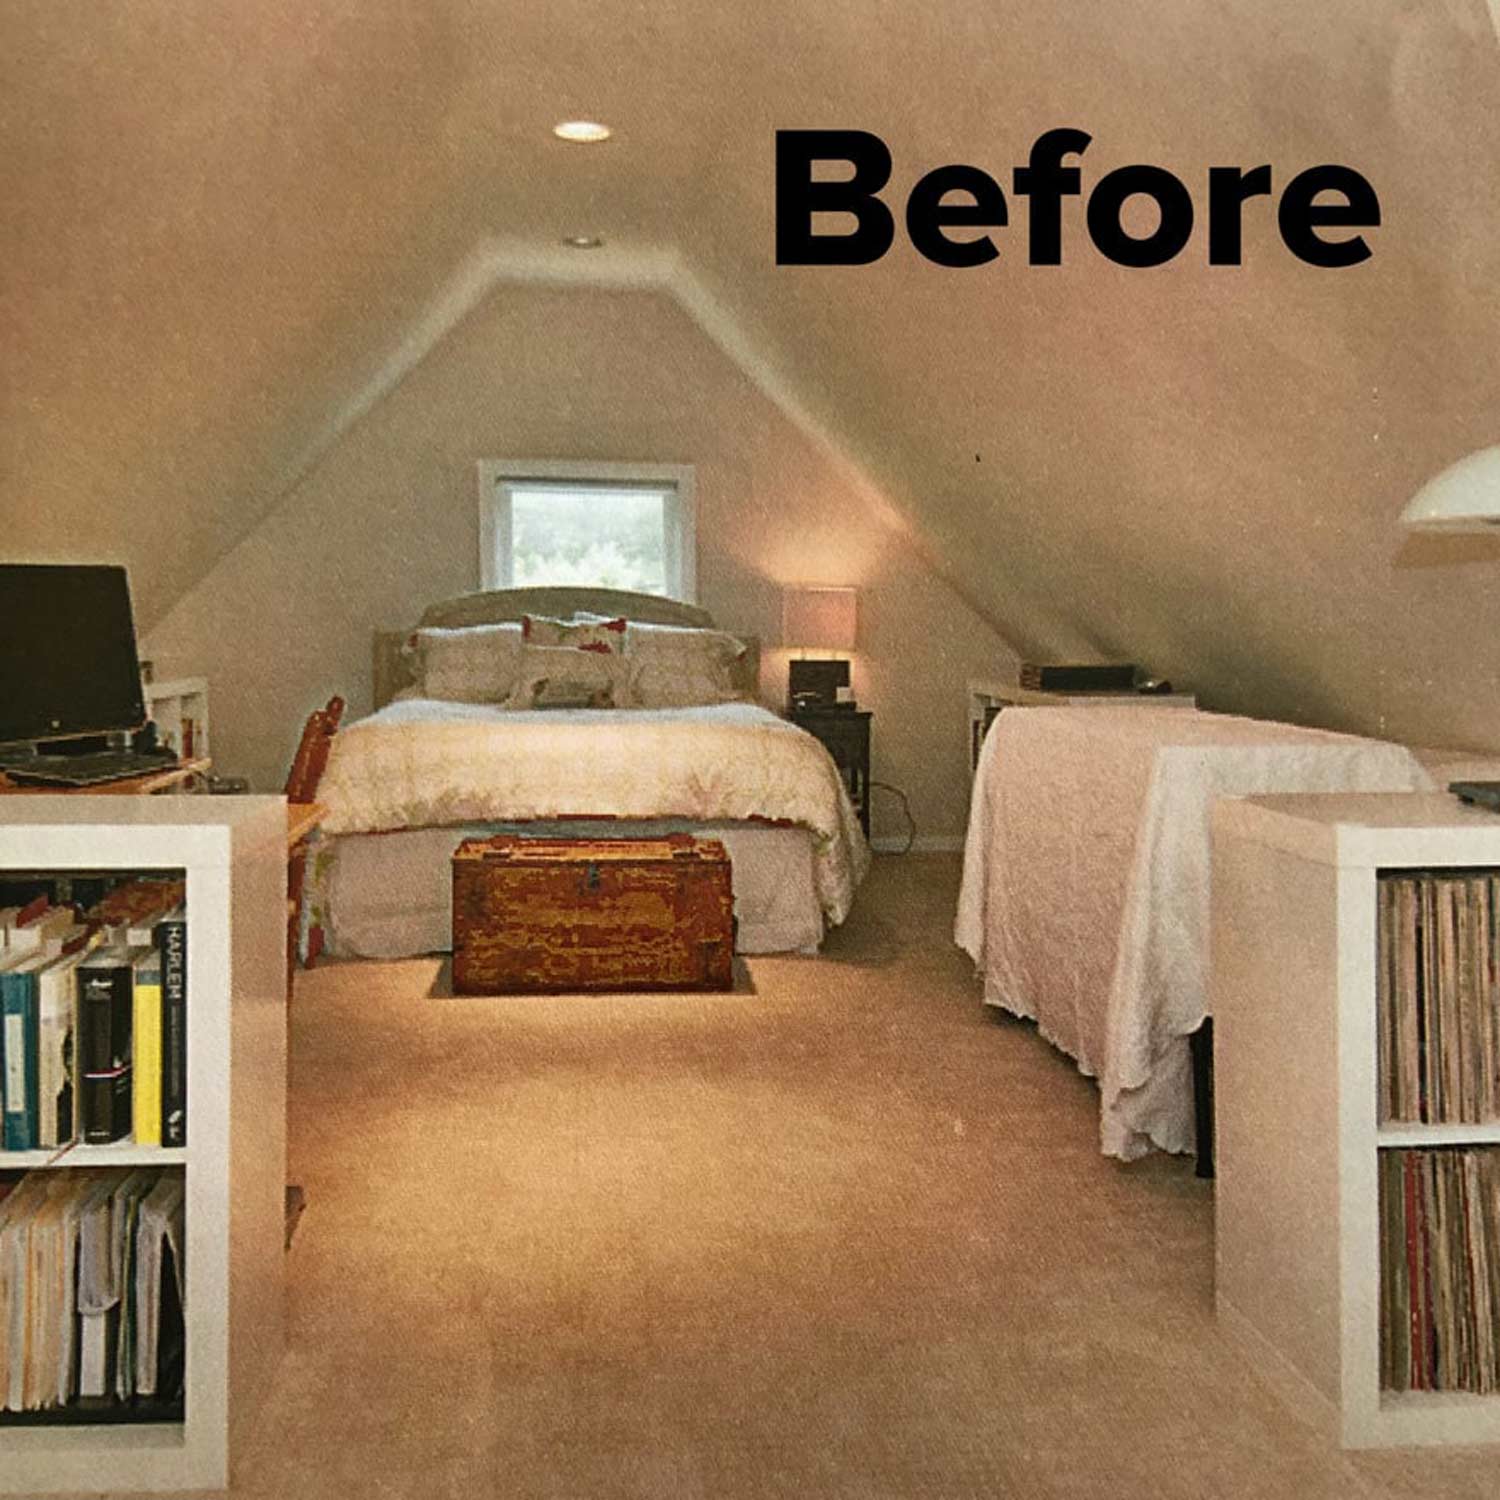
First step, we removed the old carpet
Once we removed the carpet we discovered the flooring was original bare planks. We rented an electric floor sander and sanded the planks to a very smooth finish. We then applied white floor paint and the result was a rustic wood plank floor.
Fresh wall and ceiling paint were next
Having been inspired by all the use of white from my inspiration boards, it only seemed natural to do the same with our walls and ceilings. And that’s exactly what we did.
Stikwood on the front wall

The most dramatic change to this space was adding Stikwood to the end wall. We wanted to do something to break up all the white slanted walls, ceiling, and floors. We considered wallpaper but wanted something a little more dramatic. And once we discovered Stikwood, we knew we had found the perfect product.
It was easy to install; the only difficult part was that it required a lot of up and down the stairs for each cut. Stikwood has easy tools and instructions to make measuring and ordering simple. They call it Workbench and here you’ll find tips and videos to help you with the project.
The furnishings and decorations
With most of the laborious work done, it was time for my favorite part of any major project: making it warm, cozy, and functional.
The twin beds
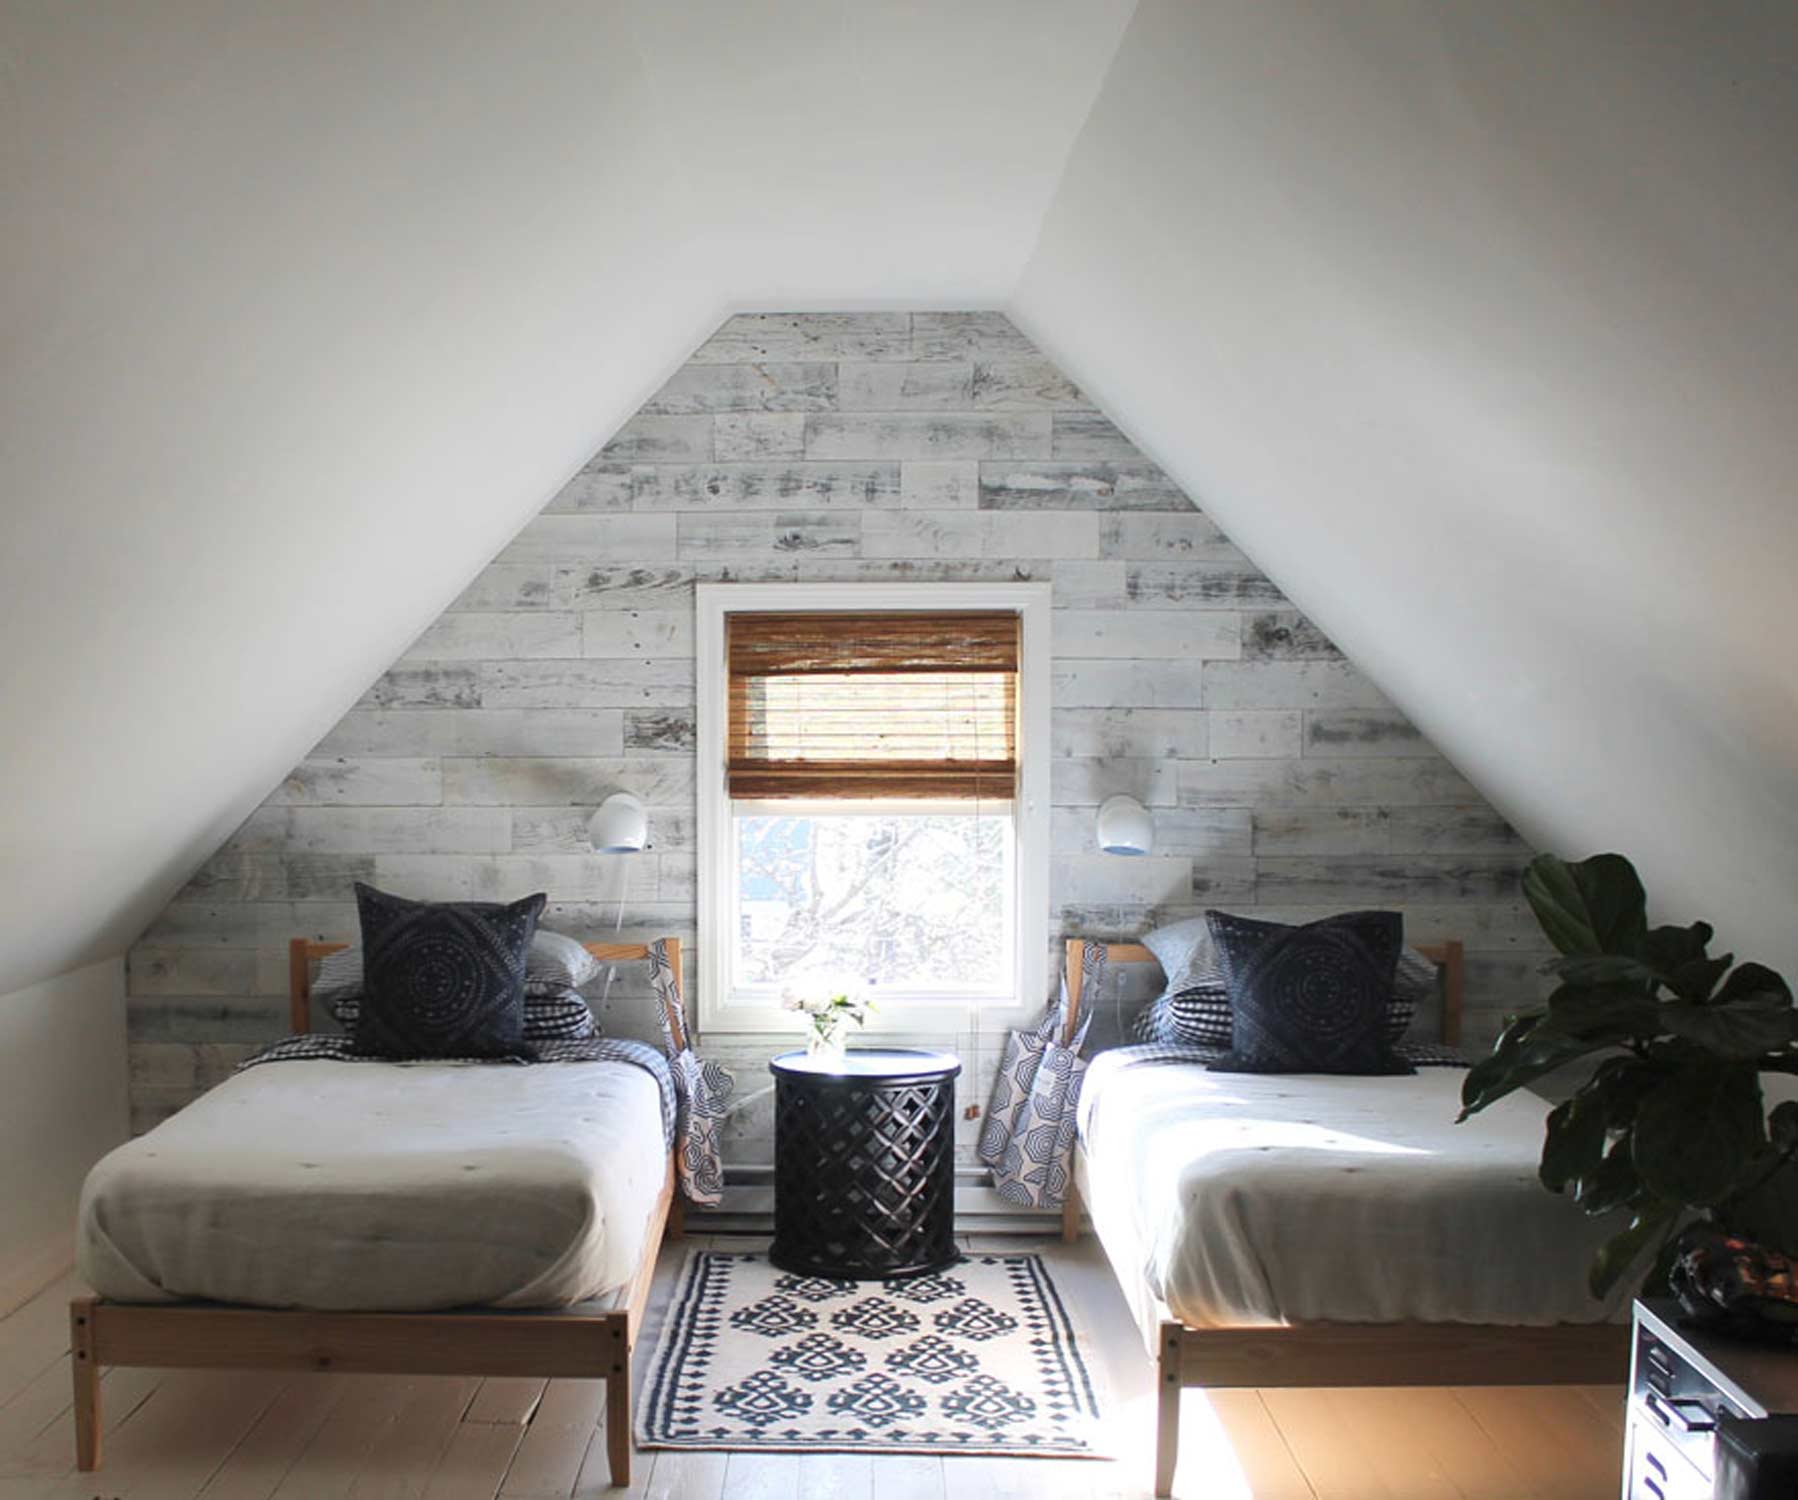
Since the space also serves as guest quarters for college friends visiting, we purchased two twin beds from Ikea. I used sheets and extra cases from Serena & Lily and the totes from S&L to hold toiletries, water bottles, and snacks for our guests. They can take the bag when they leave if they want or leave it and I’ll re-stock.
The little eyeball sconces with warmer bulbs were perfect for individual lighting for each bed. We used this table between the beds. When purchasing something new I always think of ways I’ll be able to use in other areas in the house and the Bamileke Round Side Table would work in almost any room. We also added a few accent lamps strategically throughout the space.
Black leather sofa

I designed the space around using our existing black leather sectional sofa and pillows. I would have never spent the money for this space, but since we had it and it didn’t work on the main floor of our newly purchased house, it just made sense to use it in the attic. Although it wasn’t easy getting it up there. The movers had to remove the window, hoist the sofa in sections to the third floor (from the outside of the house), and then pull each section through the window opening.
Black shag rug
We used a black shag rug that we had. It warmed the space up and made it comfortable. Would I like it better without the big black shag rug?…YES, but comfort was a top priority. Somehow my family does not think my blog/instagram feed should win over comfort!
Square coffee table
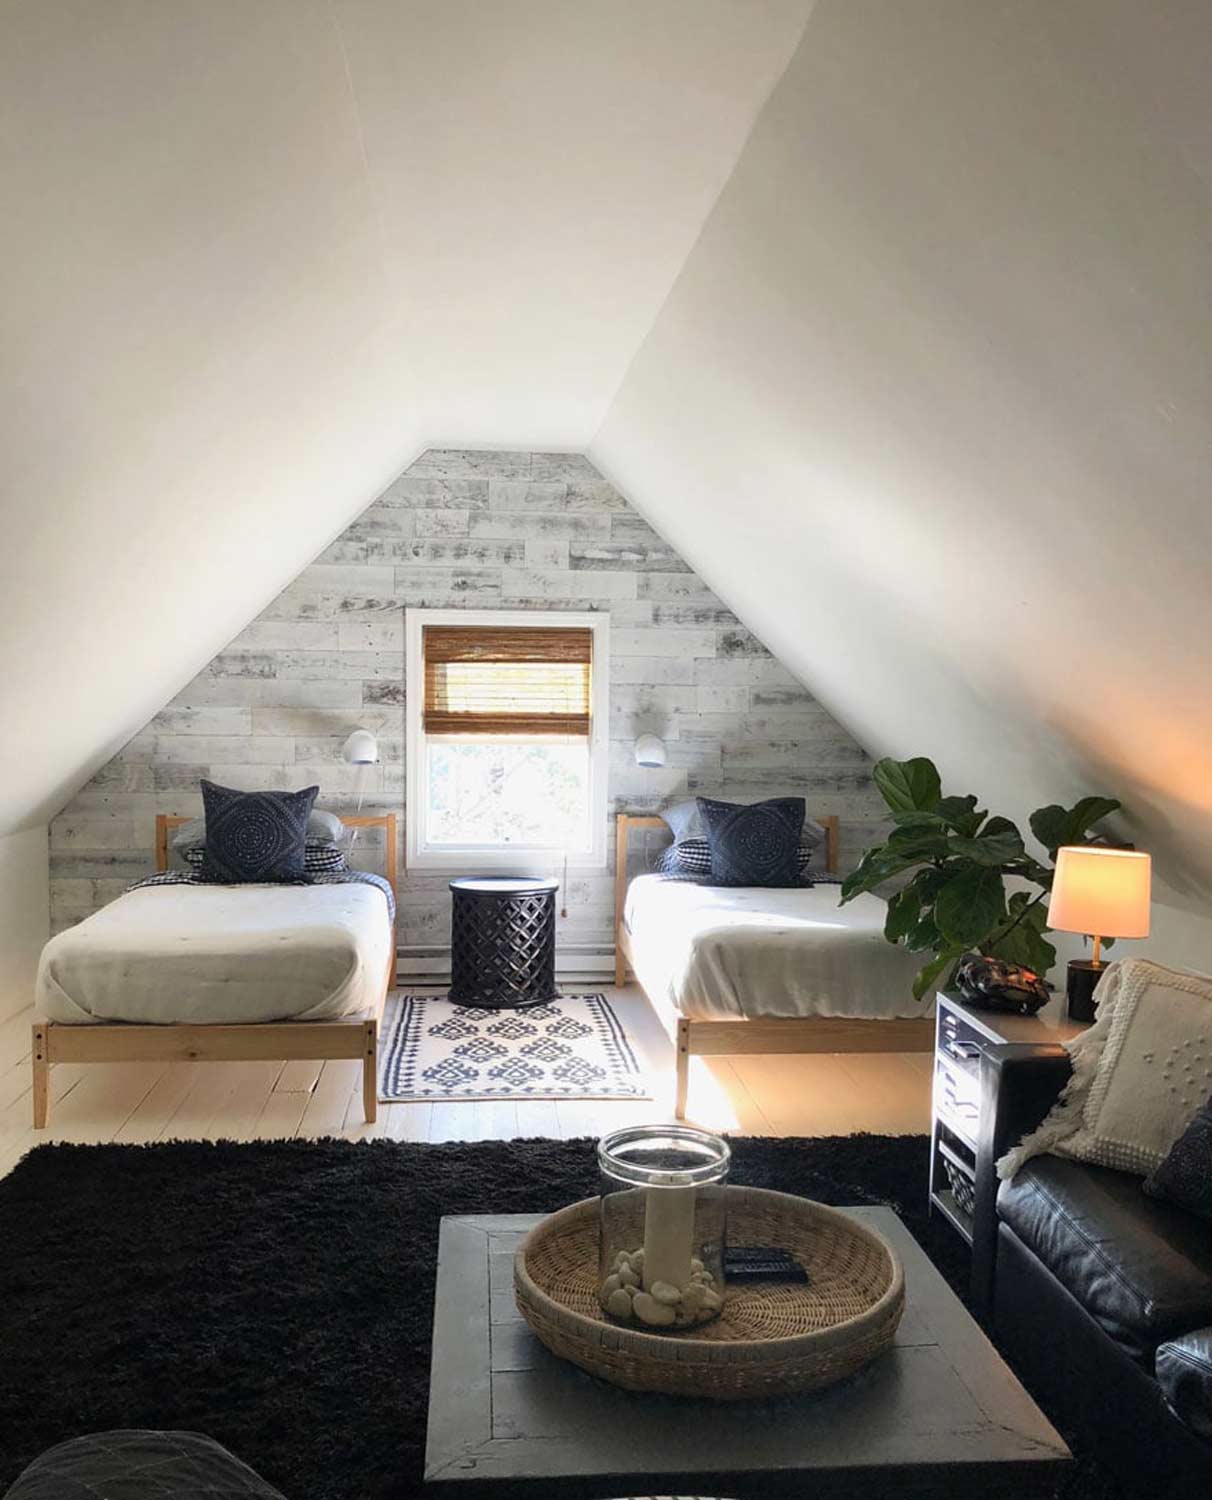
We used a vintage square coffee table in front of the sofa that we had from RJ Imports in California (unfortunately they have since gone out of business). It is solid and perfect size for the space and sectional. It was originally painted a yellow-ey off white and I can’t say why it took me forever to decide to re-paint it using Decorative Chalk Paint by Annie Sloan. I used Graphite and Pure White to create a blue gray.
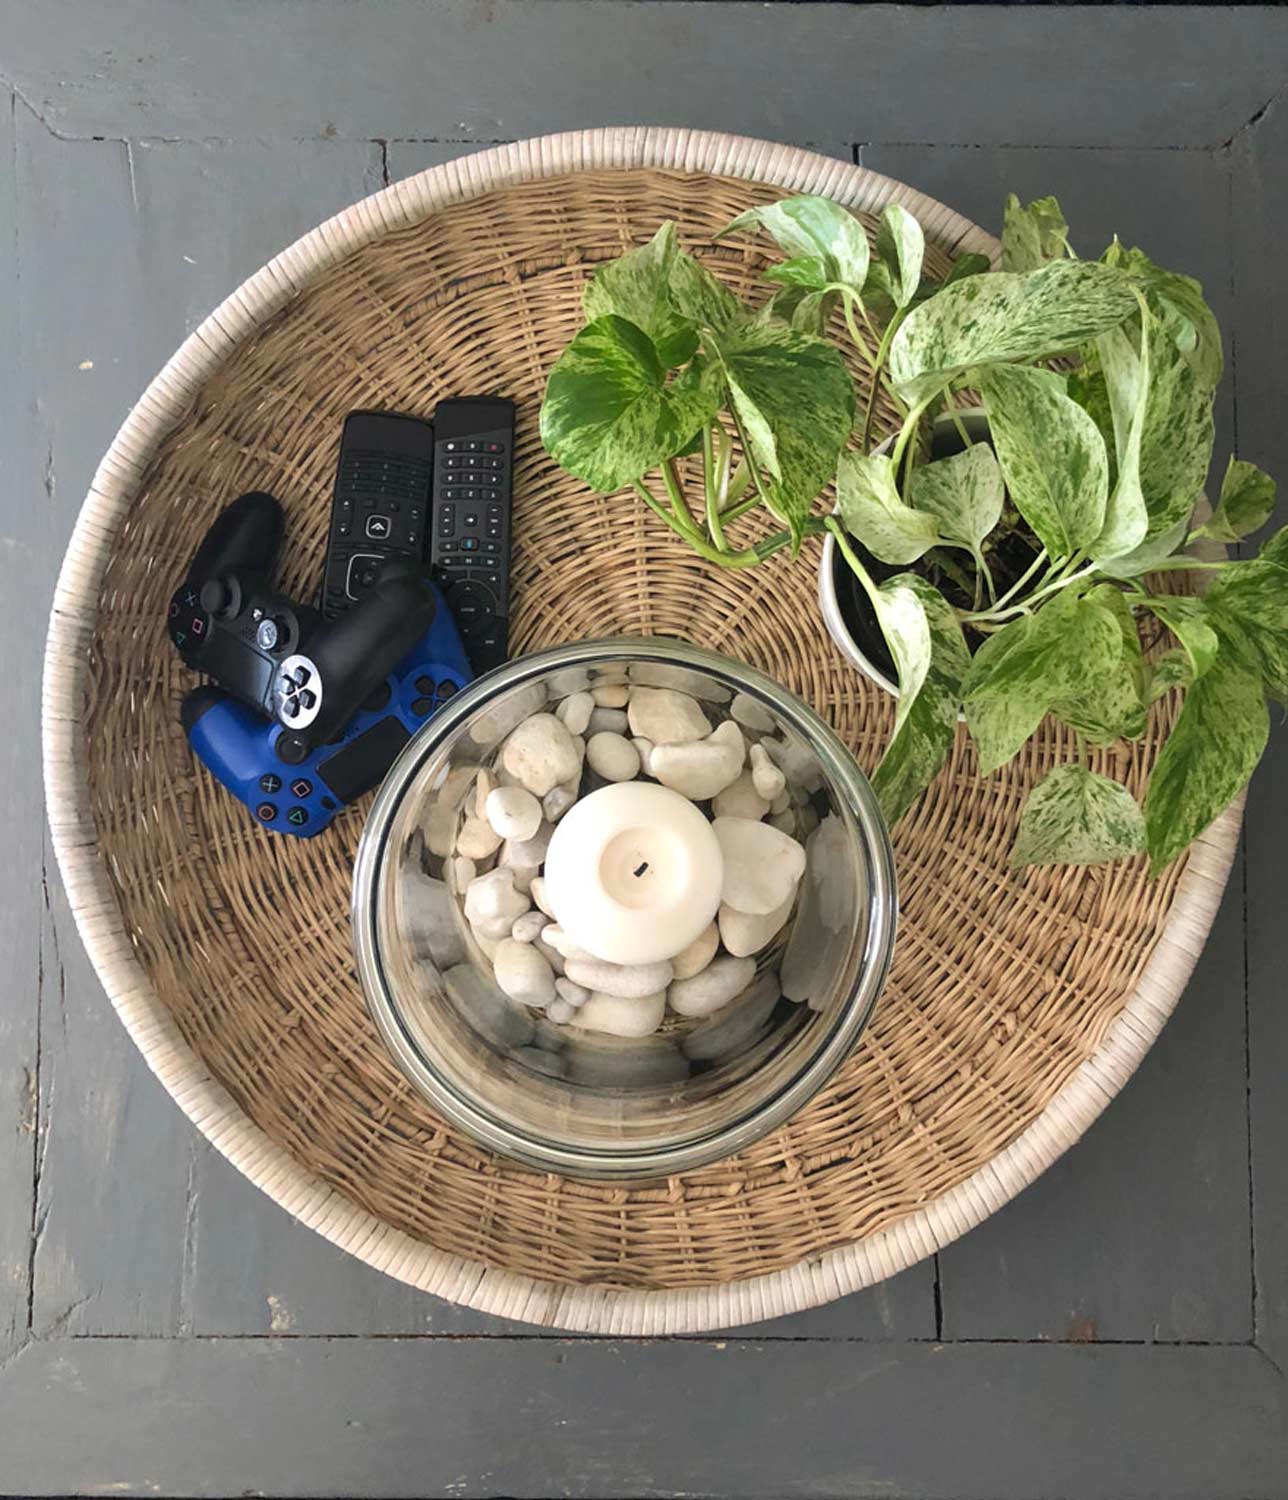
On top of the table I used a big round basket/tray from Serena & Lily.
Workspace for doing homework and projects
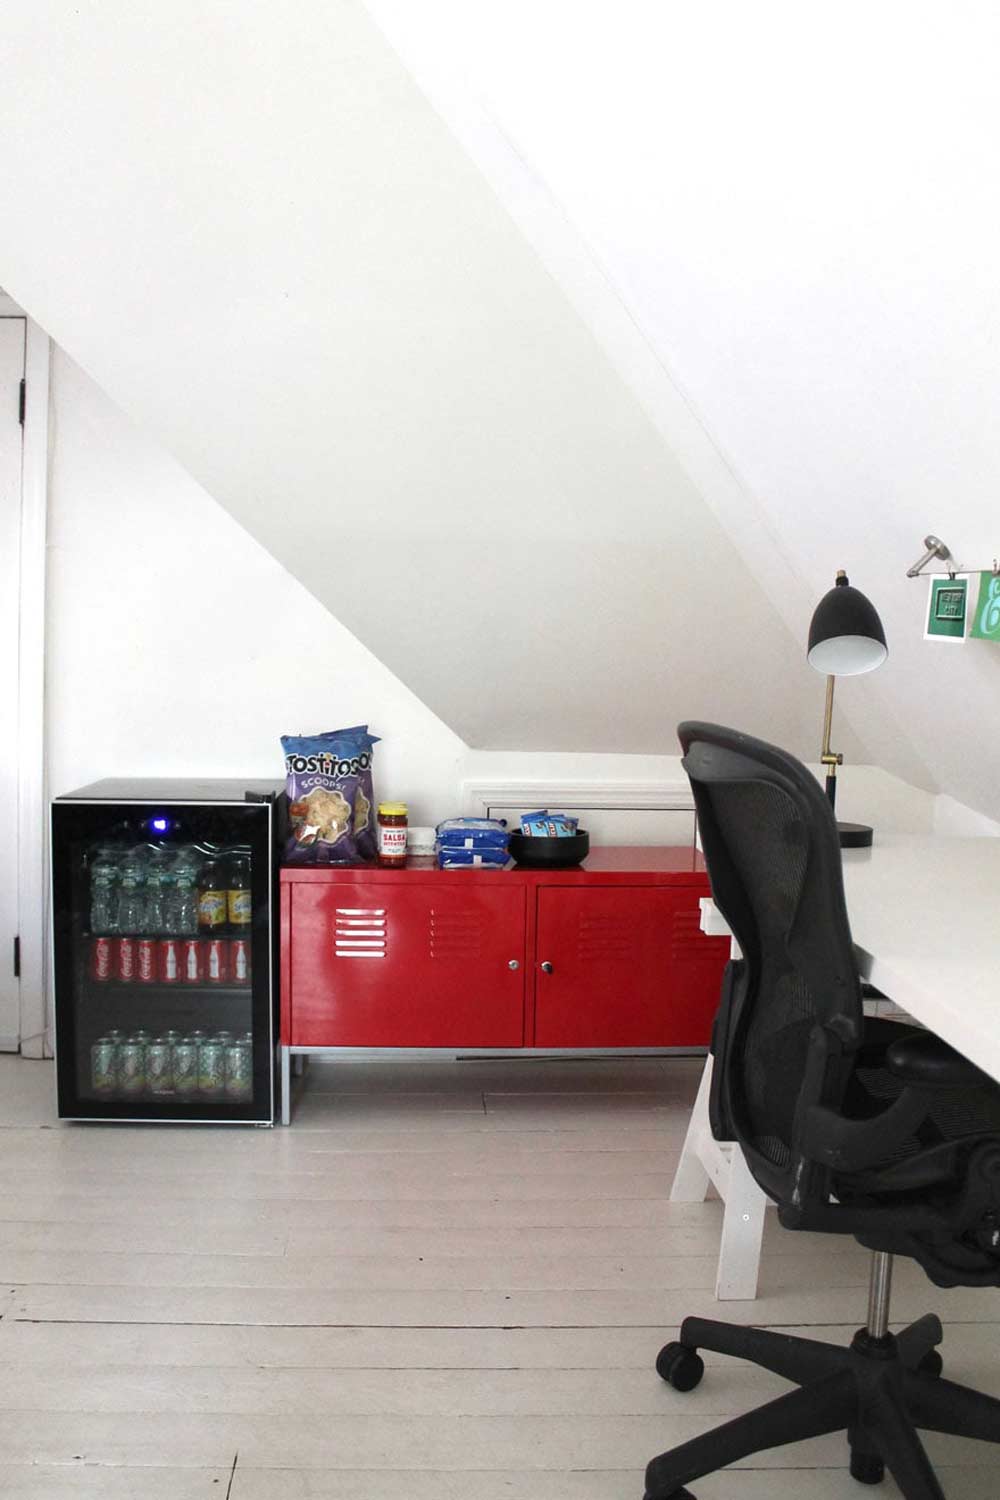
For the opposite end of the attic from the wall with Stikwood, I bought two desks at Ikea. In the corner I also used a red locker cabinet, from Ikea as well. I decided the space also needed a small refrigerator. And since I couldn’t quite justify the mini black Smeg refrigerator for $1,000, I did find this glass-front Igloo refrigerator at Walmart for $200 and it shipped free.
Storage space
Fortunately, the attic had a built-in cedar closet that had additional room for our seasonal clothing and plenty of storage room for other things. It was move in ready.
We sold this house
And here’s a link to a post we did as we were moving out.
Another cozy attic project
We eventually sold this house and bought another circa 1900 house with a completely unfinished attic. Here’s a link to that post: Our new (cozy) attic space


Can’t wait to see your progress! I have an attic in the house at Yankee Point (in Maine) and I keep dreaming about transforming it in to a wonderful addition to our space. I’m always super inspired when I’m on the third floor at Serena and Lily…wouldn’t that be nice to have! Good luck!
Heidi! I heard about your house in Maine from Althea. An attic space like Serena & Lily would be amazing! You should have seen it before those boards were all painted! I saw it before the store opened and as much as I love the all white, it was pretty cool raw too!
Can’t wait to see the After! I’m certain it will be lovely, in Annie Diamond fashion… 🙂
Thank you Janet! I appreciate your vote of confidence!
I also can’t wait to see the progress, as I just love the rest of your home ! Simply beautiful !
Thank you Patricia for your kind comment! It’s one way to make sure we finish the project is commit to ORC!
What a great space you have already-can’t wait to see what you will do for your transformation. I love all of those inspirational photos…I want an attic hang-out room myself now! 🙂 Best of luck during ORC!
YAY Annie! I can’t wait to follow along and see what you do with this space. It was so good seeing you the other day! xo Cait
This is such a great space to start with! Your son is going to be so fired up when he gets home from school! Can’t wait to see it progress.
IF he noticed Lisa! haha
where is the after?
HI Stephanie,
Here is a link to the after!
https://mostlovelythings.com/attic-hang-out-space-reveal-one-room-challenge/
Annie