
How to Make a Driftwood Christmas Tree
I was thinking of what kind of tabletop tree I could make this year, and I came up with how to make a driftwood Christmas tree. When I was asked to join these creative women today with tabletop trees, I started getting nervous that I didn’t have a new idea! And then, as I sat at my corner table in the living room, I saw the bowl of driftwood we’ve been collecting over the years.

I love a traditional Christmas tree, but not all Christmas decorations must be red and green! We live by the water in Connecticut, so some coastal Christmas decor that can carry into winter decor seems right.
Here’s what you’ll need to make a driftwood Christmas tree


- You will need several pieces of driftwood in different sizes (We used approximately 48 pieces)
- A base (We used a plywood base cut into a 7″ circle). You could probably find something at a craft store that would work if you didn’t have the tools to cut a wood circle. Or you could use wood slices from a tree if you could find the right size.
- Wooden dowels or something straight and sturdy can be inserted into the base of the wood.
- Hot glue and a glue gun
- Heavy duty pruners to cut some of the driftwood into smaller pieces
How to make your DIY driftwood Christmas tree


- Take your base and wooden dowel or garden stake and cut it to about 22″ in size to make a tree about 24 to 26″ tall. Your size can be whatever you think will work, but three tiers of driftwood on a base 6 to 7″ in diameter seems to be about the right height.
- First, sort your driftwood pieces by size. You’ll need four pieces of the same size, height, and diameter that are relatively sturdy to begin the base of the tree structure. Then, you will need shorter pieces to add to the wood frame.
- As you make your driftwood tree, you work from the bottom up, adding driftwood pieces that fit purely by trial and error. Some may need to be cut to fit and fill in the gaps of the longer or curved pieces.
- Once you reach the last tier, you use shorter pieces of driftwood that meet at the top. We had a small opening, just enough to fit one last piece of driftwood for the top of the “tree.”
- We used hot glue to secure each piece of driftwood. You could use wood glue, but drying would take much longer. The other advantage of using hot glue is that you can easily remove it, and your driftwood pieces will return to their original state. So, if you are concerned about destroying your collection of driftwood, use hot glue!
- You could add a strand of fairy lights to your tree or display it next to bowls of shells and beach stones.
Where to find driftwood


We have our favorite beaches for collecting shells, driftwood, and rocks. Beachcombing is often best after tropical storms. One of our favorite beaches, where you can find beautiful stones, driftwood, and shells, is called Ditch Plains. It’s in Montauk, New York, just before the tip of Long Island. It’s a beautiful beach to visit any time of year.

If you enjoyed reading about this DIY wood Christmas tree project, you might also like this project, in which we made an advent calendar using driftwood. Both are great projects that use driftwood branches and pieces and are perfect for people who love to collect things at the beach.
Blogger’s Best DIY Holiday Table Top Trees
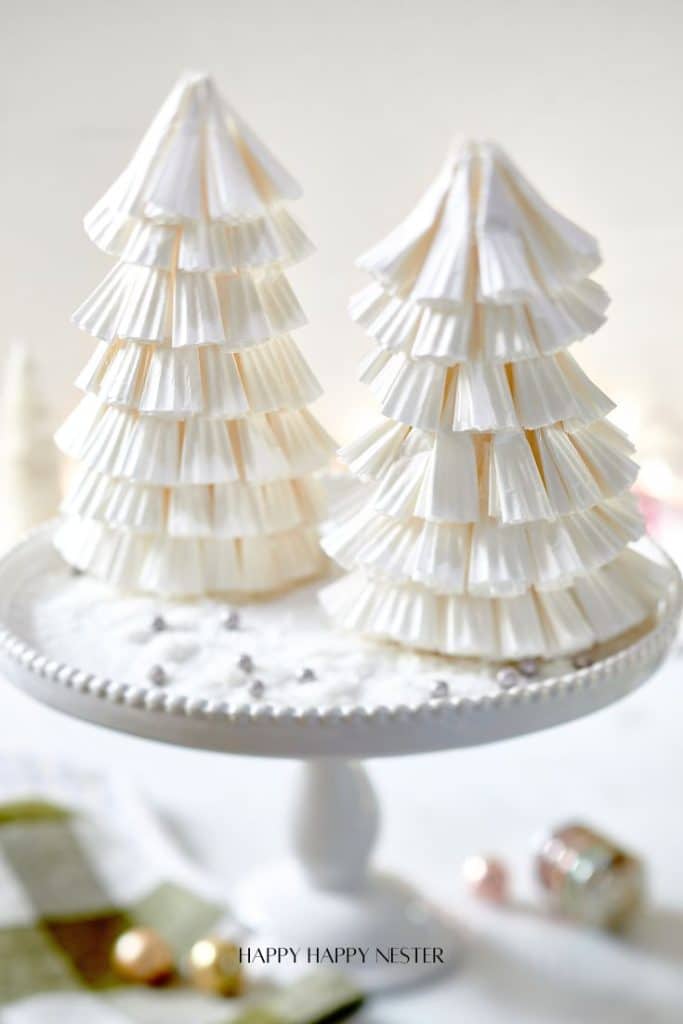
Paper Christmas Tree DIY | Happy Happy Nester
This Paper Christmas Tree DIY is an easy and festive craft perfect for adding a handmade touch to your holiday décor. Made from simple cupcake paper liners, this budget-friendly project is fun for all ages and ideal for creating charming Christmas tree decorations.
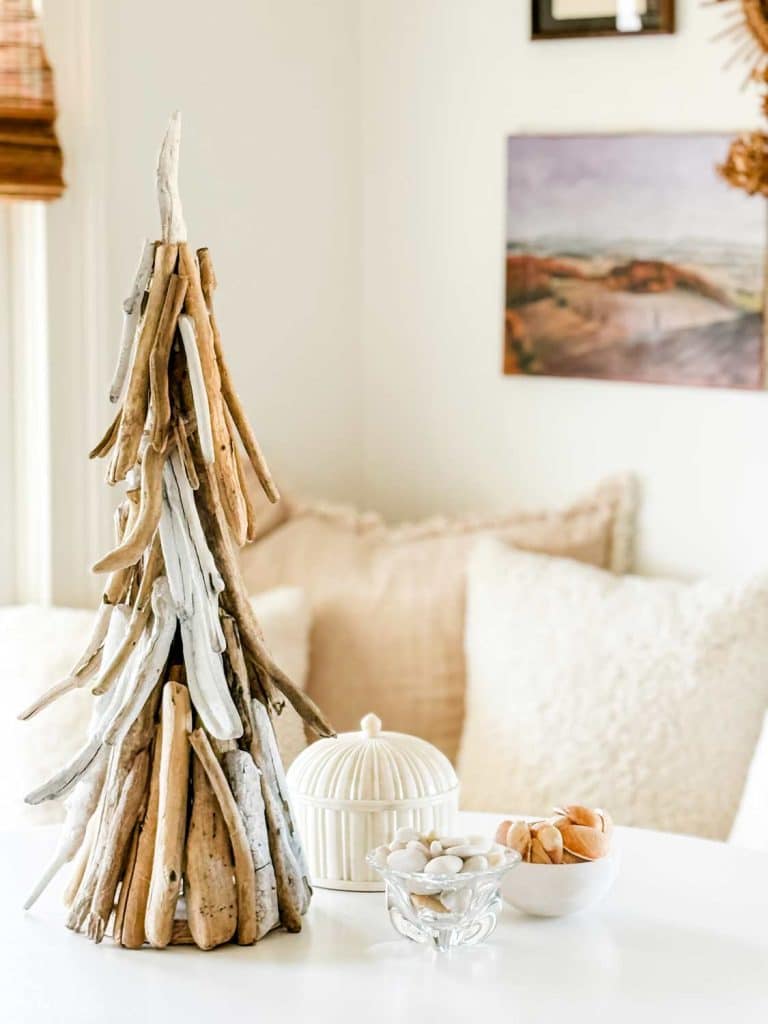
How to Make a Driftwood Christmas Tree | Most Lovely Things
Inspired by nature and walks on the beach in Montauk, we made a Christmas tree made out of collected driftwood.
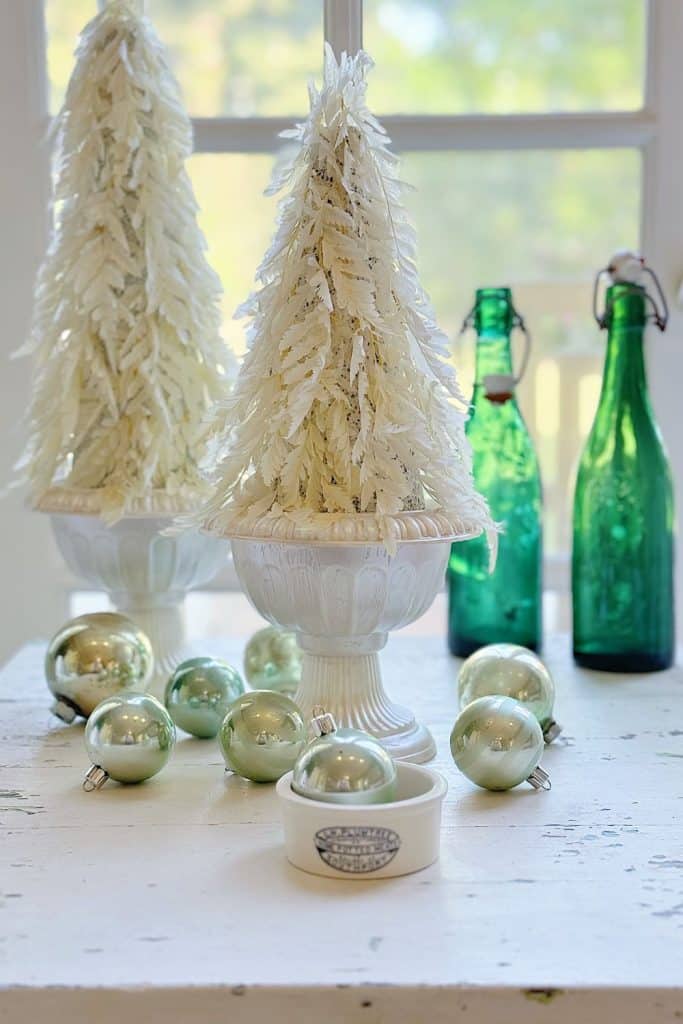
DIY White Christmas Fern Tabletop Tree | My 100 Year Old Home
I wanted to create something elegant and unique for my home décor this holiday season, so I made beautiful DIY White Christmas Fern Tabletop Trees.
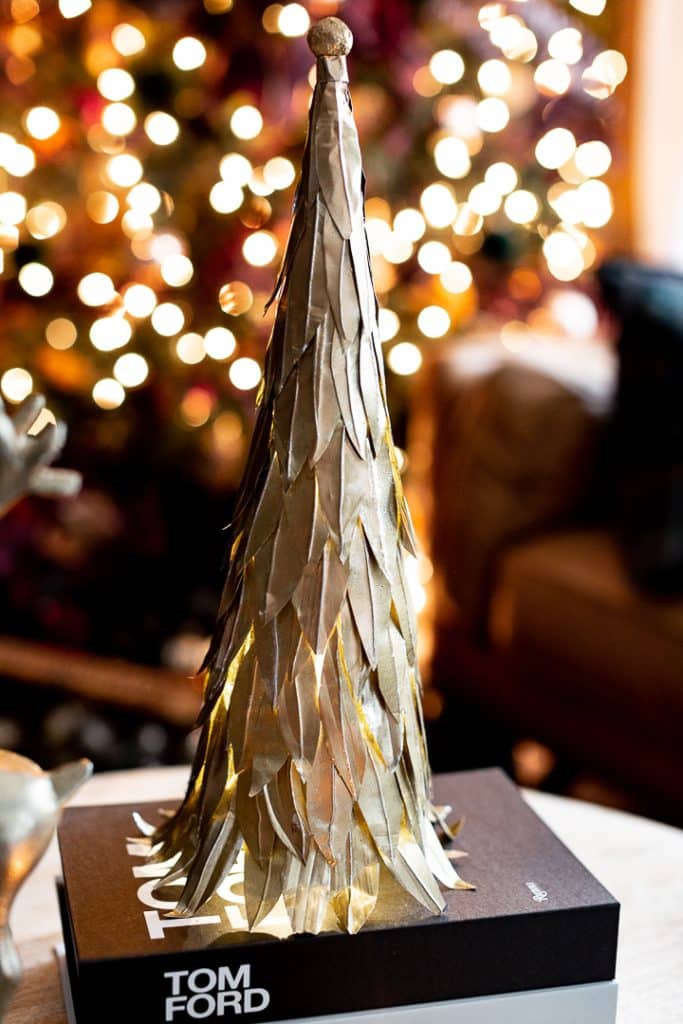
Metal Tabletop Christmas Tree | Craftberry Bush
This ‘metal’ DIY tabletop Christmas tree is easy to make and makes a beautiful statement whether displayed on a table, sideboard etc.

Gingerbread Christmas Tabletop Tree: A DIY Makeover | My Sweet Savannah
The holiday season is the perfect time to add some festive charm to your home. But decorating doesn’t have to mean breaking the bank—especially when you can transform thrift store finds into beautiful, personalized pieces that fit your style perfectly. Today, I’m going to show you how I took a simple thrifted cone-shaped tree and turned it into a gingerbread-inspired Christmas tabletop tree that fits right into my holiday décor!


Pinned! I wish I would’ve seen this post before I went out and bought some! Saving for next year!