
How to Make a Minimal Propagation Wall
How to make a minimal propagation wall with clear glass tubes and an idea to use it when you’re not propagating your favorite plants!
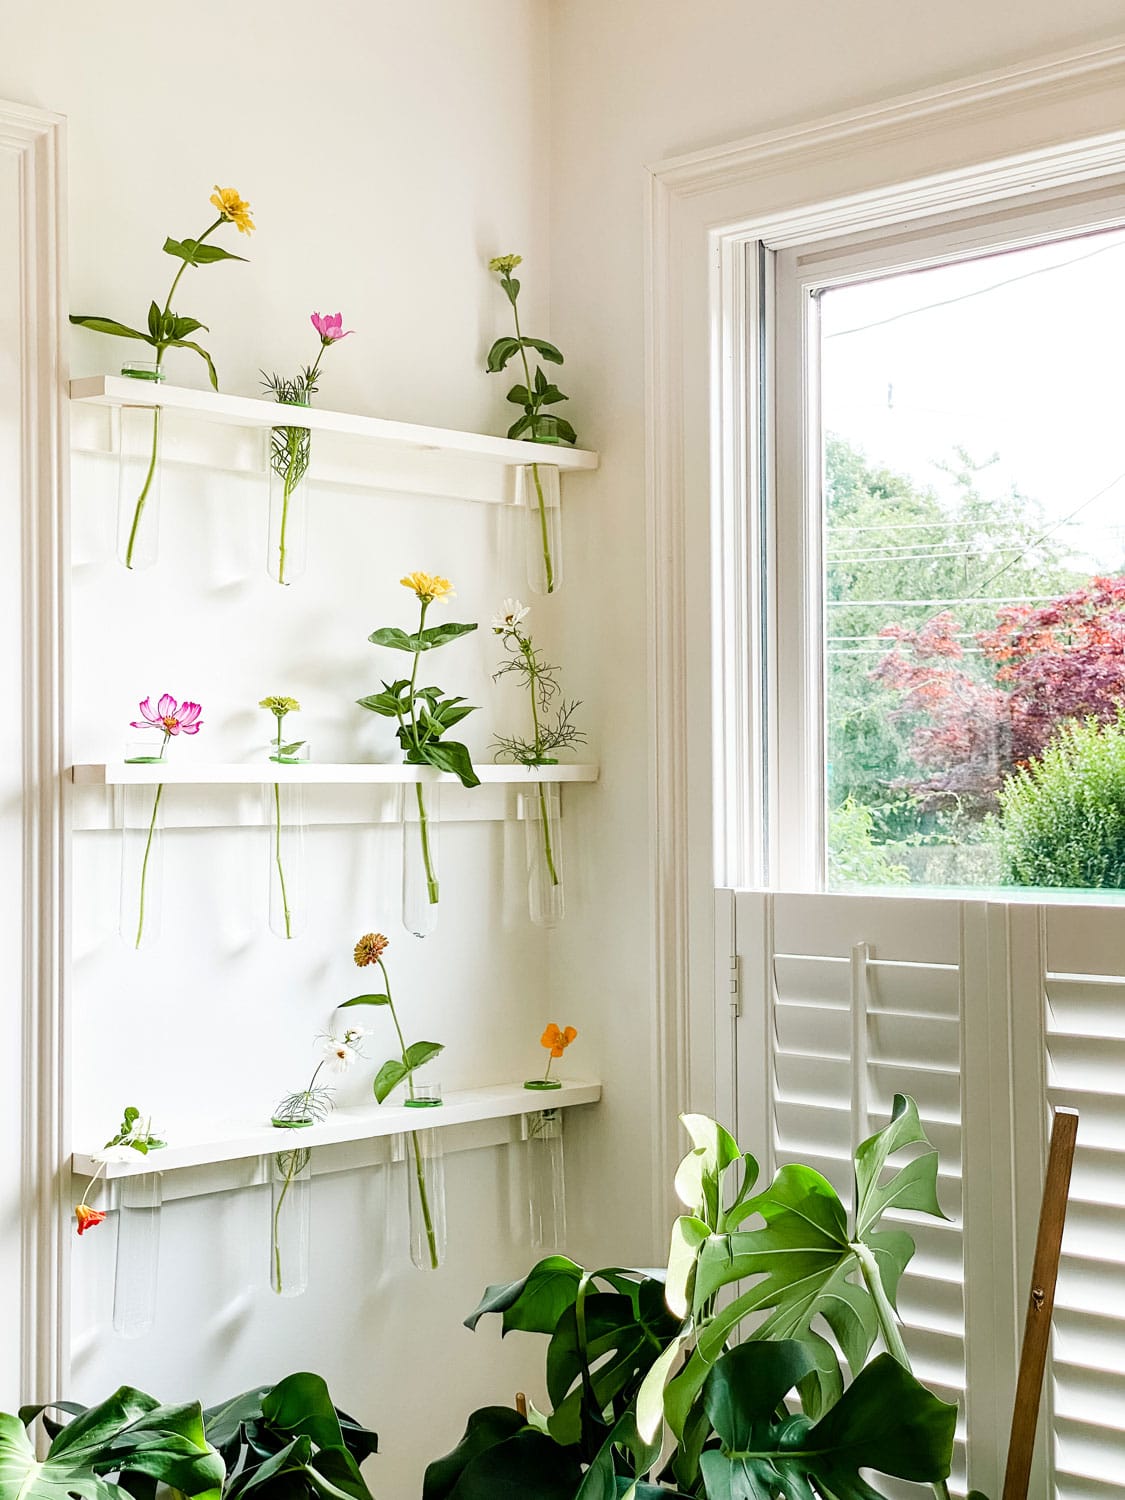
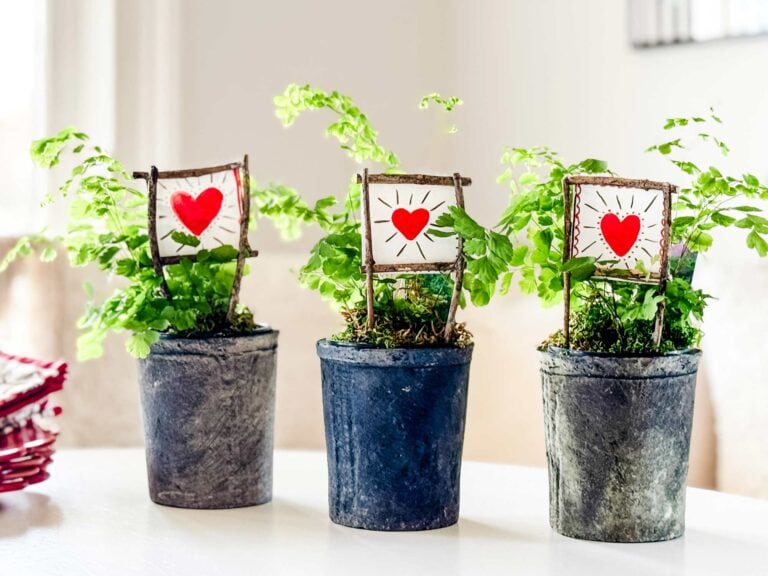
This minimal design works and it’s an easy way to create a simple flower display too! You can see it with garden flowers below, but how fun would it be to have different color poinsettias in December?
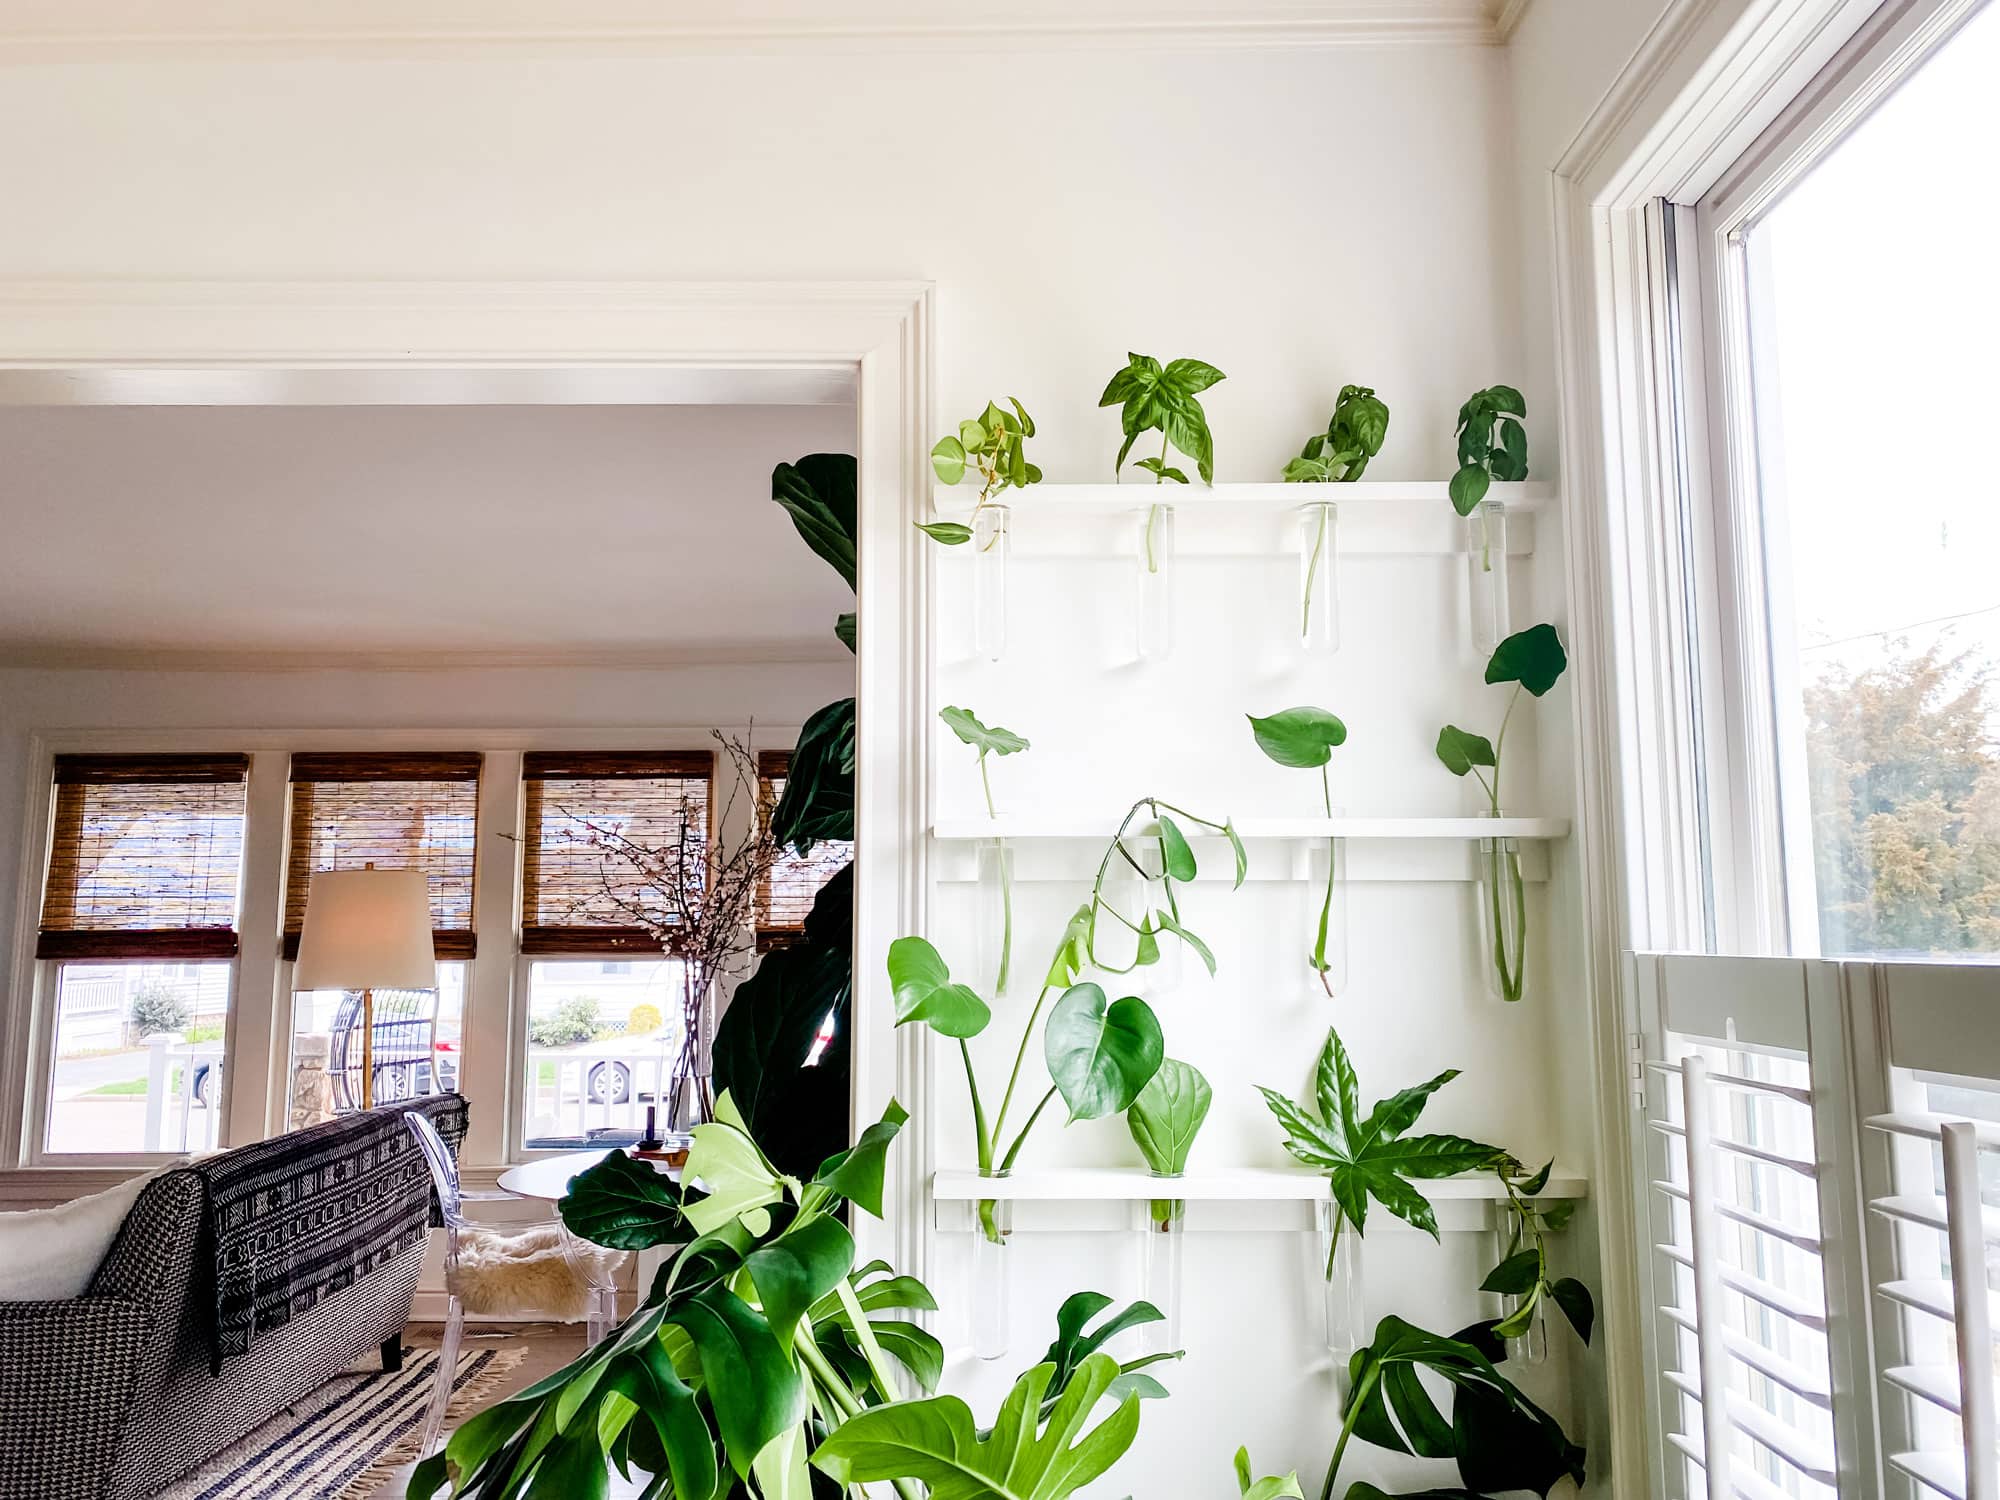
We’ve been wanting to make a propagation wall for quite some time. We had a lot of ideas, and then one day, I saw it on social media on Joanna Gaines’ Instagram, and I knew right away that the simple design was just what we were looking for when making our own propagation wall. Ours is much smaller but we found the perfect the space for it in our house. This type of propagation wall is easy to customize to your space. Brent made it with scrap wood (we love scrap wood projects and repurposing wood), and it was a project that didn’t take a long time! I love the way it turned out! So let’s get started!
What is the purpose of a propagation wall?
Aside from looking pretty cool, it is a great way to expand your greenery. I love to propagate plants and share the cuttings with plant-loving friends. I save small bottles for this purpose. When having a few friends over, you can use them on the table instead of flowers for a casual lunch. At the end of the party, let everyone take one home. I love when another plant lover sends me photos many months, even years later, showing how the small cutting is now a full-size plant! And now they can repeat the cycle and give cuttings to their friends.
There are three types of Propagation
For what I do on my propagation wall, I only use stem cut propagation. I’ve only done propagation by division in my outdoor garden so I’m not sure it would work indoors in my propagation tubes.
Stem cut propagation
Stem cut propagation includes Pothos, Monsteras, and some Philodendrons. According to experts, when using stem cut propagation it is best to have stems that are four inches to six inches long. For best resutlts, cut them about a quarter of an inch below the node and on a 45 degree angle. A node is where a new leaf is growing from a stem. It’s also best to sterilize the clippers or scissorrs you’re using by cleaning them with hot, soapy water before cutting.
Propagation by division
Examples would be ferns and some succulents. For propagation by division, you dig up a plant at it’s roots, break off a piece of the roots and then replant both.
Tip cut propagation
Fiddle Leaf Fig, Snake plant, ZZ plant, and Rubber Tree are a few examples where you would use tip cut propagation.
Hilton Carter is an excellent resource on how to propagate plants
Hilton Carter is the first person that comes to mind when I think of plant propagation. Hilton made plant styling a profession! He has three books I always turn to for all things plants, including propagation. @hiltoncarter

What is the most important factor in determining where to have a propagation wall?
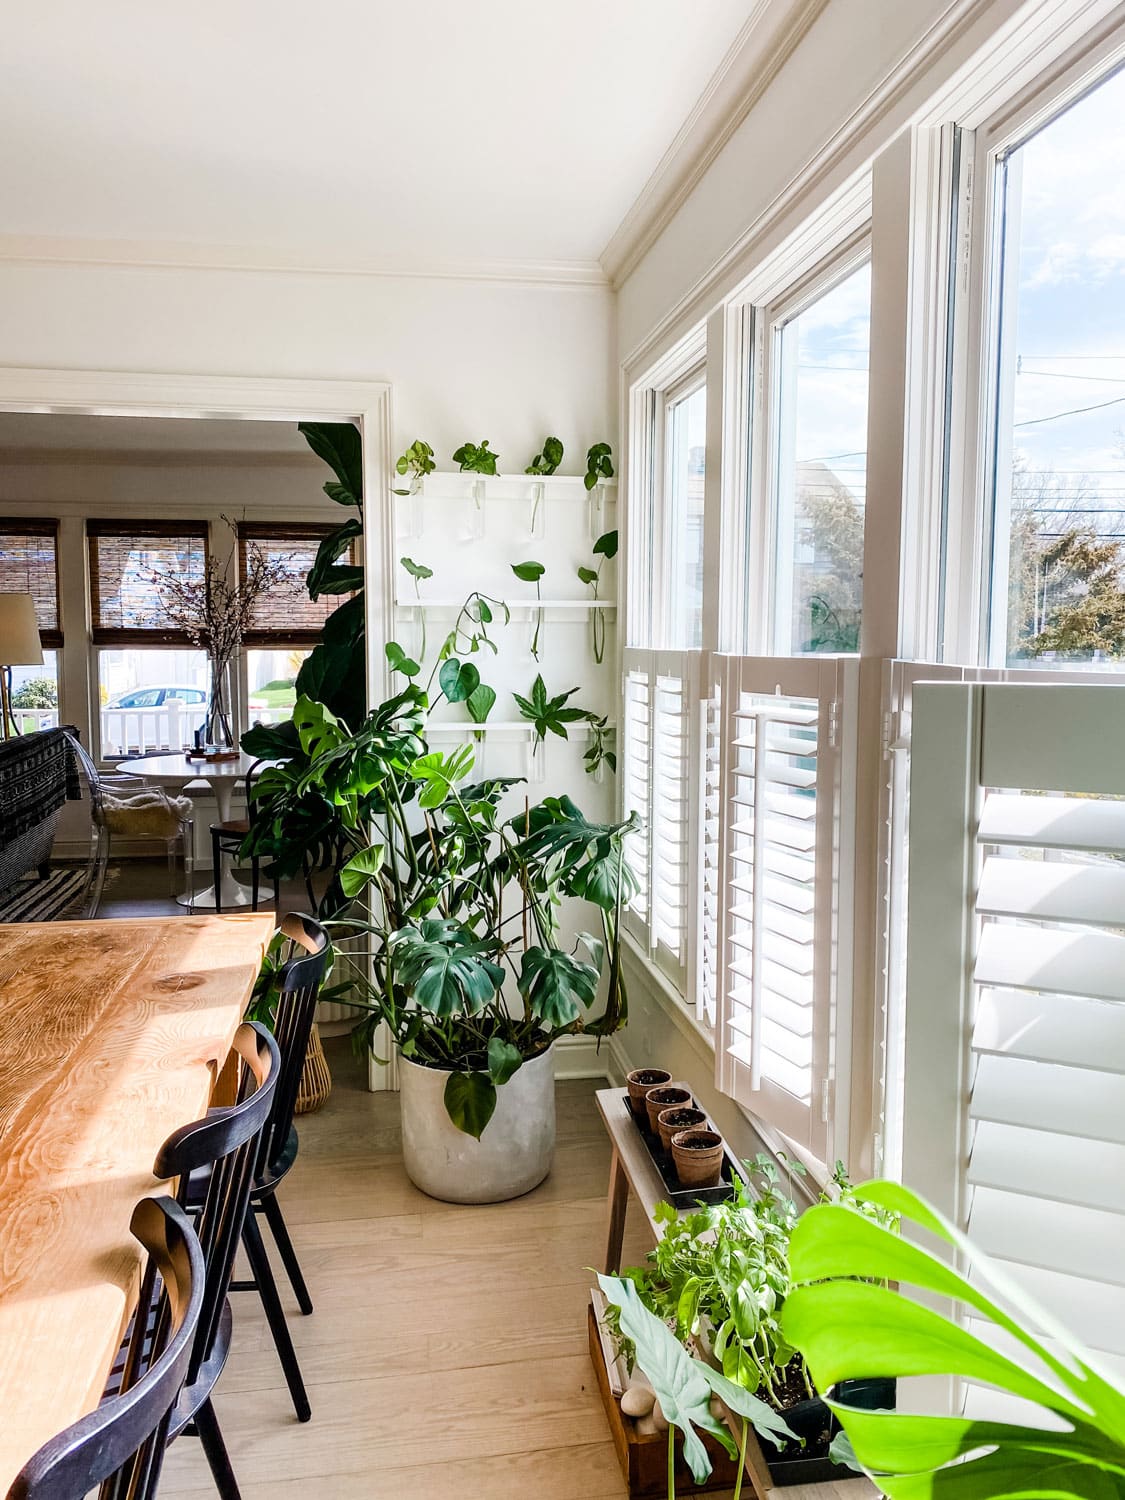
Light! We chose a wall in our south-facing dining room because, after living in this house for nearly three years and seeing how well our plants do in this room, it’s clear that the light is perfect for plants to thrive.
It can also be used as a flower wall.
I went out to my garden and clipped anything in bloom. We have a few zinnias, nasturtium, and some cosmos. I can’t wait to use it during the holidays!
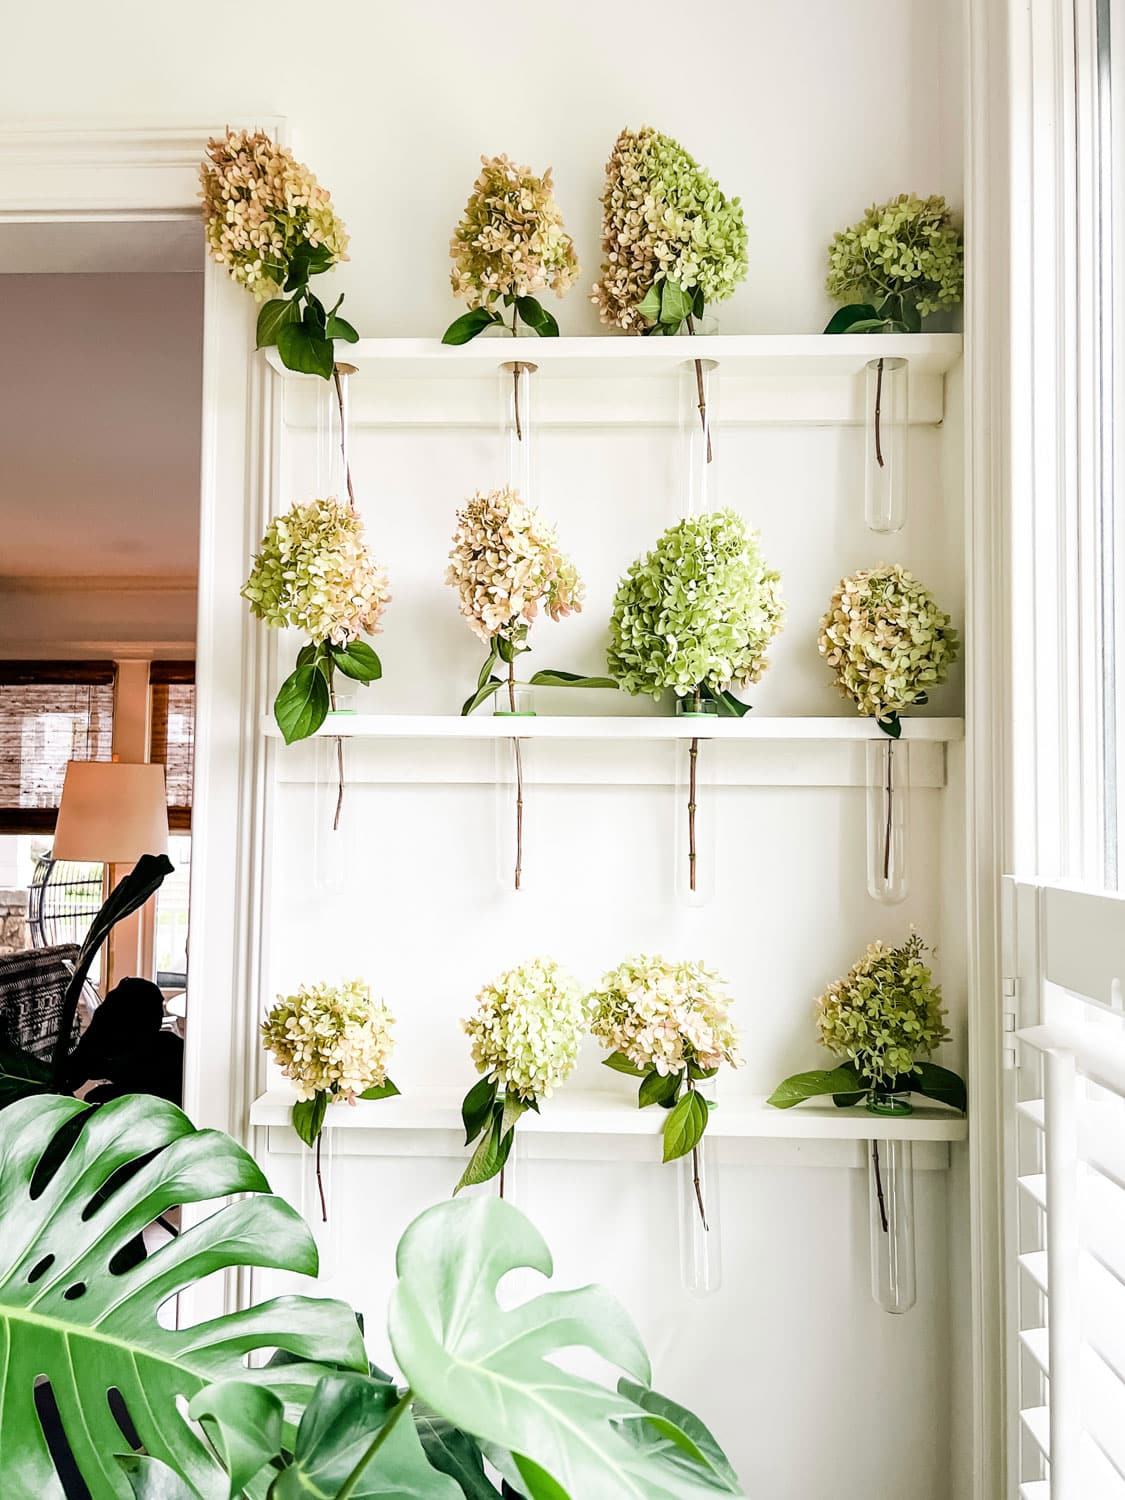
In the Fall, Dry Handrageas in the Glass Tubes Without Water
The supplies you’ll need to make this minimal plant propagation wall:

We decided we wanted the design to be minimal and sort of blend into the room. So we chose to paint the shelves the same color, white as the walls.
- Glass Test Tubes (The exact glass tubes we purchased from CB2 are no longer available. Amazon has several options. Make sure to purchase before cutting your holes so you can build to exact dimensions.
- 1 x 3 Pine Board
- 2″ screws
- paint
- wall anchors and screws to mount the shelves
Tools you’ll need:
- Cordless drill
- 1 1/2″ drill bit
- Dremel
- level
- tape measure
- pencil
- table saw or hand saw
Steps to making three Shelves
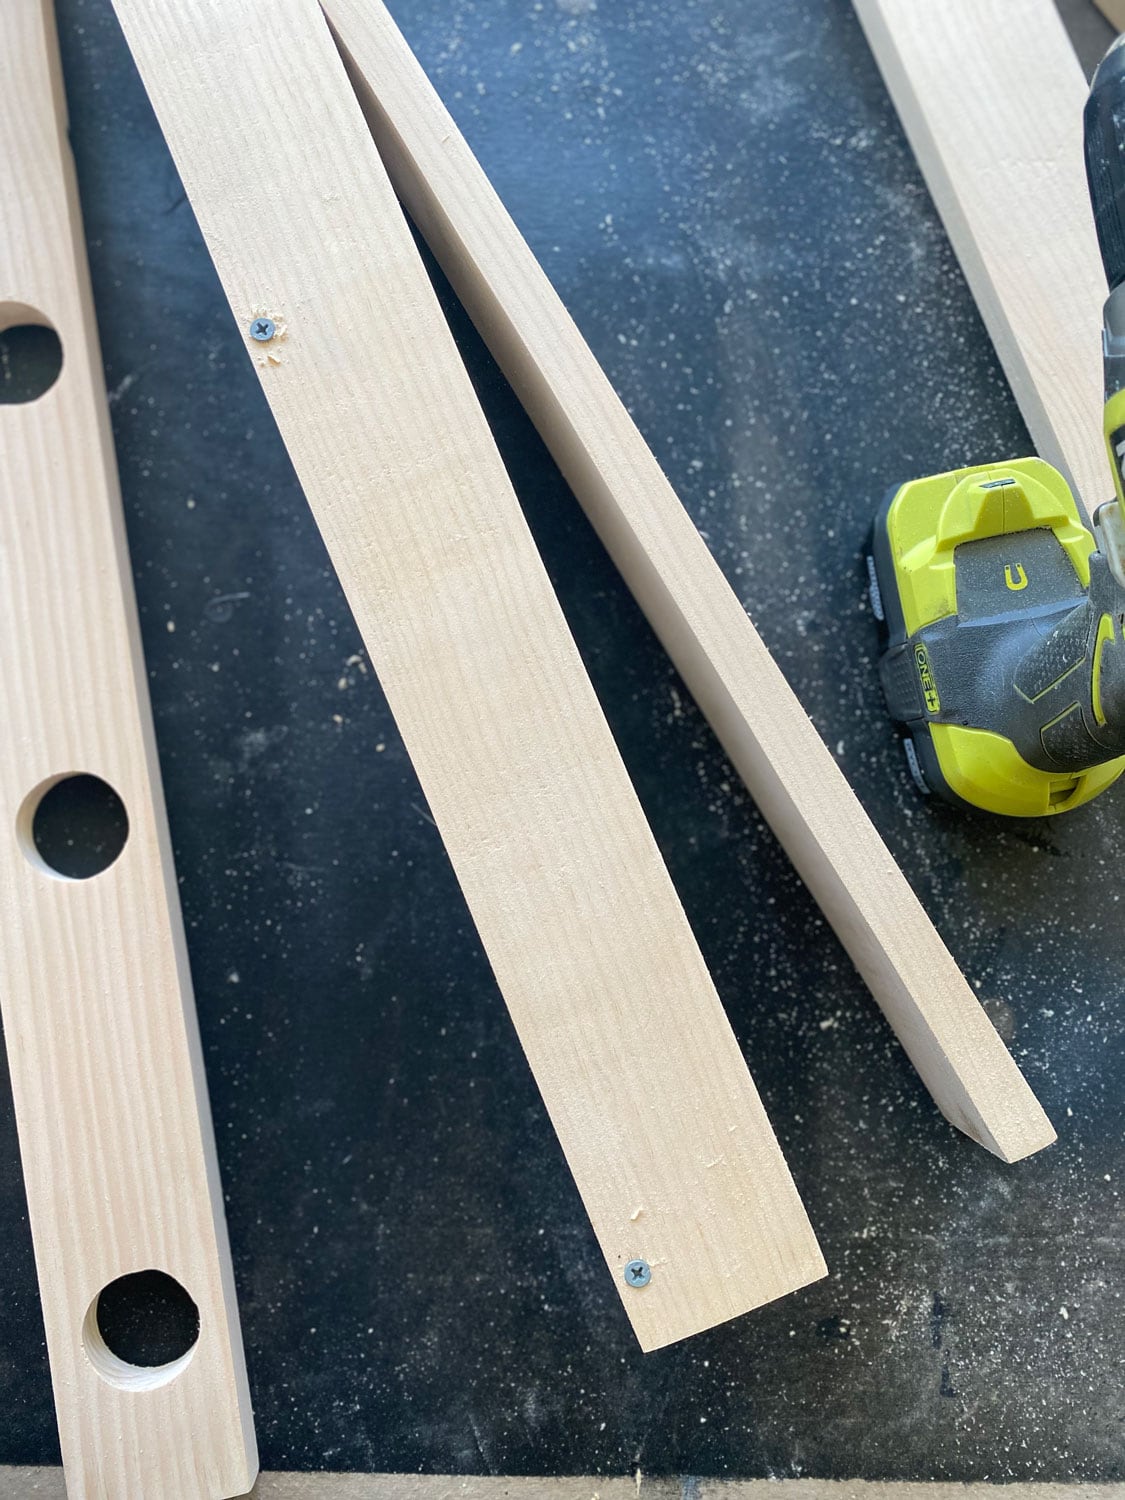


- Cut six pieces of wood to your desired length (We made them fit from the door opening molding to the wall.
- Measure where you want your holes (center hole to center hole, ours are approximately 7″ apart).
- Using a small drill bit, drill one hole at the center of each hole as the starter hole. Then drill each hole using the 1 1/2″ drill bit (again, the smaller hole was just the starter hole).
- Patch and sand all six boards.
- Check to see if the glass tube vases fit in the holes. Our test tubes were slightly larger than the hole. To fix this, we used a Dremel with a sandpaper attachment to carefully sand inside the holes, making them a little bit larger so that the test tubes fit snugly.
- Attach the board that doesn’t have the holes to the back of each top piece with the holes. This will be the part that is mounted to the wall. You’ll use 2″ screws to secure the board with the holes to the one without.
- Sand once more to smooth out any nicks and wipe them down with a damp cloth.
- Paint or stain with your desired finish.
- Attach to the wall. Use wall anchors if not going into a wall stud. Tip: if you prefer the screw heads not to show, before anchoring it to the wall, drill a hole the same size as the screw head and mount it to the wall. Use a wood patch to fill in the hole, sand, and paint.
NOTE:
You may want to practice making a couple of holes in scrap wood. Then use the Dremel to make the hole larger to see what you are trying to do. It would be easy to overuse the Dremel causing the hole to lose its circular shape. Once you get the hang of it, it’s not difficult. But you want to get a feel for it before starting your shelves.
Get ready to Propagate some plants!
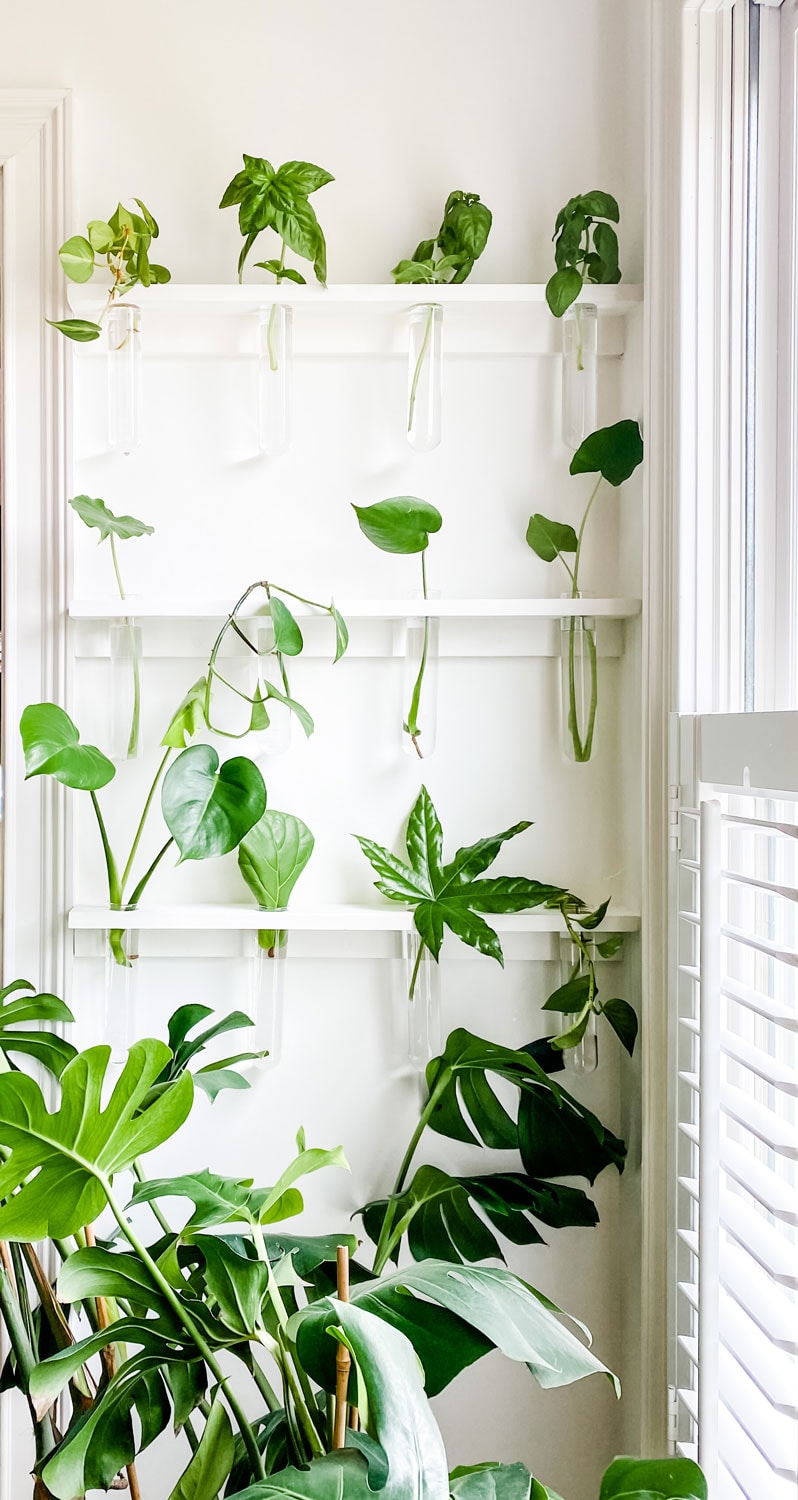
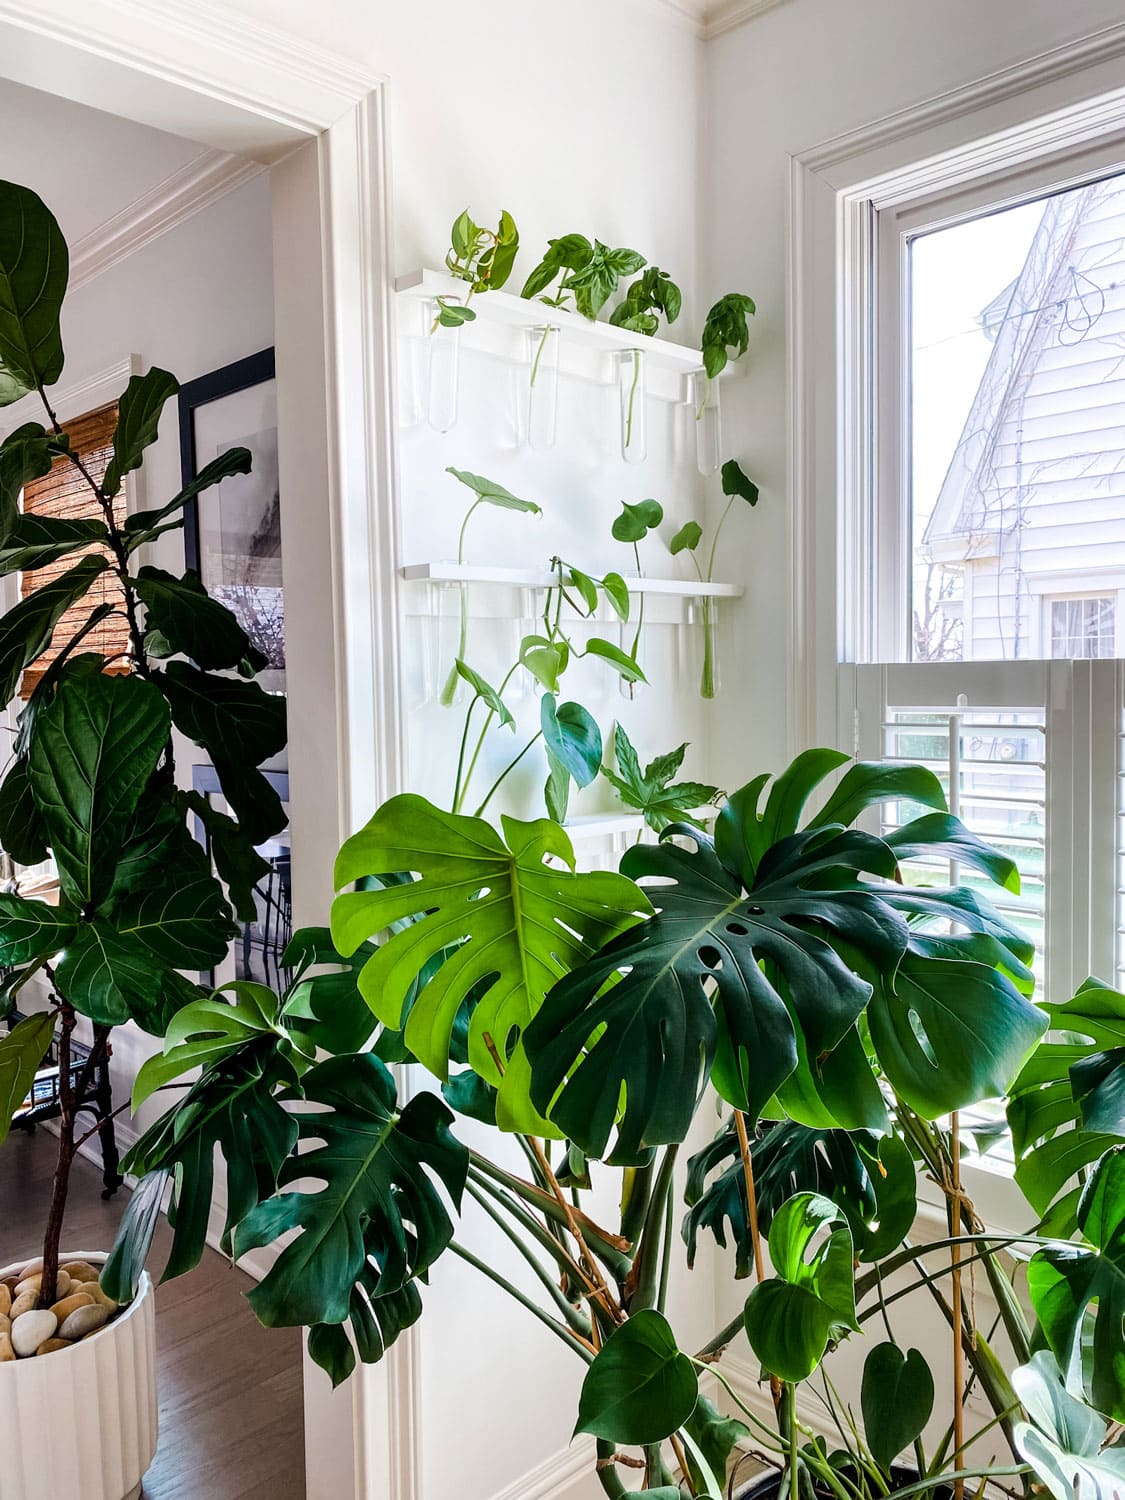
This will be the fun part of making your plant wall. Fill the test tubes with water and then add some stem cuttings using the methods mentioned above, depending on the type of plant. I even added a few basil cuttings. I can’t wait to share it with my neighbors!
How to Clean the Glass Tubes
I knew this would be a problem, like cleaning vases with narrow openings or decanters. They get that film on the inside, and it can be tricky to get them looking like new again! I shared about my lucky find on how to clean them in this post. It’s a small jar of Magic Balls! Fill your vase or tube with warm water, a little dish soap, and the beads. Swirl, shake, and shake some more. The little beads go to work on the inside of the tube, and the result is a sparkly clean, like a new tube or glass decanter.
What If the Space I Have Doesn’t Have Great light?
You can still have a propagation wall even if you don’t have a house or a room with great light. There are tons of options for grow lights that start around $10. Like this one or for about $25, this light is a good option.
You might also like this post on how we built a custom peg board for plants.
Happy propagating!


Shop the post


This is so cool, Annie. What a great team you and Brent make. I hope you will give us updates on your success! How lucky your neighbors are. Happy Easter!
This is unbelievably clever Annie! I can see how this would be fabulous for herbs or any other plant for that matter, and it looks so pretty too!! You are amazing!
Thanks, Cindy! Does your new house have a potting shed? Could work?
Oh my gosh Annie – I love this so much! Just sent the link to Mike and fingers crossed that he can make one for me! xo
This is a clever design, Annie! There’s something I’m wondering about. What percentage of the plants in the propagation wall can be successfully reproduced.
Well, we are still figuring that out! The basil is doing very well! I’m on the third round. Pesto all summer!
What are the green gaskets around the glass tube?
Hi! Since the holes are made by hand, each is slight;y different, and so I added a green rubber band to make sure the glass tube doesn’t fall-through. I should probably get some white rubber bands!