
Make Your Own Scalloped-Edge Terra Cotta Pots With Air-Dry Clay
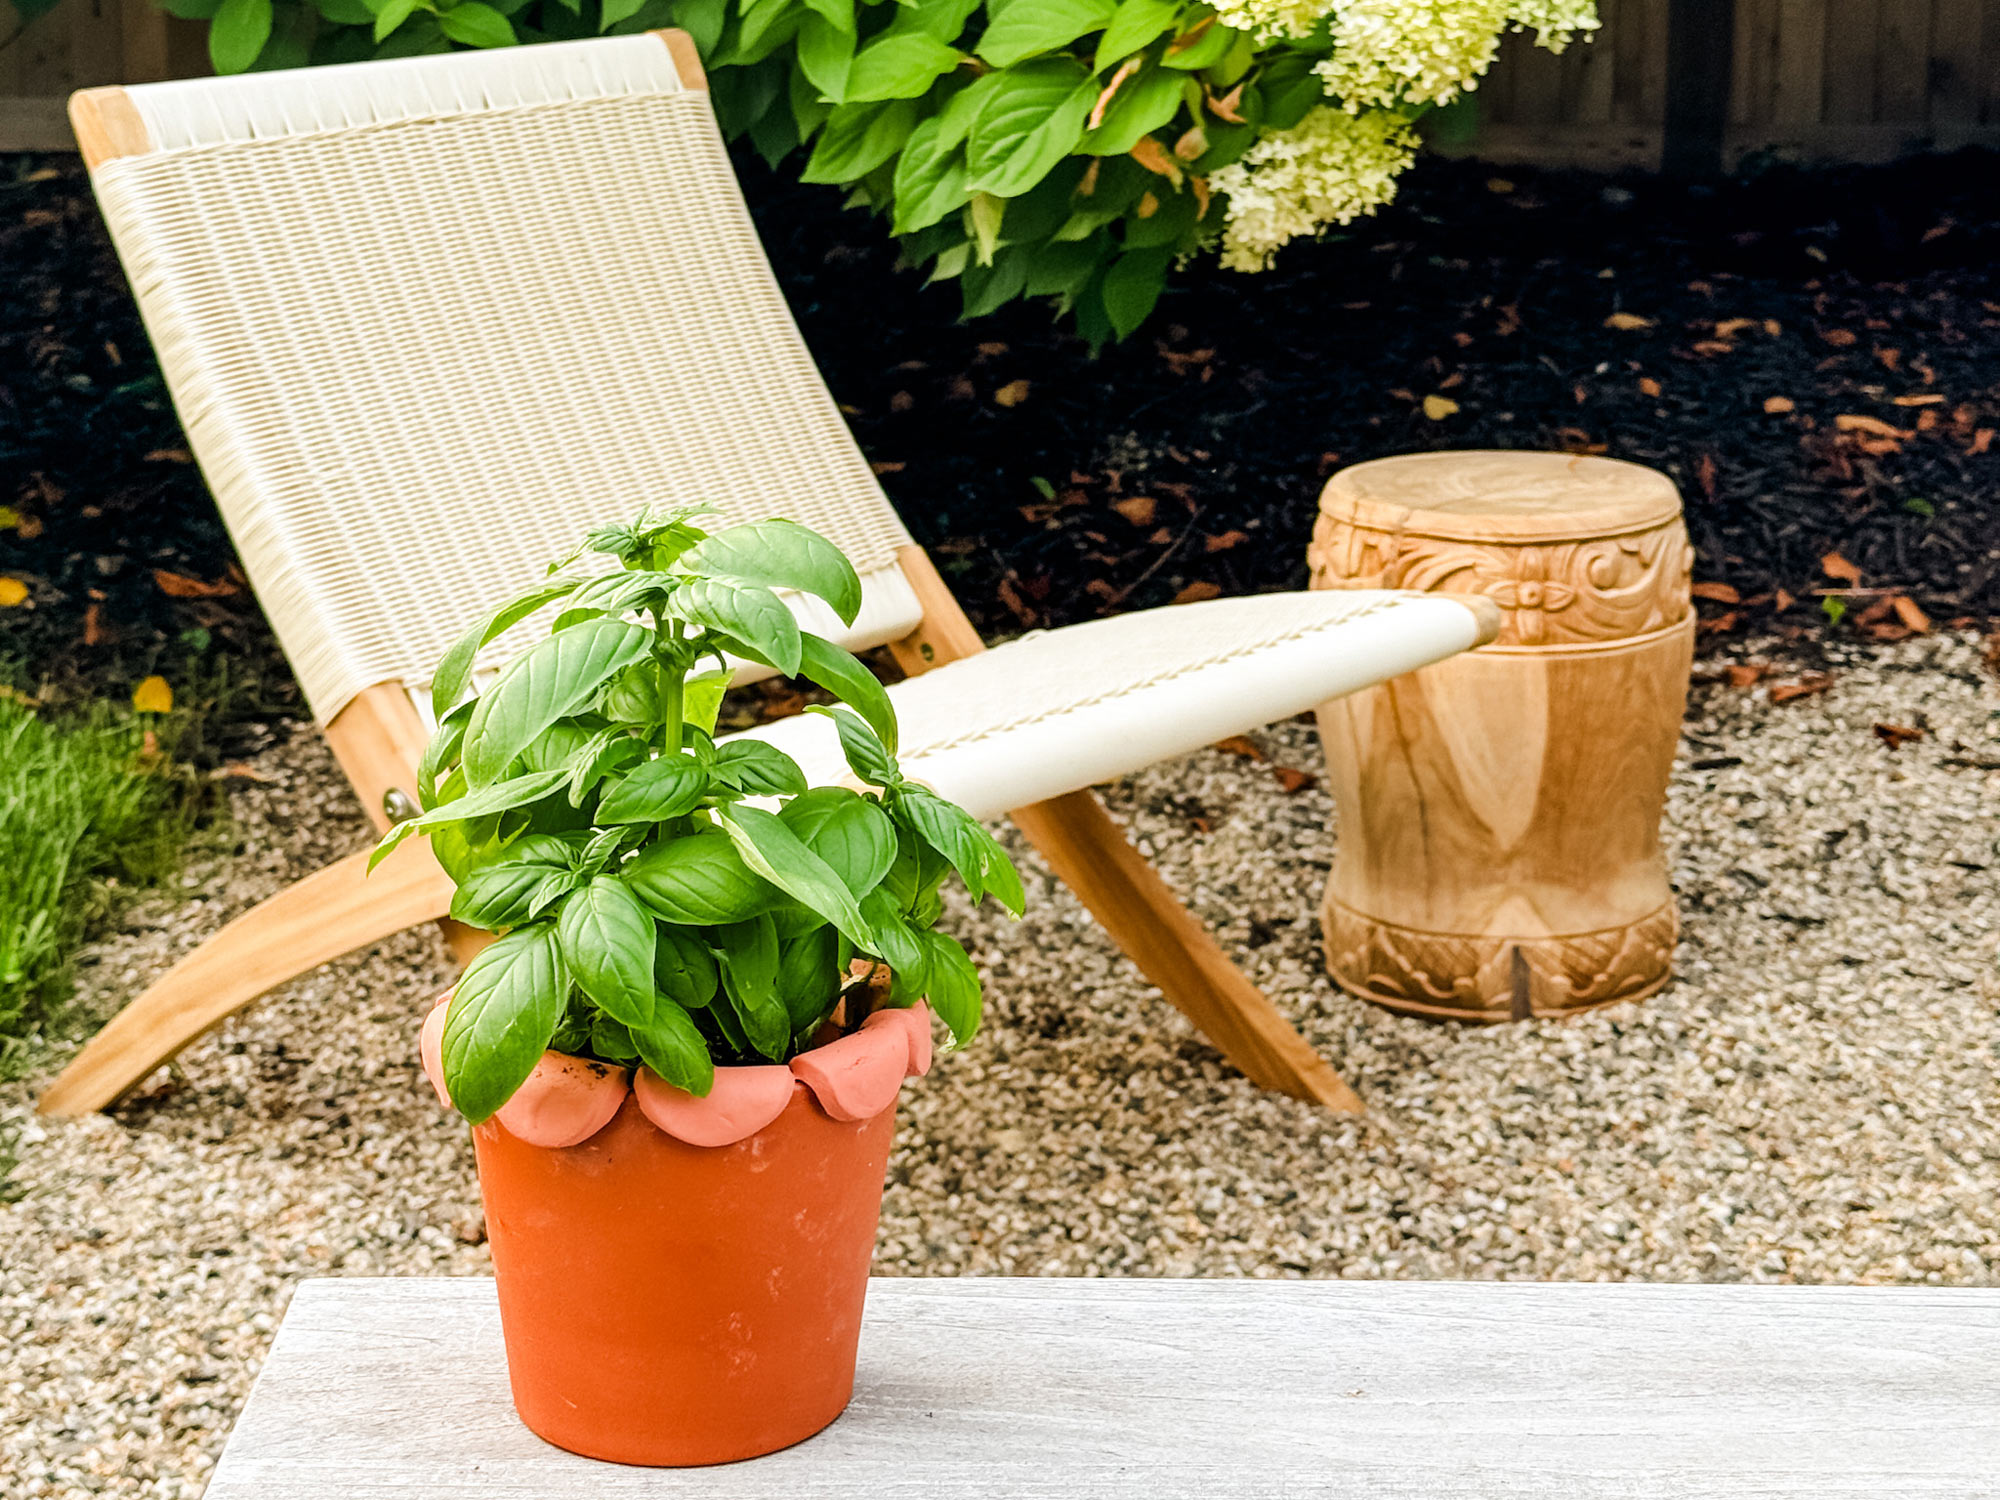
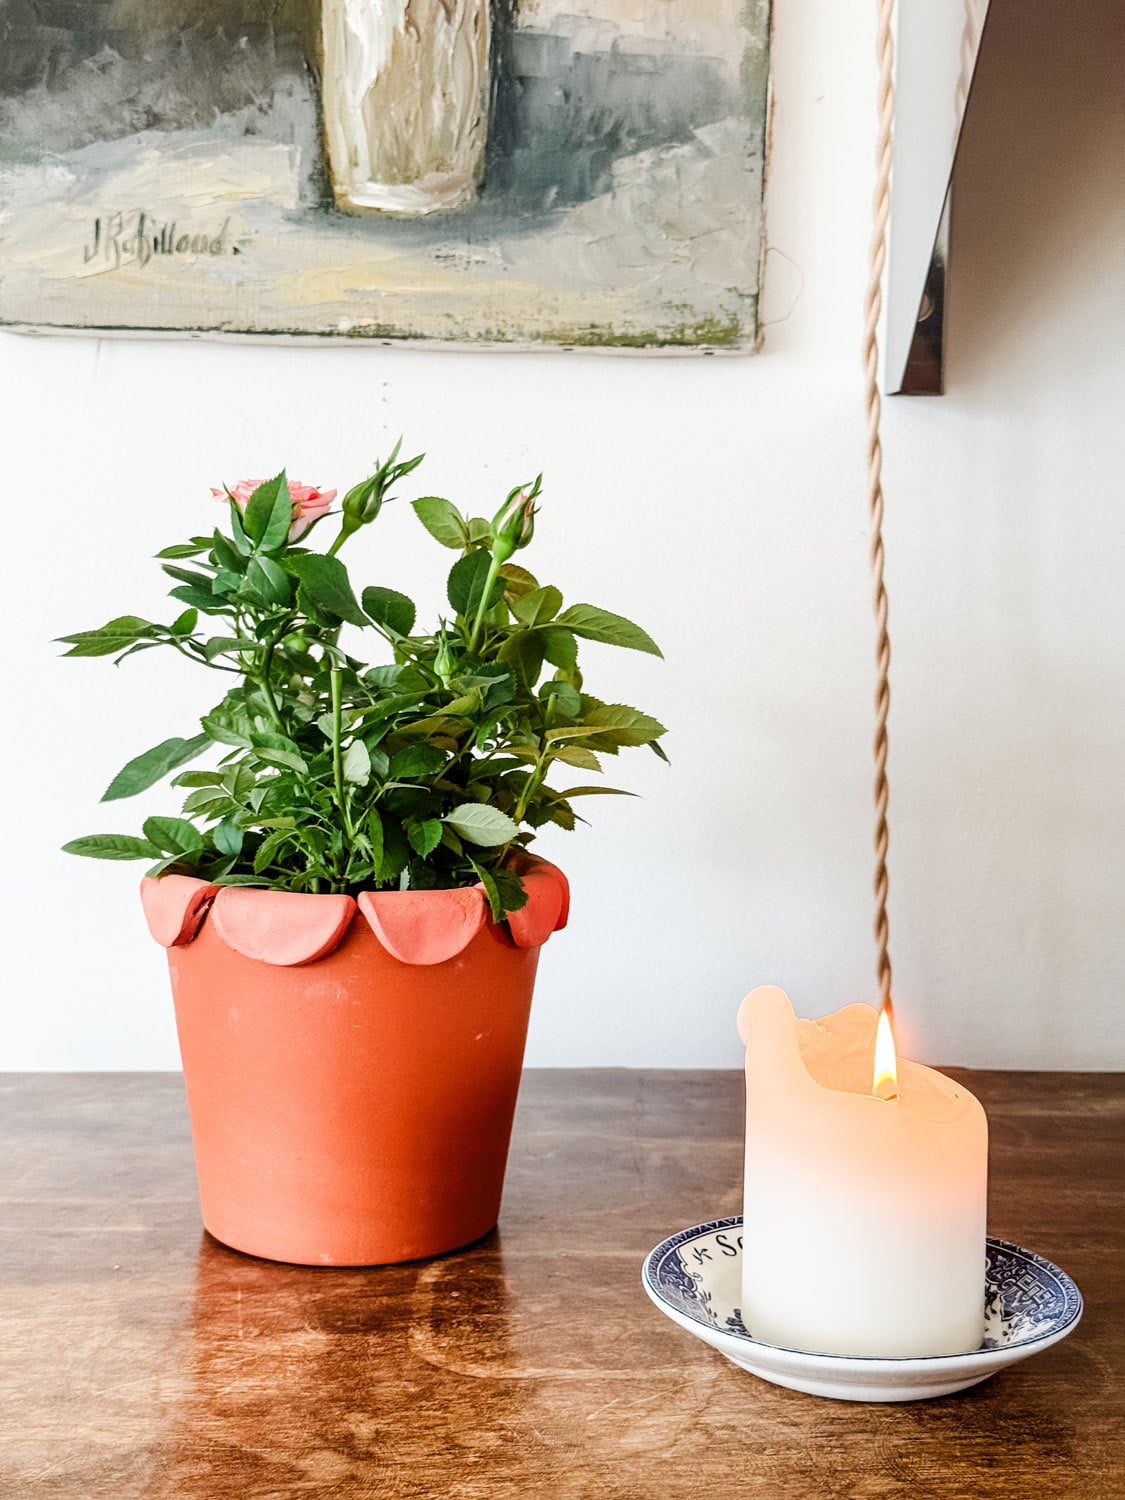
I’ve always found something charming about the simplicity of terra cotta pots. With just a little creativity, you can turn this garden basic into a personalized piece of pottery. In this easy DIY project, I’m adding scalloped edges to a terra cotta pot using air-dry clay for a fun, customized look that’s perfect for spring and summer. Whether you use them for herbs in your kitchen or fill them with flowers for your patio, these scalloped-edge pots are sure to add a touch of your style to your home or garden.
What you’ll need for making scalloped-edge terra cotta pots
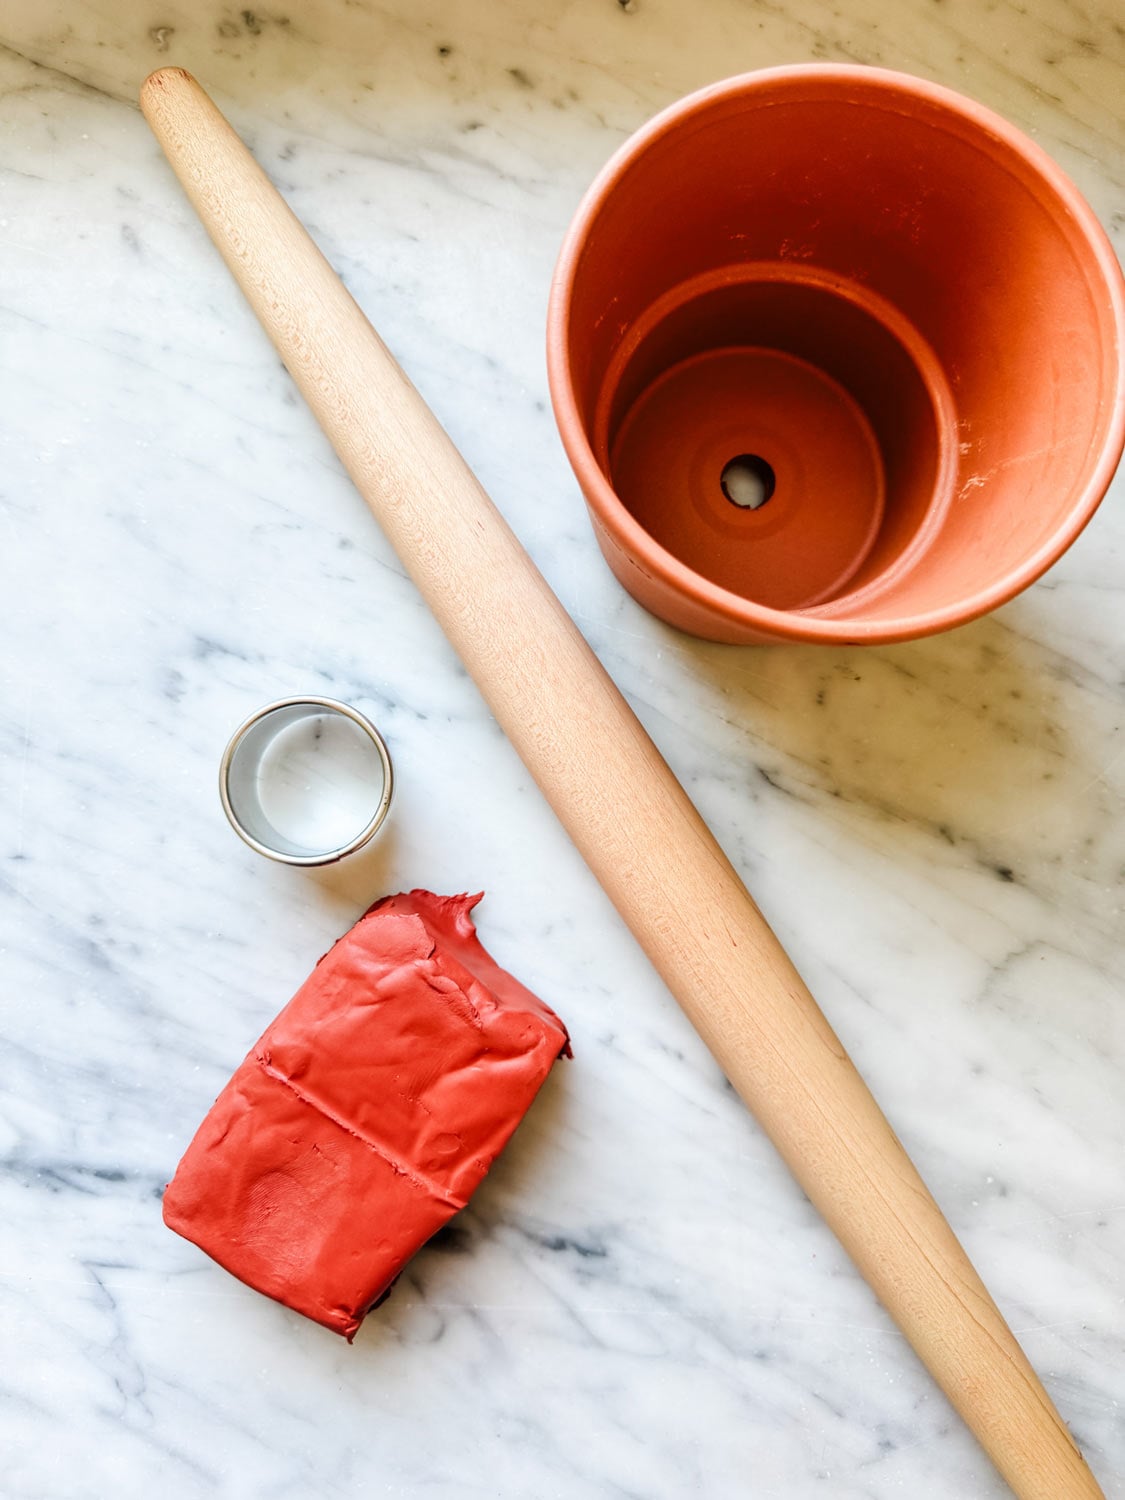
- Air-dry clay
- Terracotta pots (I used plain pots without a beveled edge)
- Rolling pin
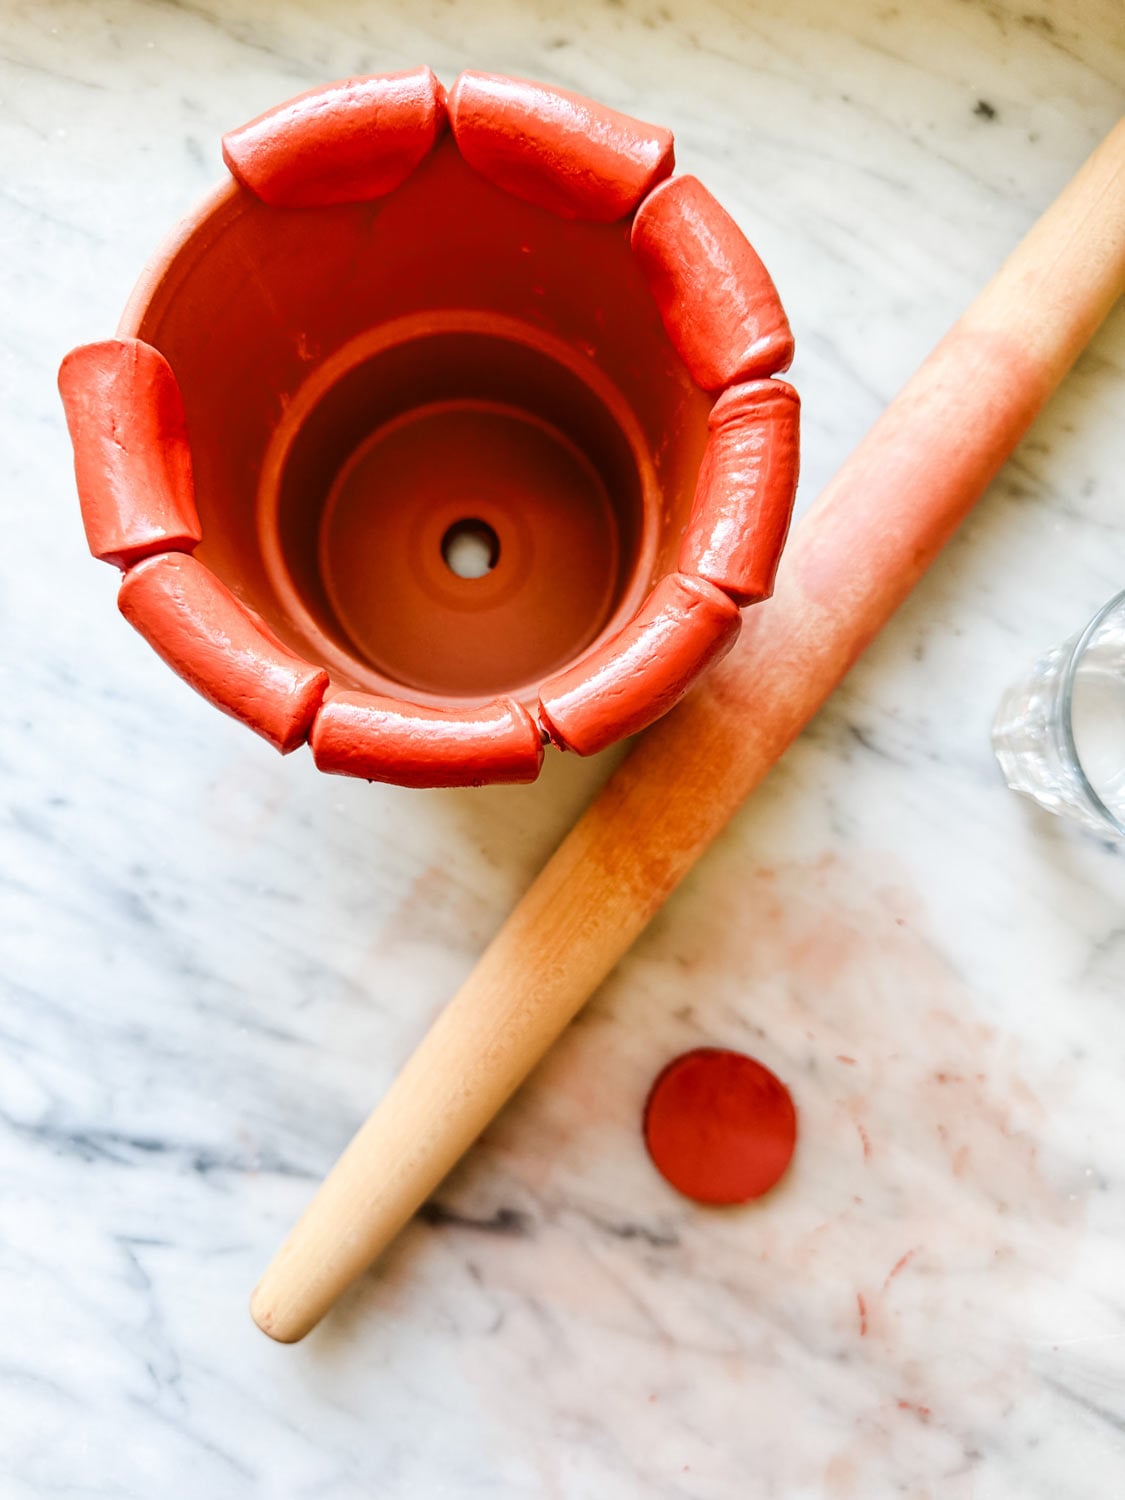
- Small, round cookie cutter (I used the 1 5/8 size from a set of eleven decorative cutters)
- A small glass of water
- Clean work surface
How to make a scalloped edge on your terracotta flower pots
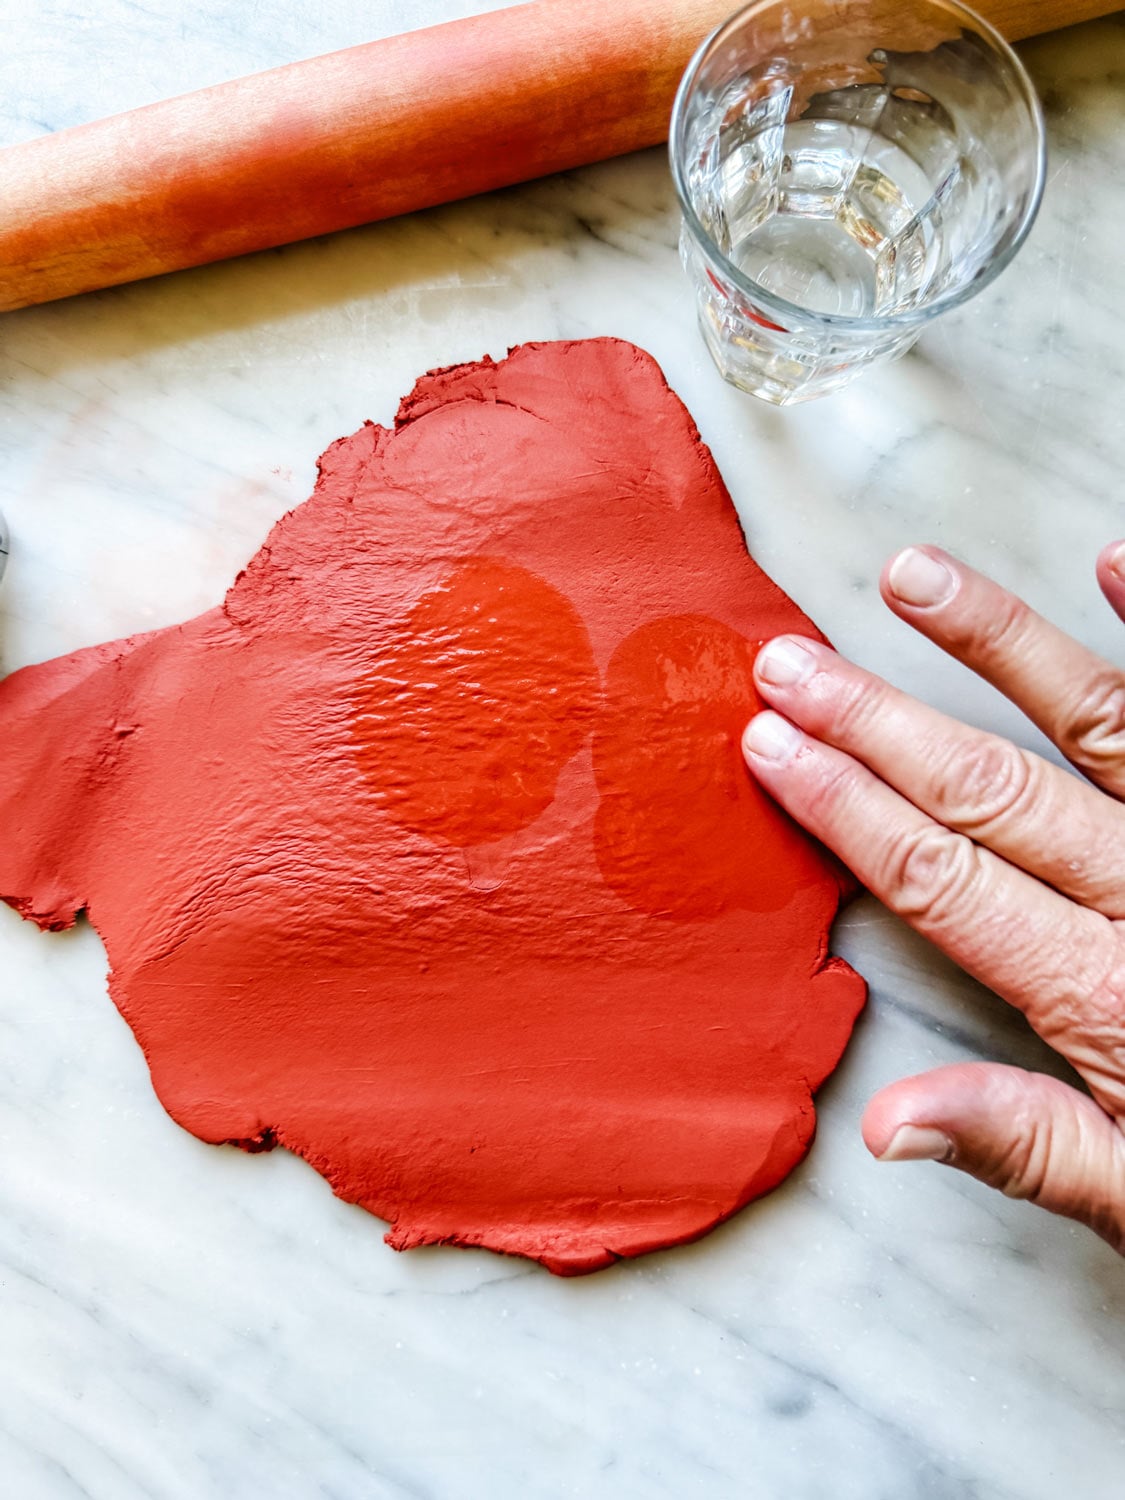
- Start with a package of terracotta air-dry clay and, using a rolling pin, roll out the clay to about 1/4″ thick all around.
- Dip your fingers in the small glass of water and rub the clay to make it smoother and eliminate any roll marks.
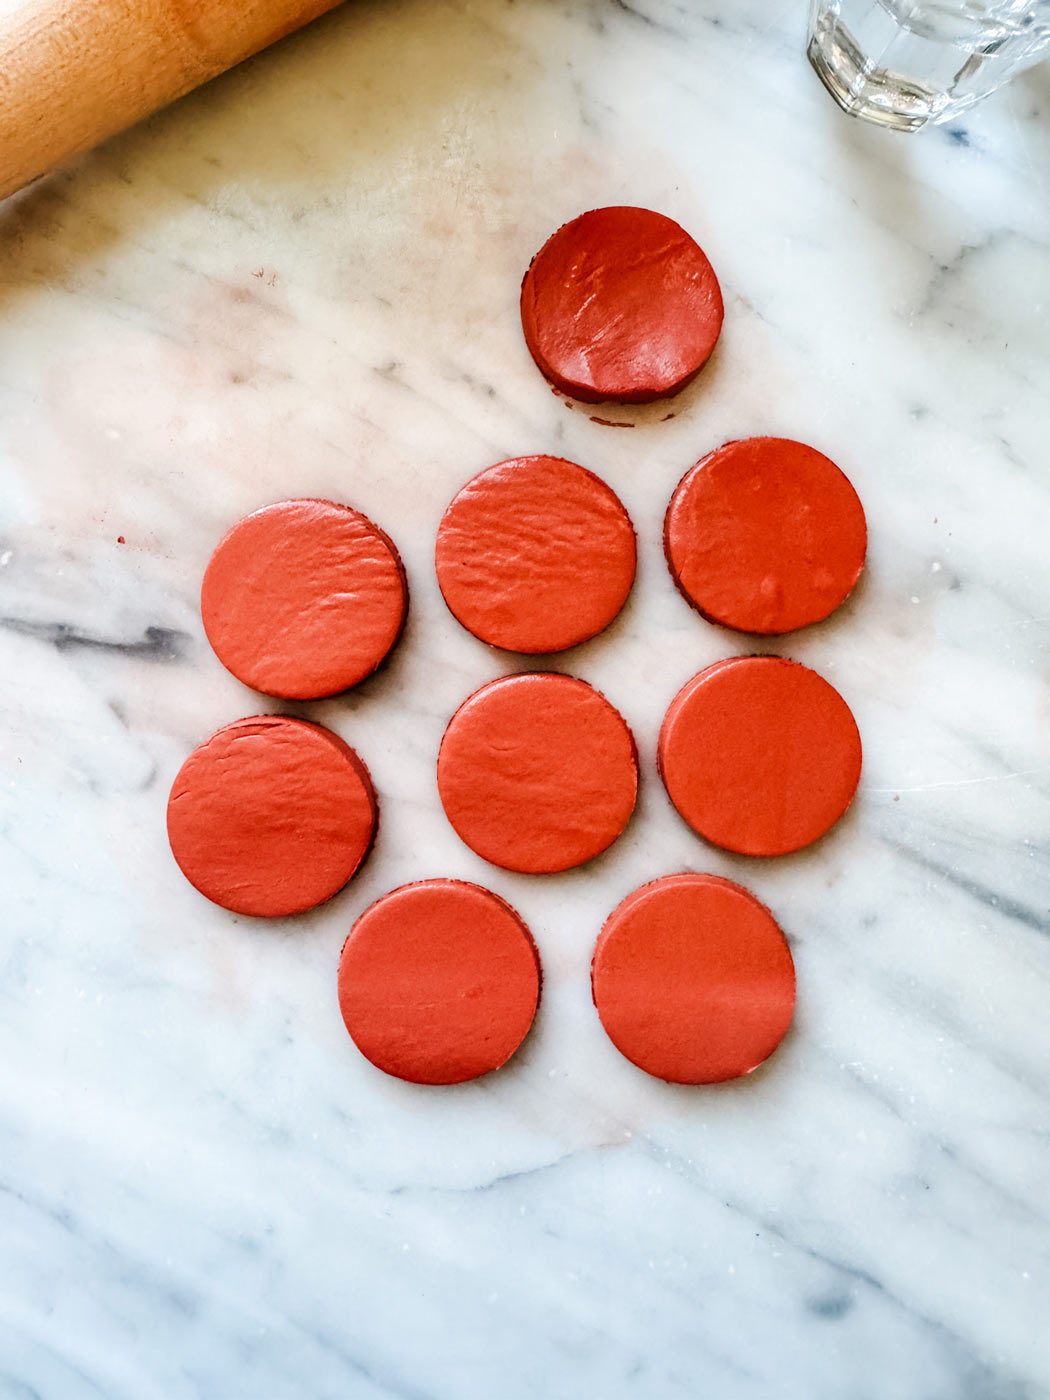
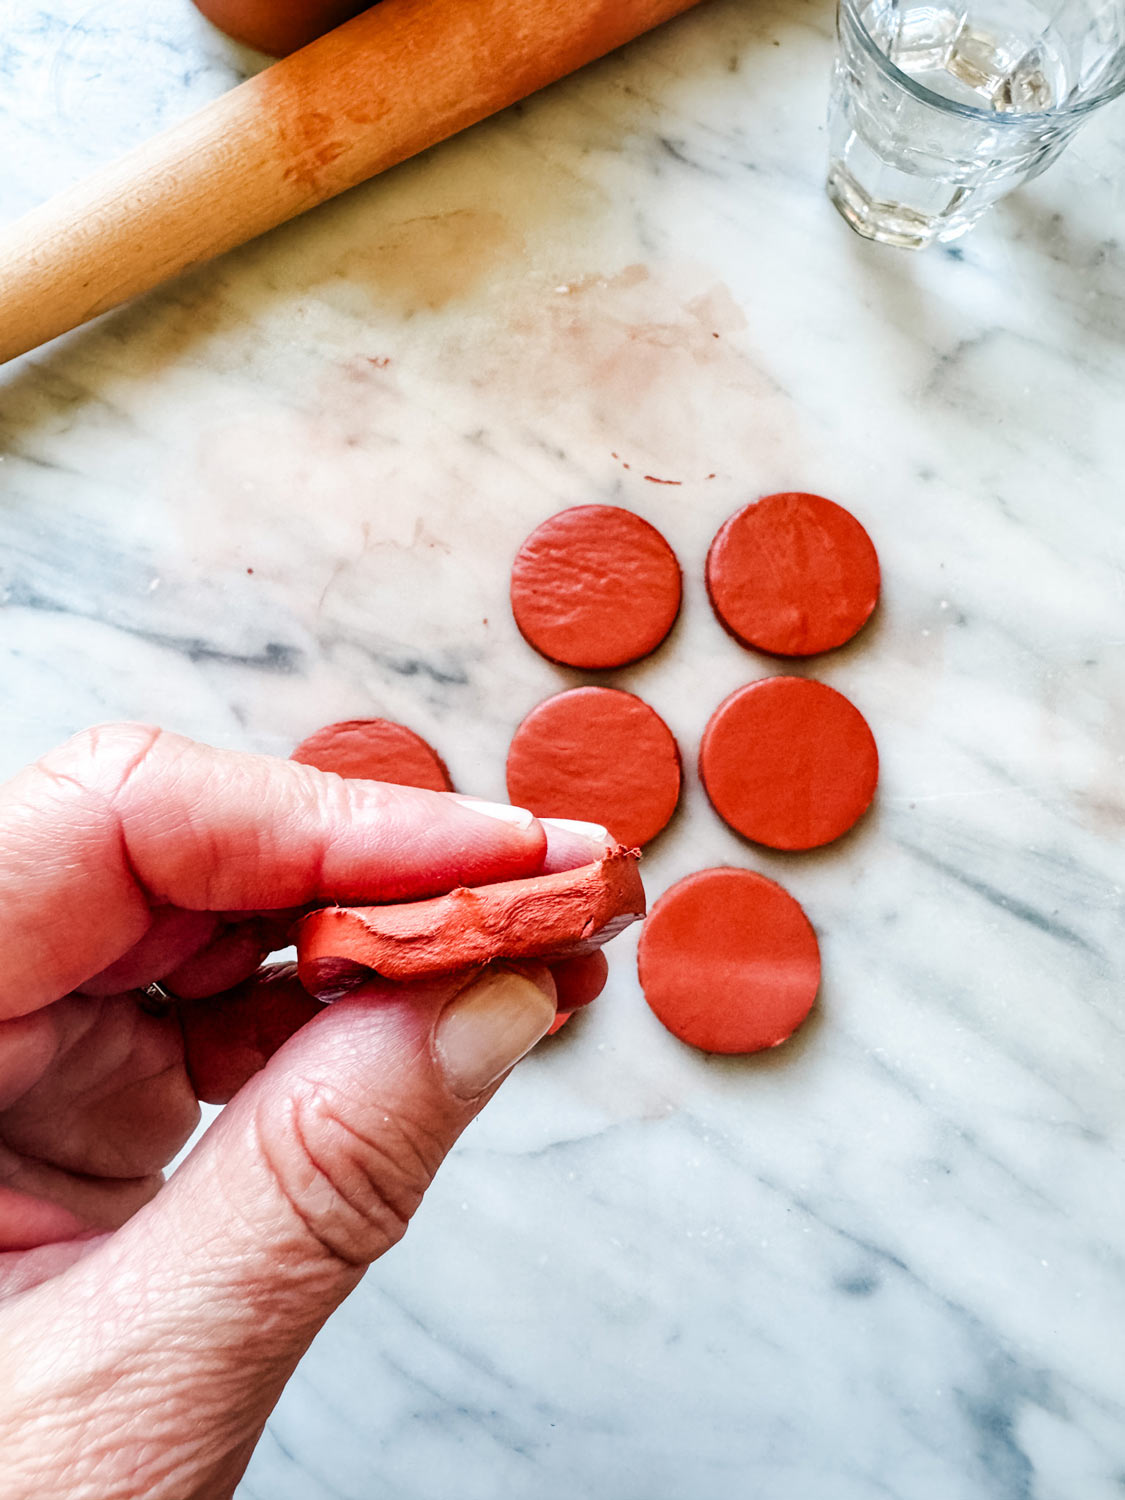
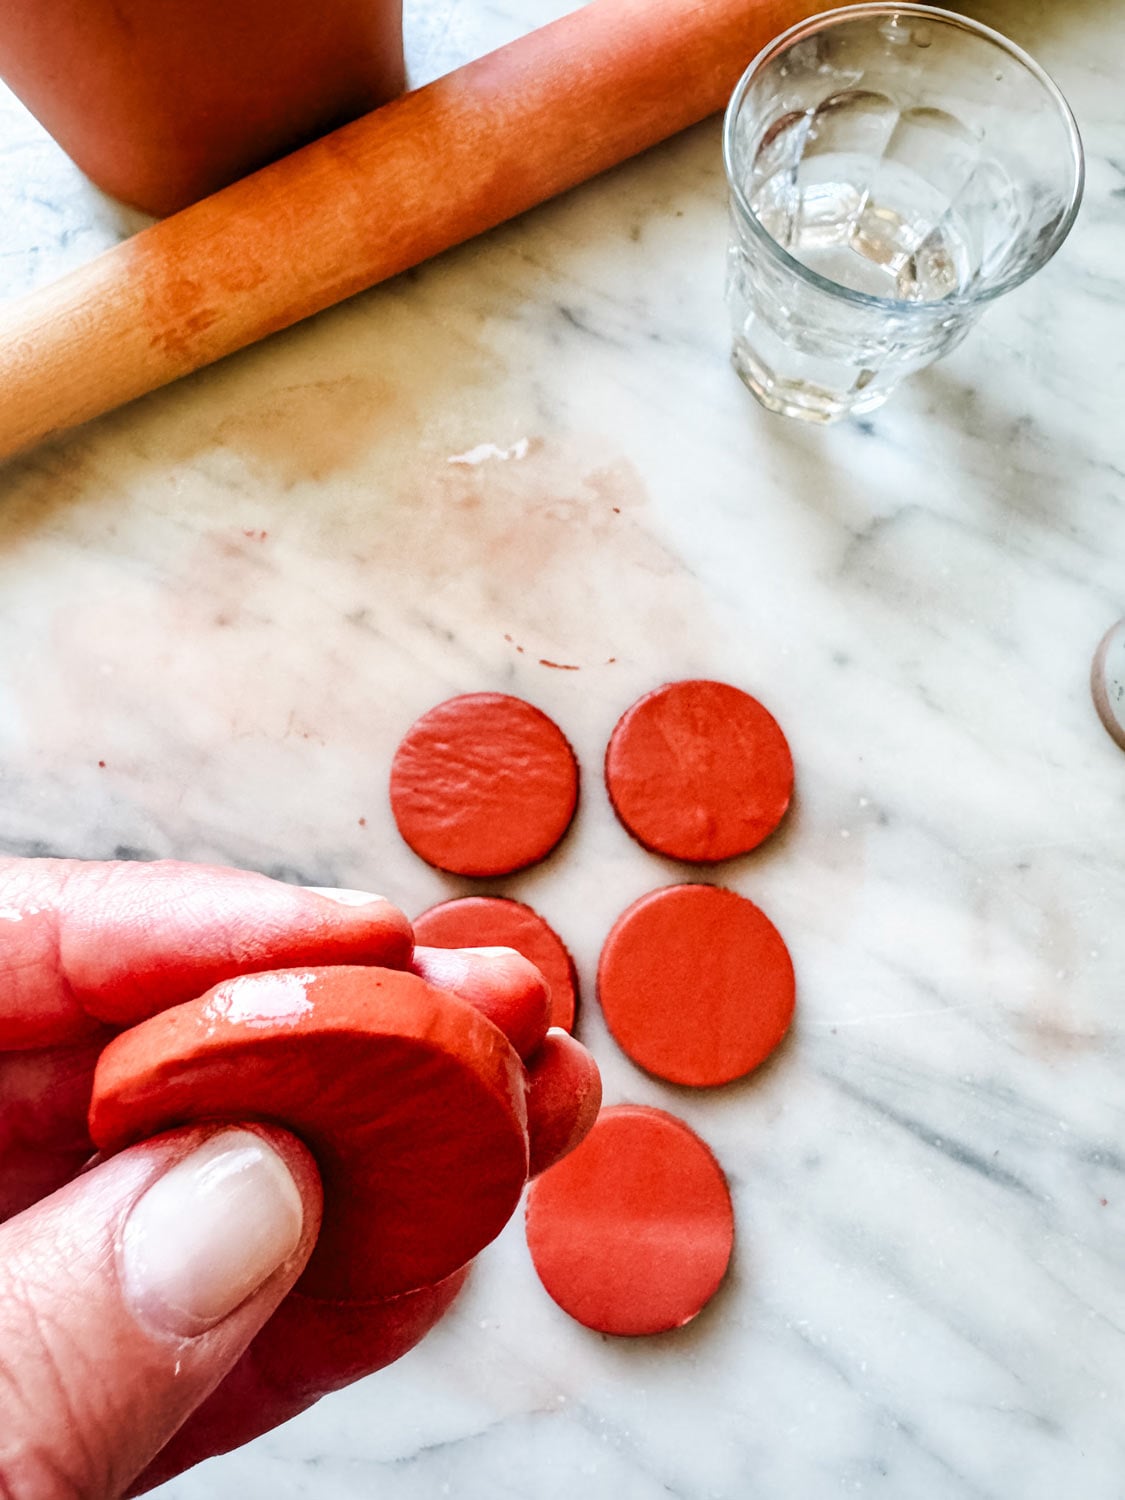
- Using the cookie cutter, cut small circles of clay and set them aside.
- Using your fingers and a little bit of water, smooth out all the edges and tops of the clay circles.
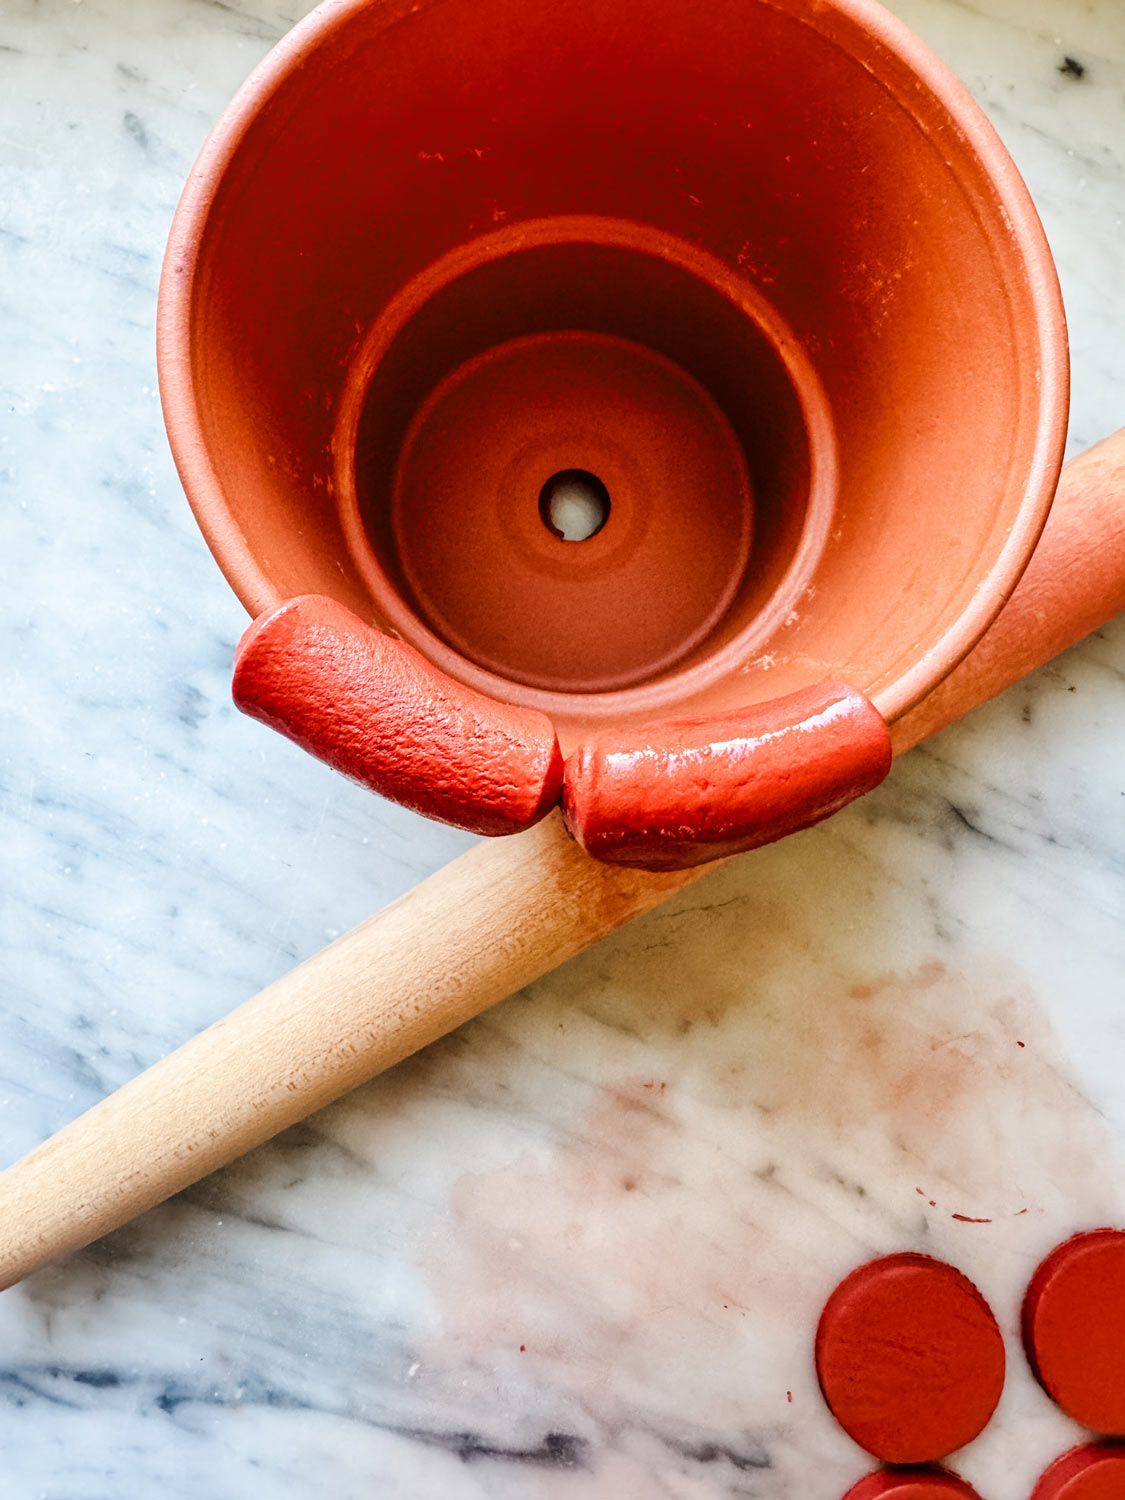
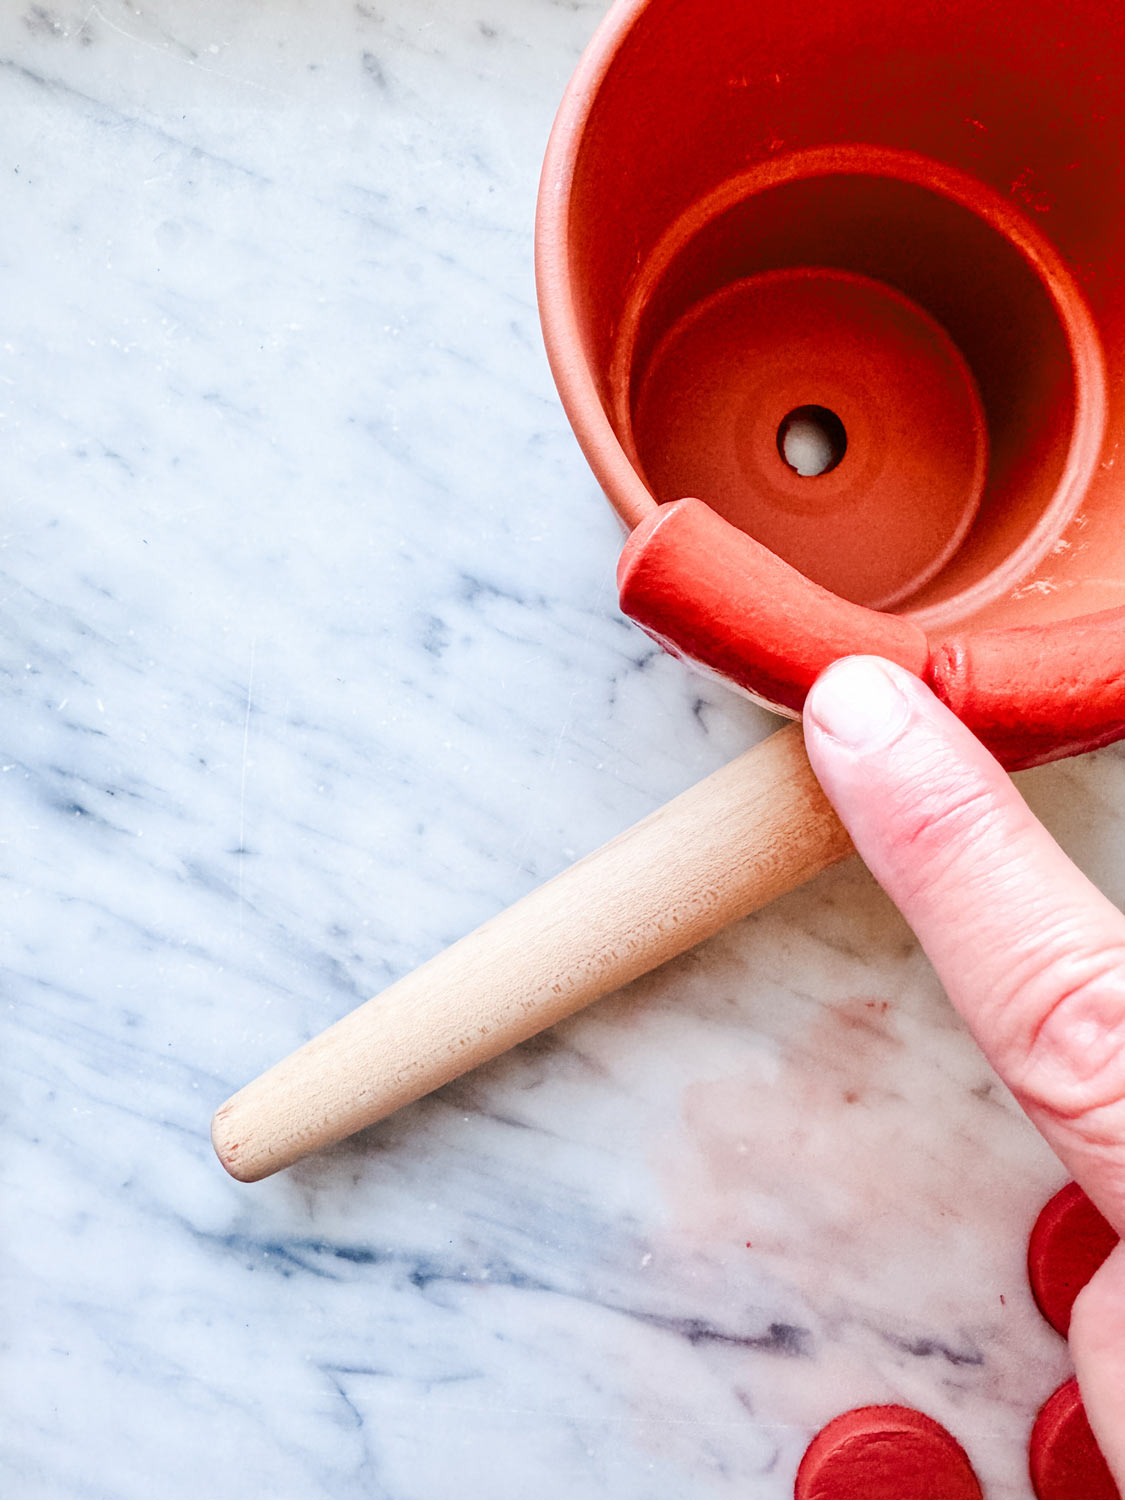
- Begin placing the clay circles around the edges of the terracotta pots and, using a little bit of water, smooth out the tops and touching edges of the clay circles.
- Work your way around the top of the pot until the entire rim of the pot has touching clay circles. Use your fingers and water to smooth out any minor imperfections, and the clay will be smooth.
- Place the clay pot in a preheated oven at 200°F and bake it for about an hour.

Helpful things to know about using air-dry clay
- Air-dry clay is available in terracotta, white, and stone colors.
- Many projects use only a small amount of air-dry clay. Wrap the opened package of clay in plastic wrap and place it in a zip-loc bag. It will keep for several months.
- Air-dry clay is very easy to work with. If you don’t have a rolling pin, use a bottle or a smooth-edged glass to roll out the clay to the desired thickness.
- Air-dry clay does not stain a work surface and washes up easily with soap and water. (As you can see above, I roll out my clay on my marble countertop.)


This so so sweet and clever. Love it.
Only Annie Diamond would think of this!! So clever!!
This is a wonderful idea! I love clay pots too!
Thank you! I love a scalloped edge…and terracotta!