
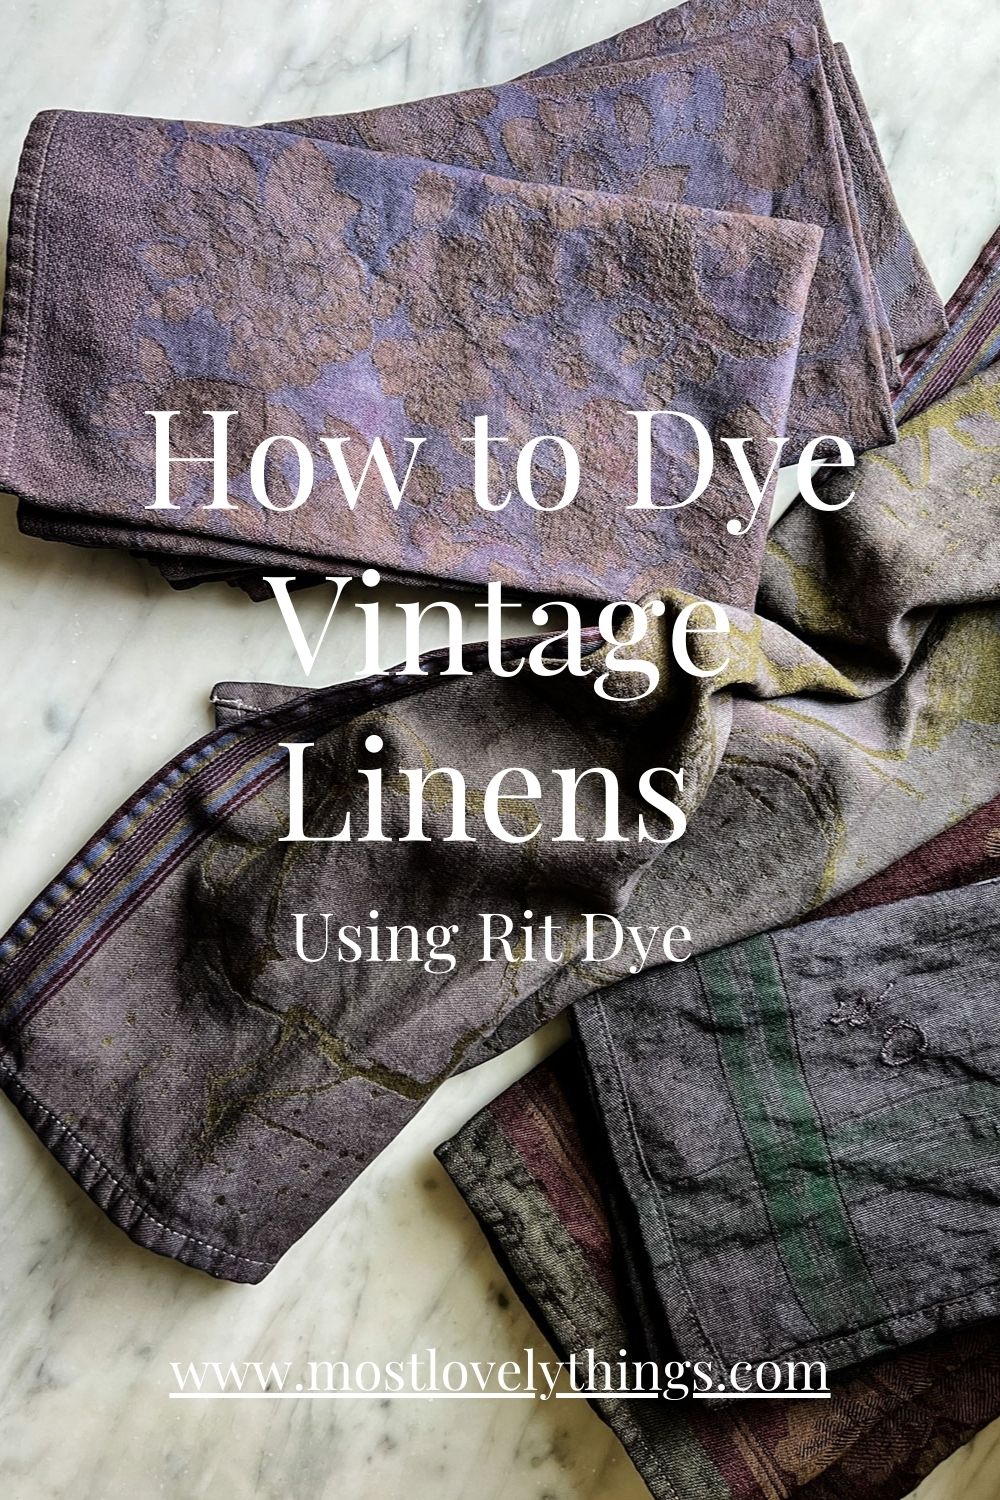
How to Dye Fabric With Rit Dye
The easiest and best way to dye fabric with Rit dye
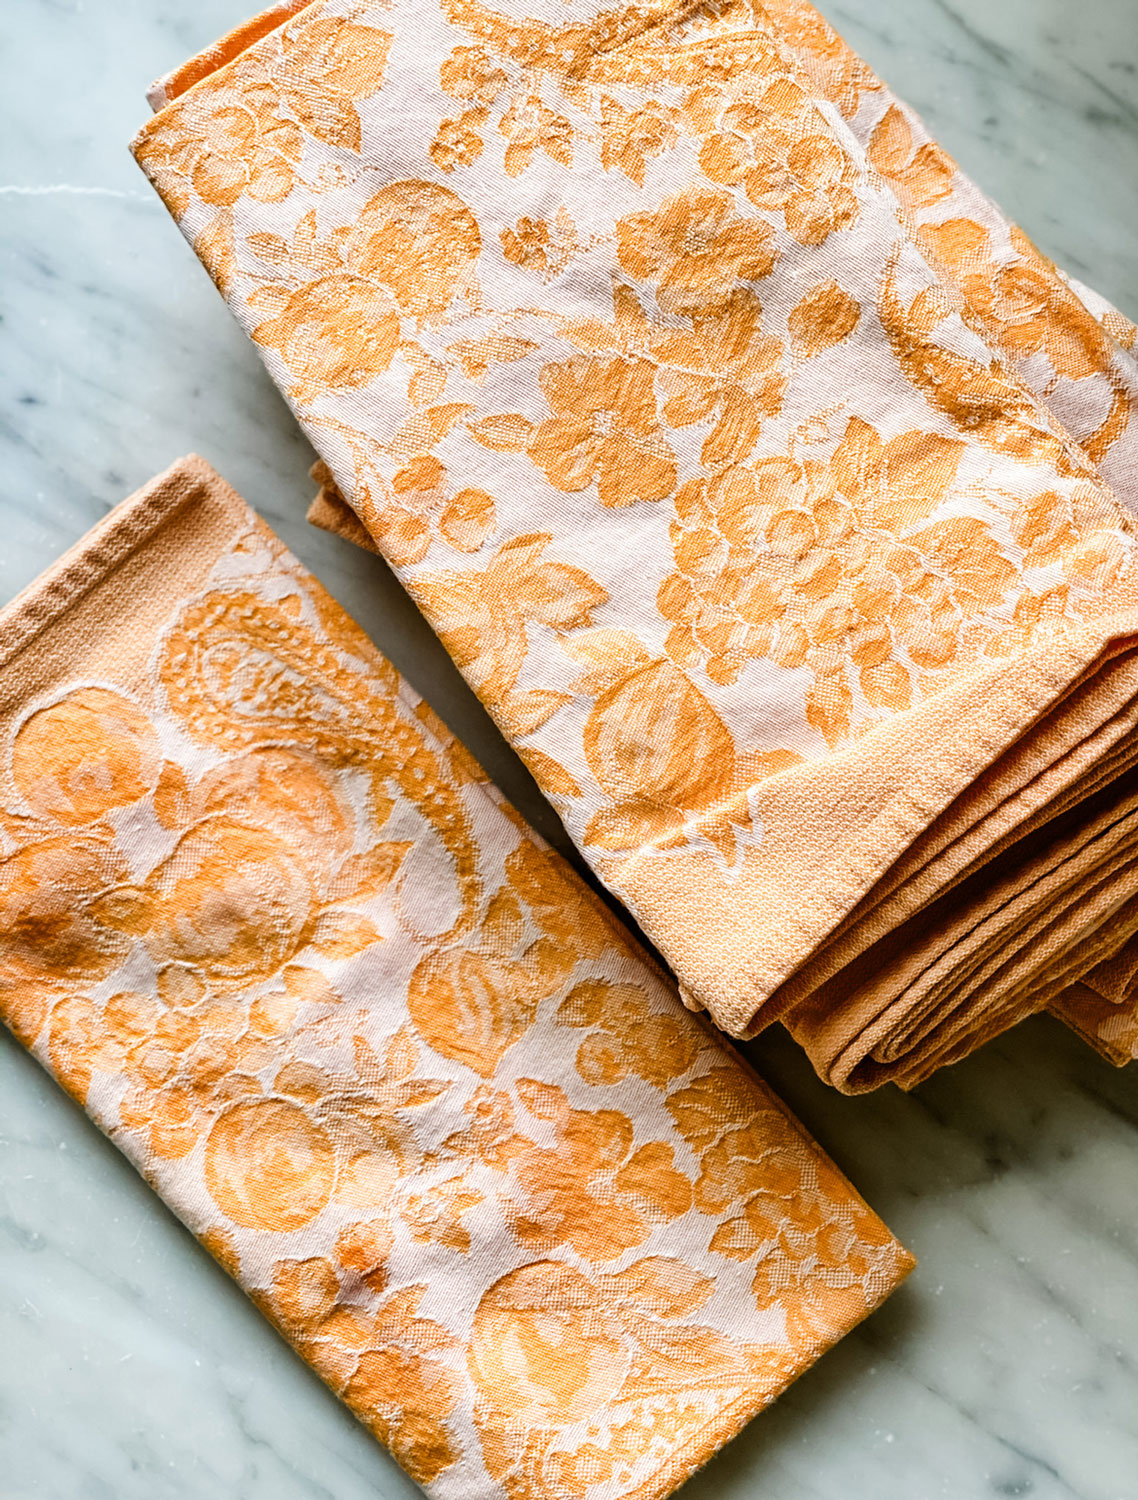
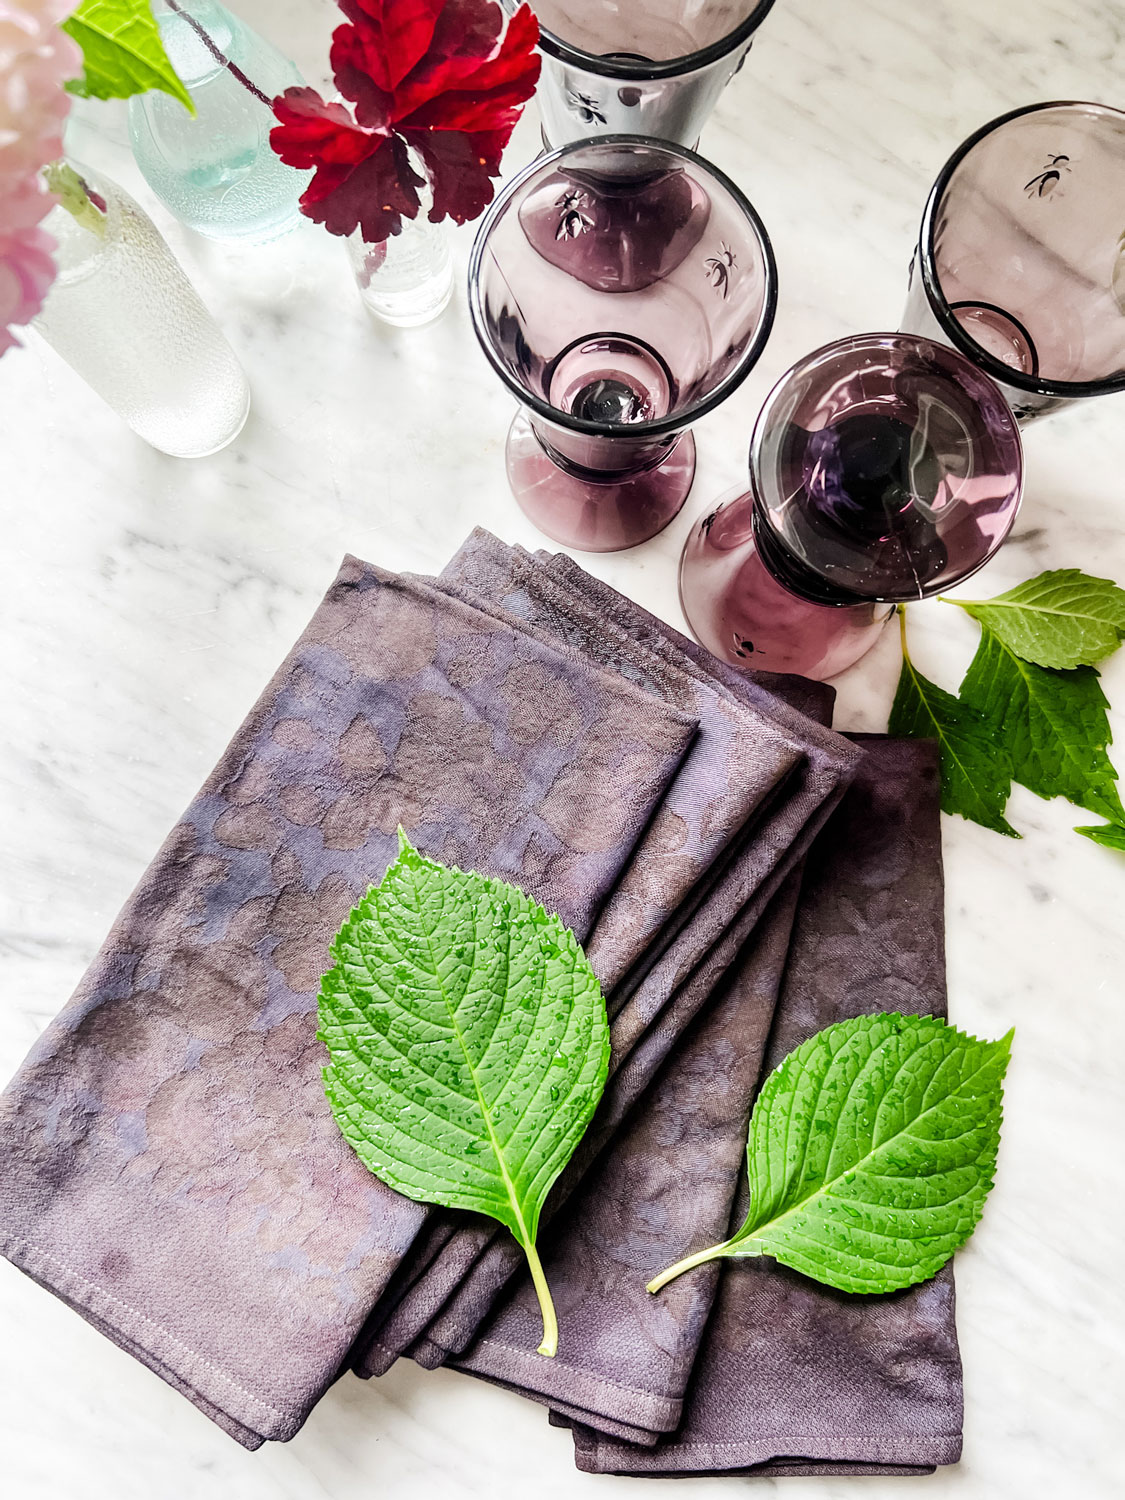
Back in the 1980s, my sister and I each bought a stack of beautiful napkins from the sale table at Williams Sonoma for about $2 each. The Damask woven pattern is beautiful, and the quality is great and hard to find these days. They hold their shape and size with very little coaxing. I wash them, give them a snap, and hang them to dry. Unlike most cloth napkins, they don’t even need ironing.
But I never liked the color, which is probably why they were on sale. Nobody else liked the color either. It was sort of an odd yellow-gold that went with nothing. So I kept them all these years but used them only occasionally. That is, until I had the idea of dyeing them.
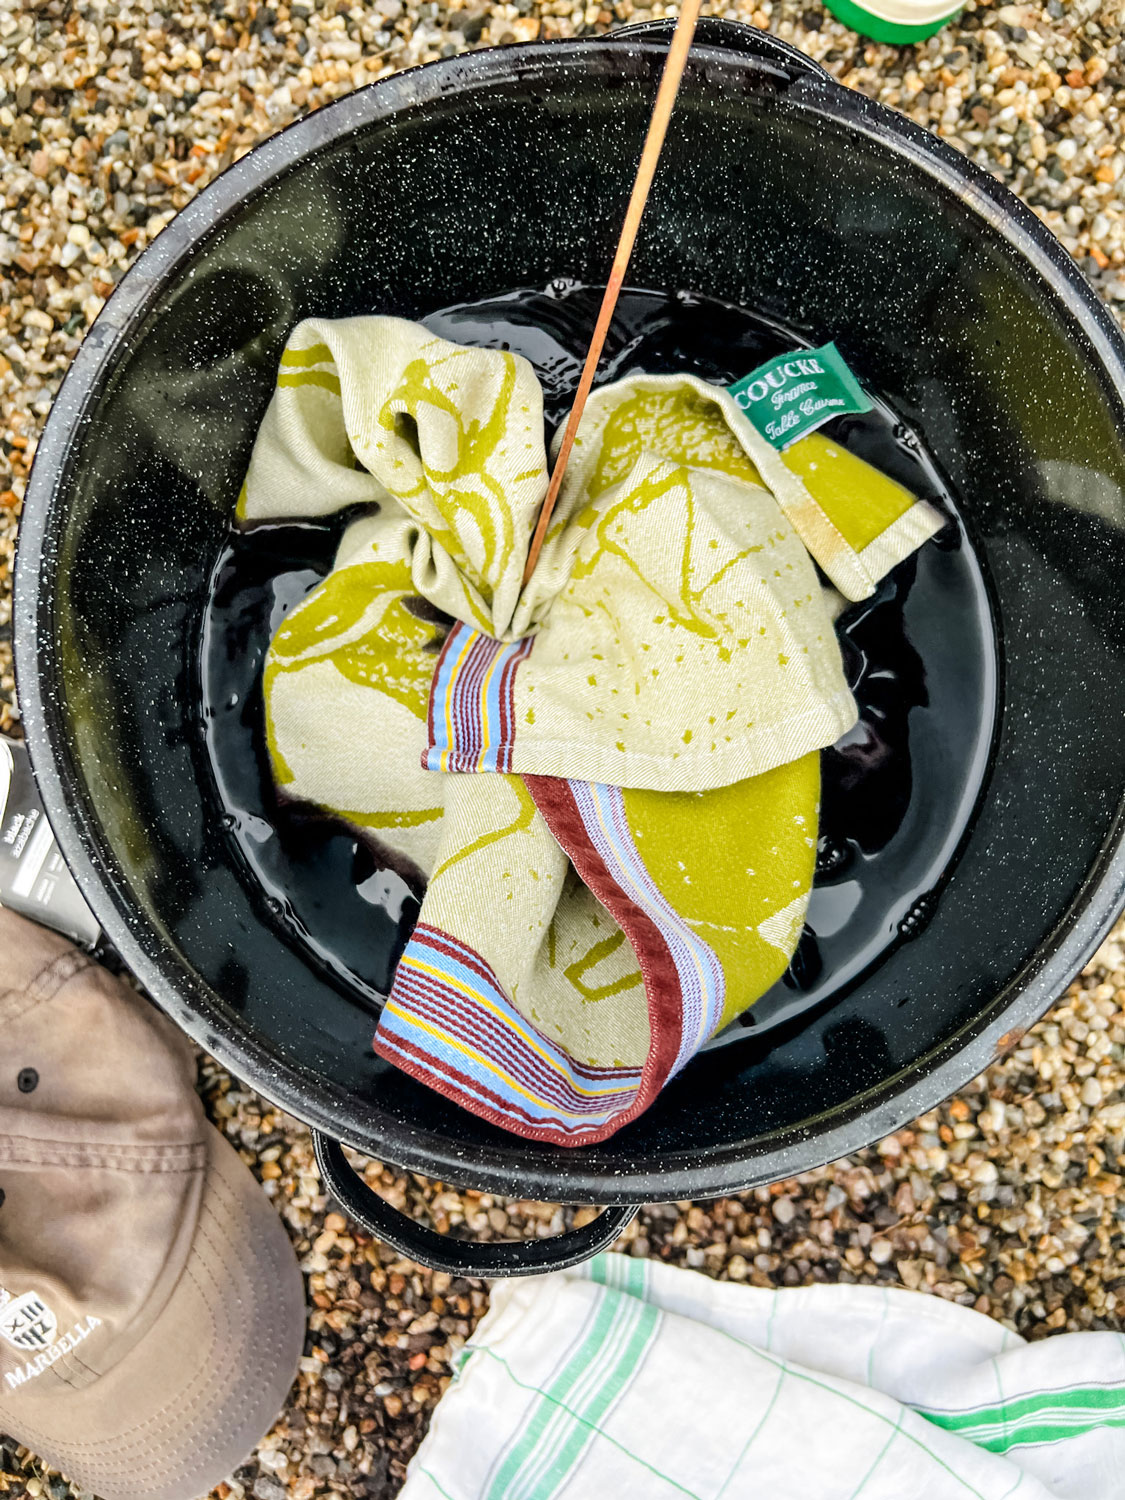
I’ve been meaning to dye them for quite some time now, but whenever I think about it, all I can think of is the mess it will create. And I certainly don’t want to do it in my washing machine – even though people say it’s safe and won’t discolor or harm the machine. So after a little research, I decided to give the bucket method a try – and by bucket method, I mean an enamel lobster pot that I have.
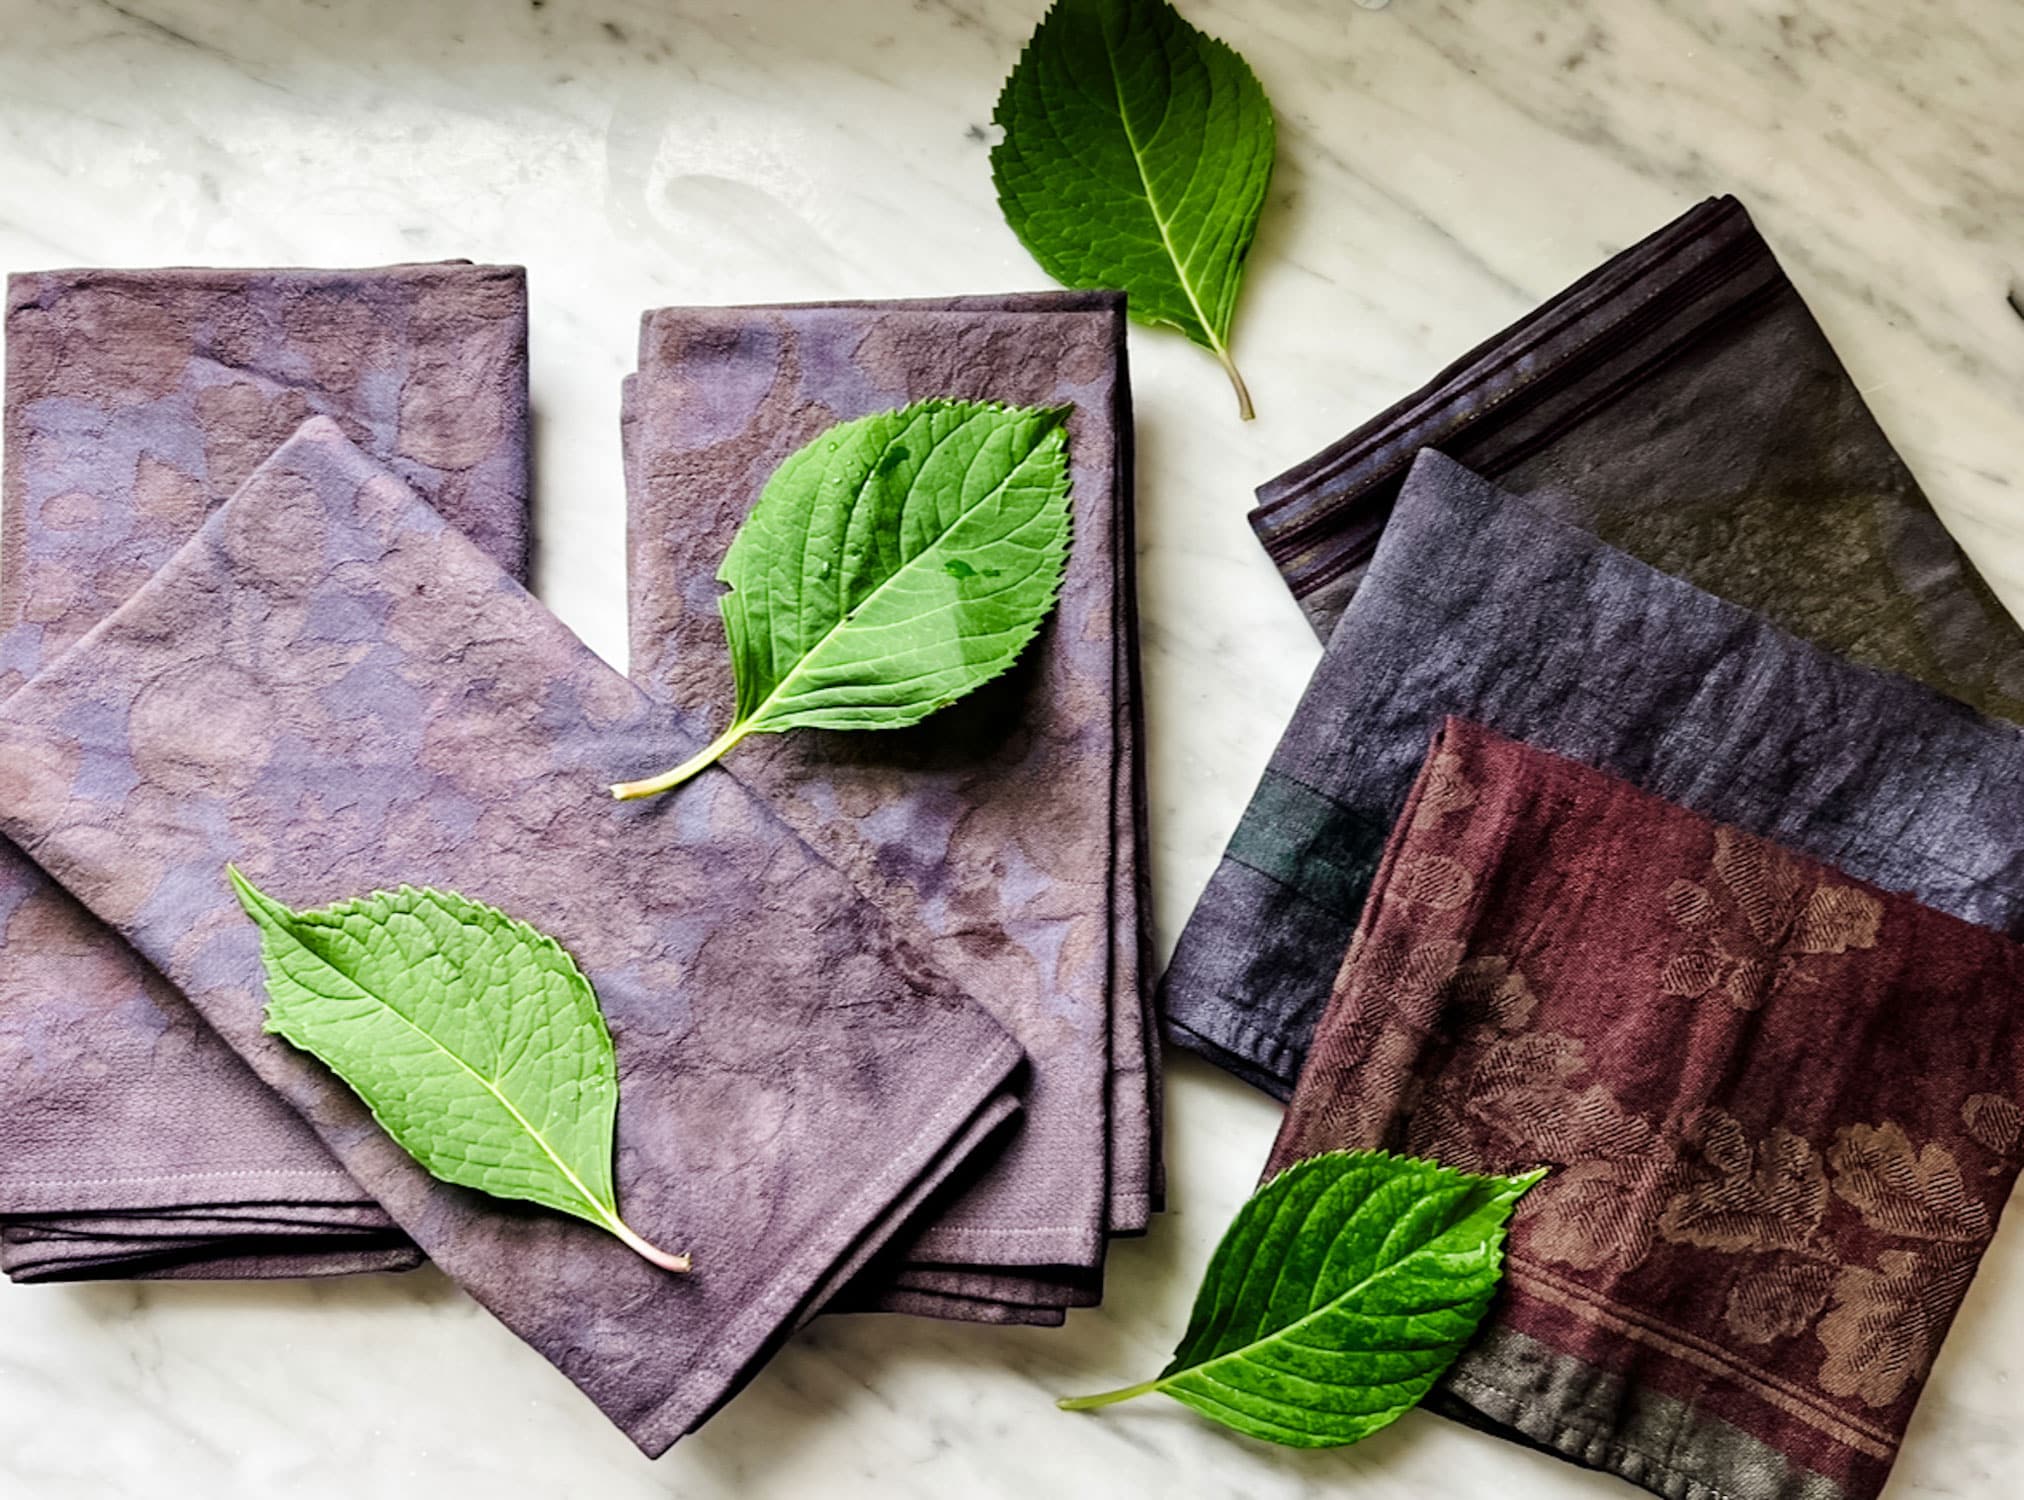
Where we started and how they look after using black RIT dye
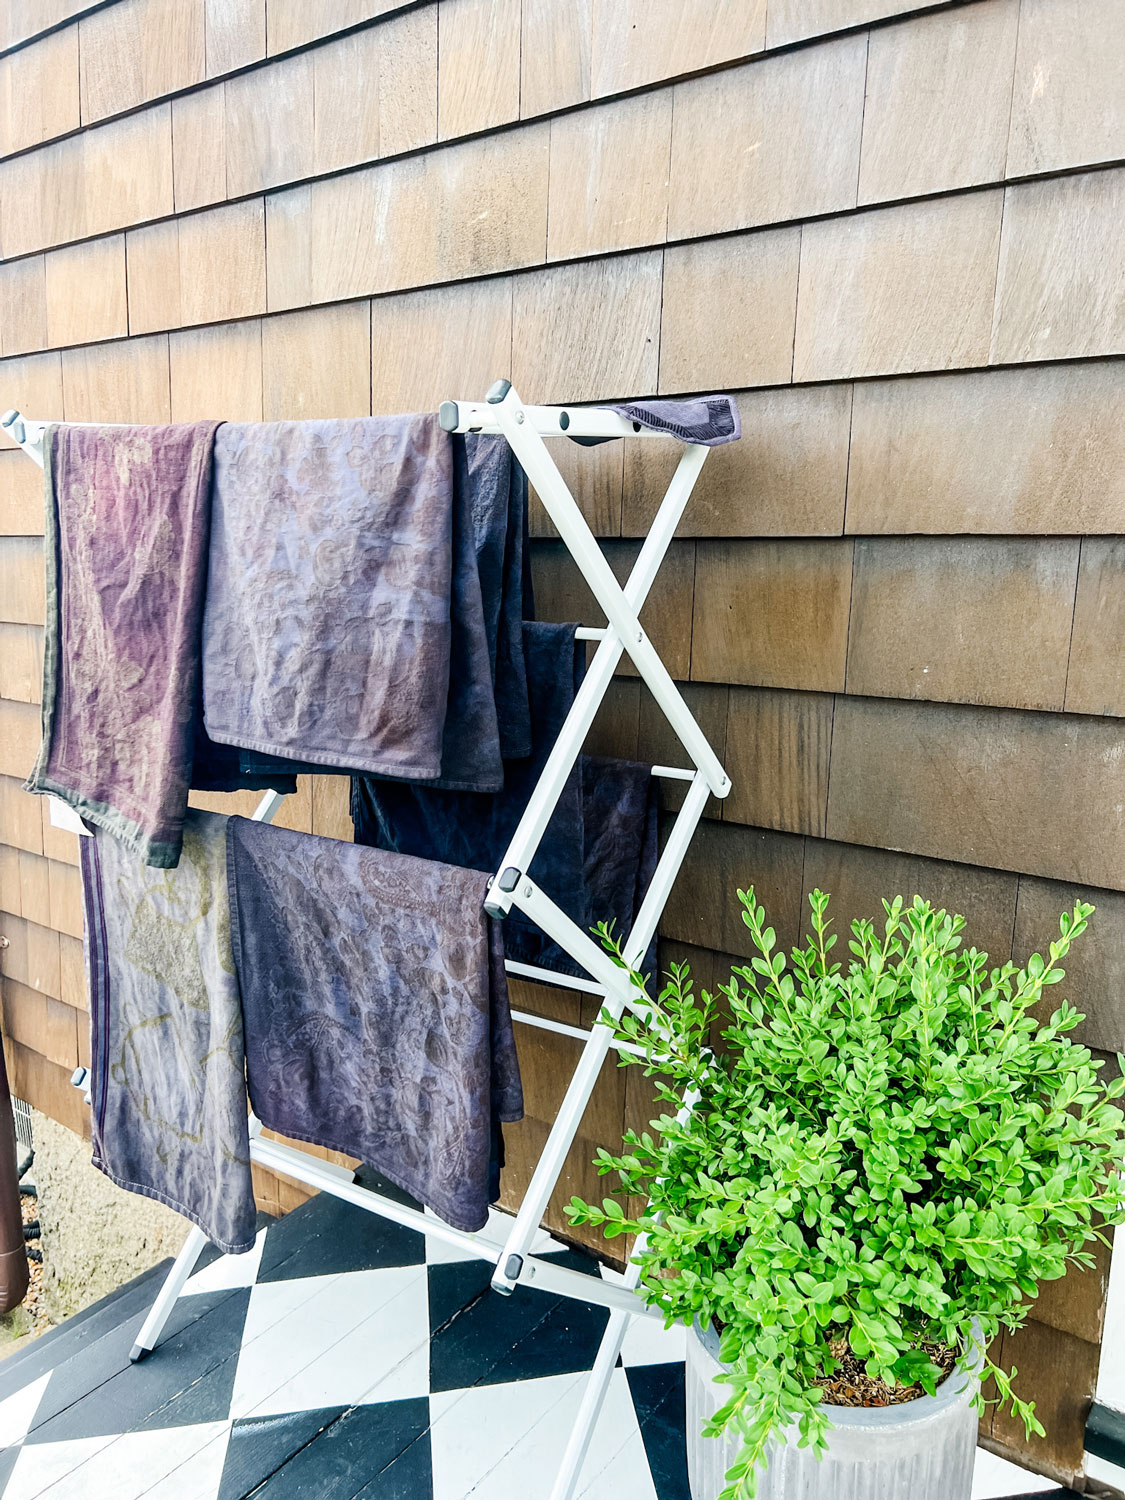
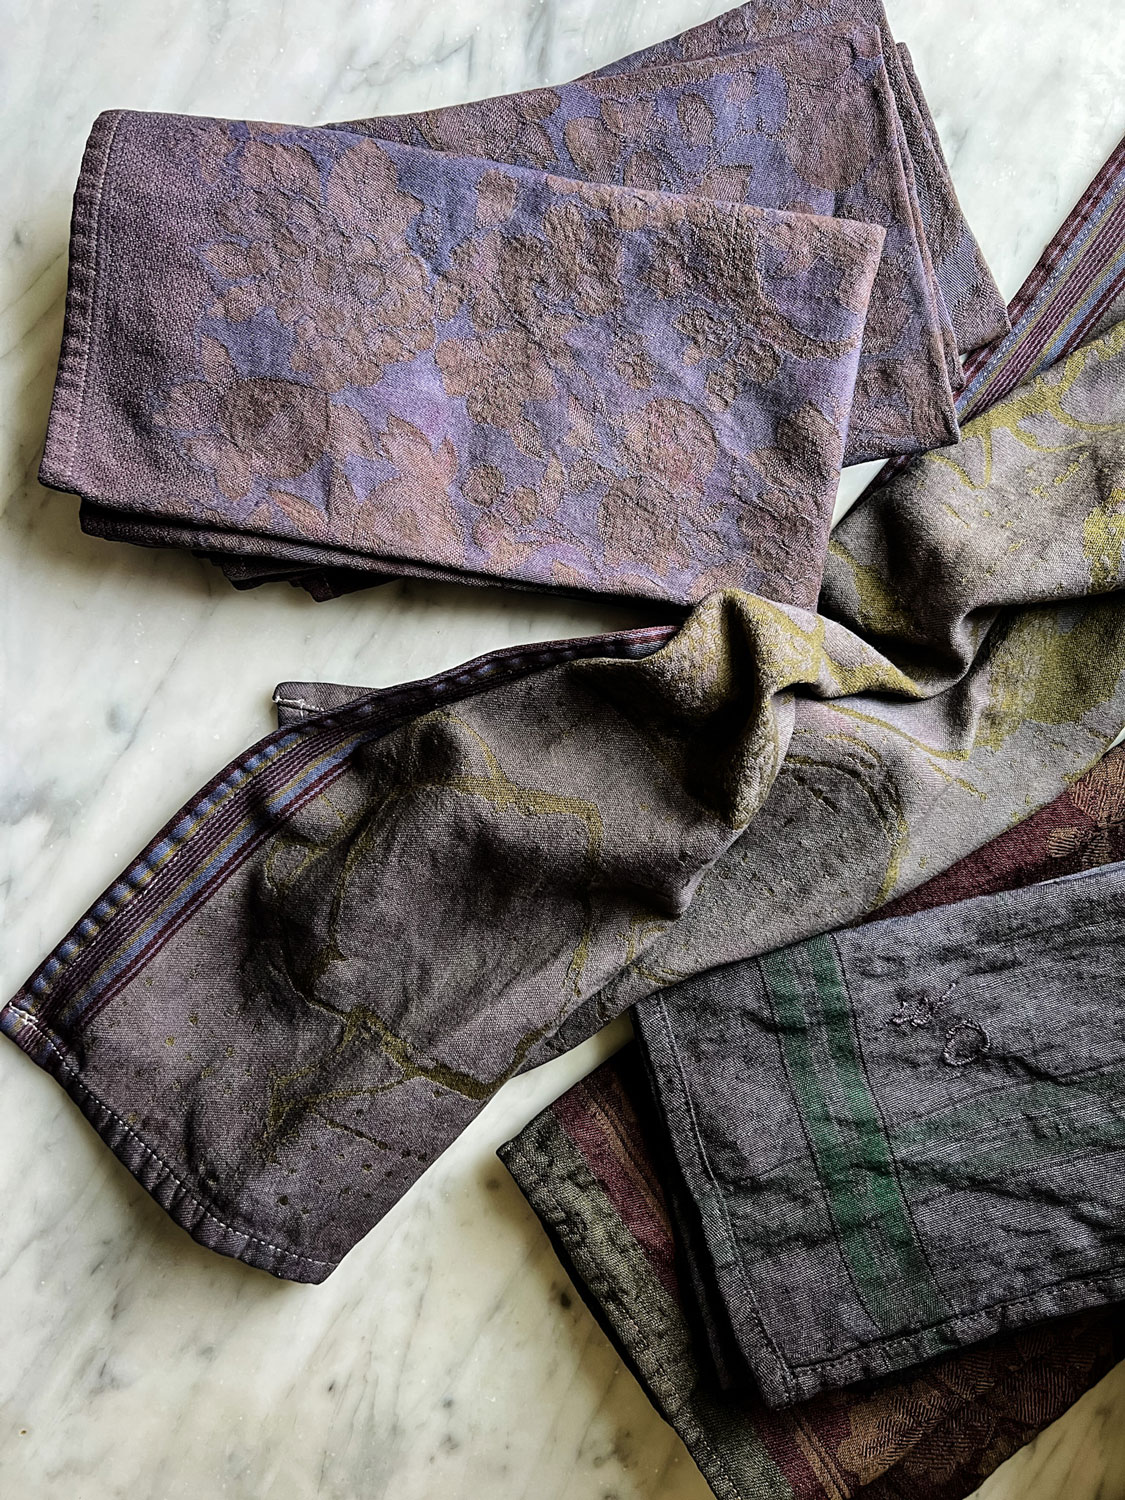
The former yellow-gold napkins are now kind of an earthy gray, thanks to the black Rit dye, and they have quickly become my favorite napkins. The process was so easy, with very little mess. But I would recommend using rubber gloves and tongs throughout the process.
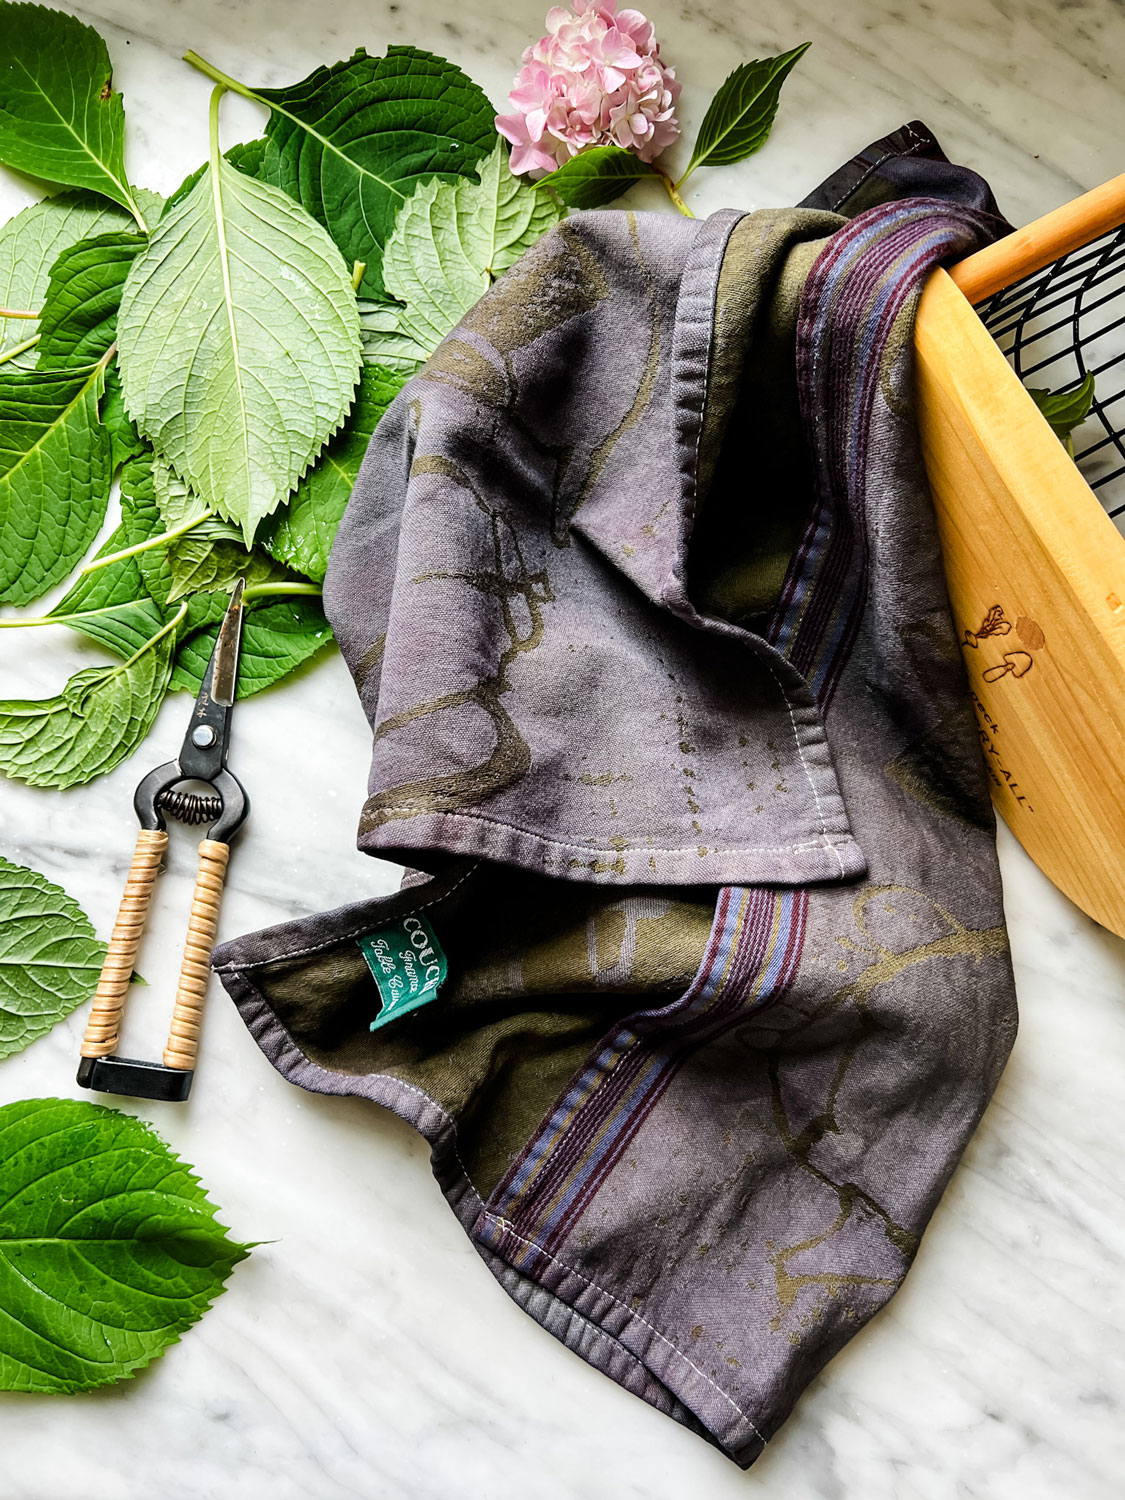
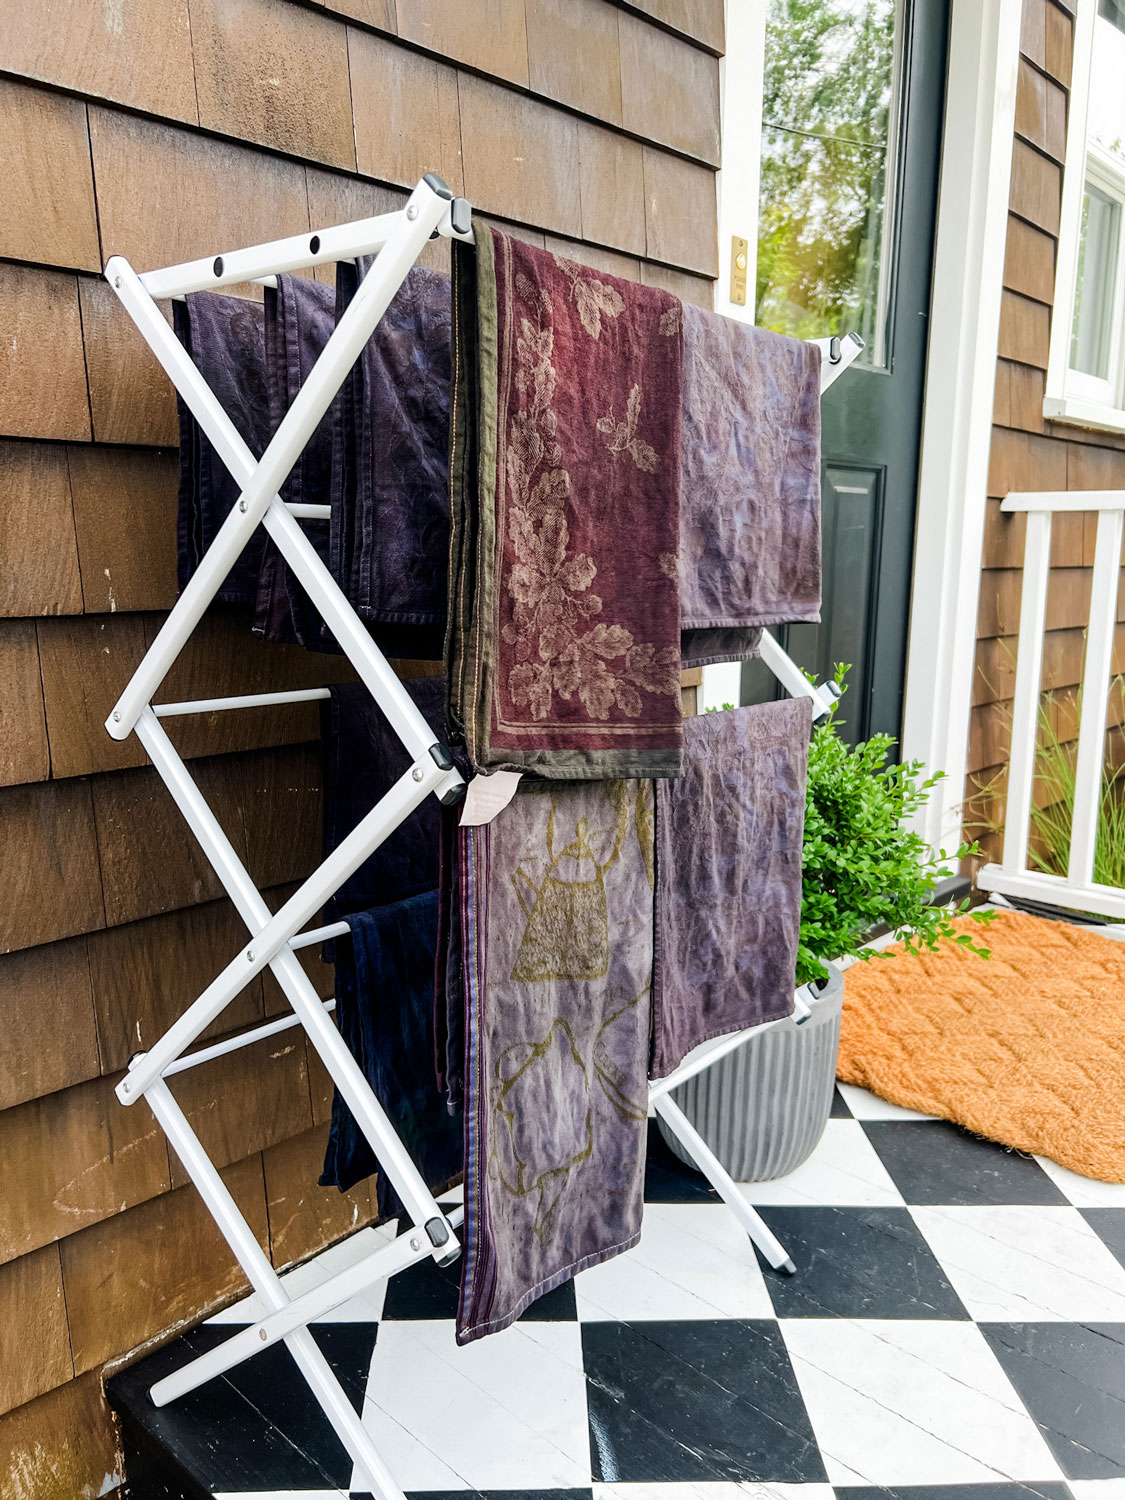
The French tea towels were stained but in great shape. Putting them in the black dye, we had no idea how they would turn out. But they are so beautiful and look great in our kitchen. We just used them for summer entertaining on the patio with our potting bench makeover. You can read that post right here.
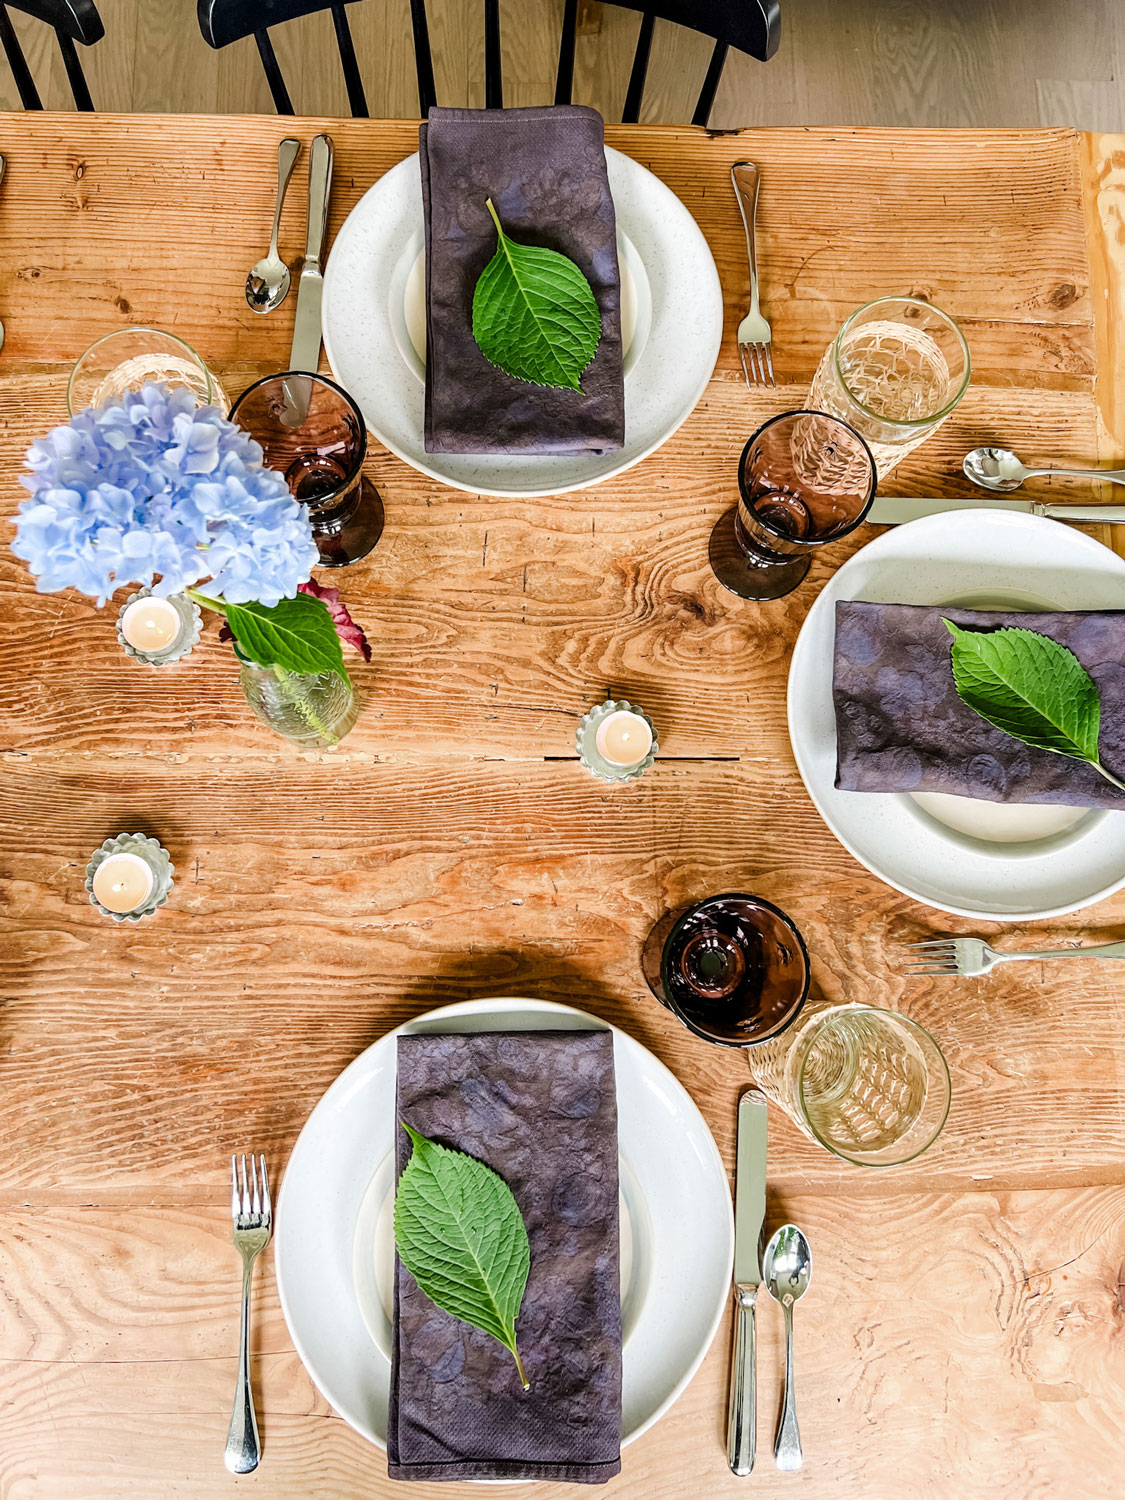
The newly dyed black vintage napkins inspired an indoor summer dinner party.
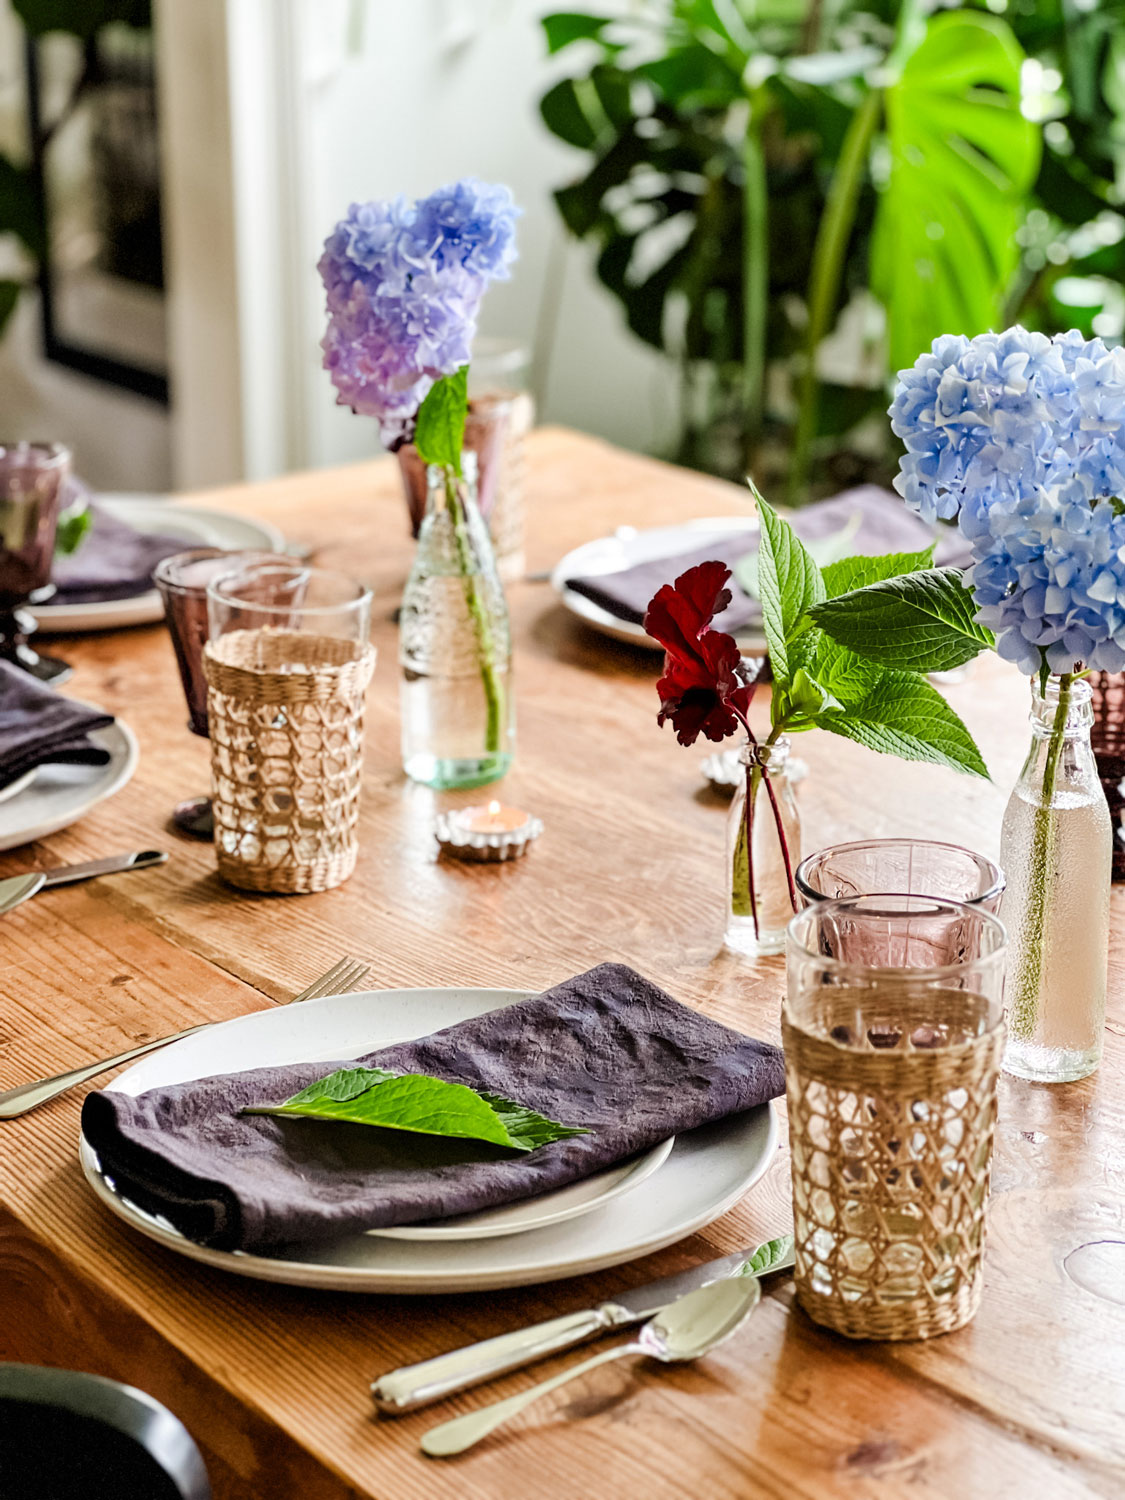
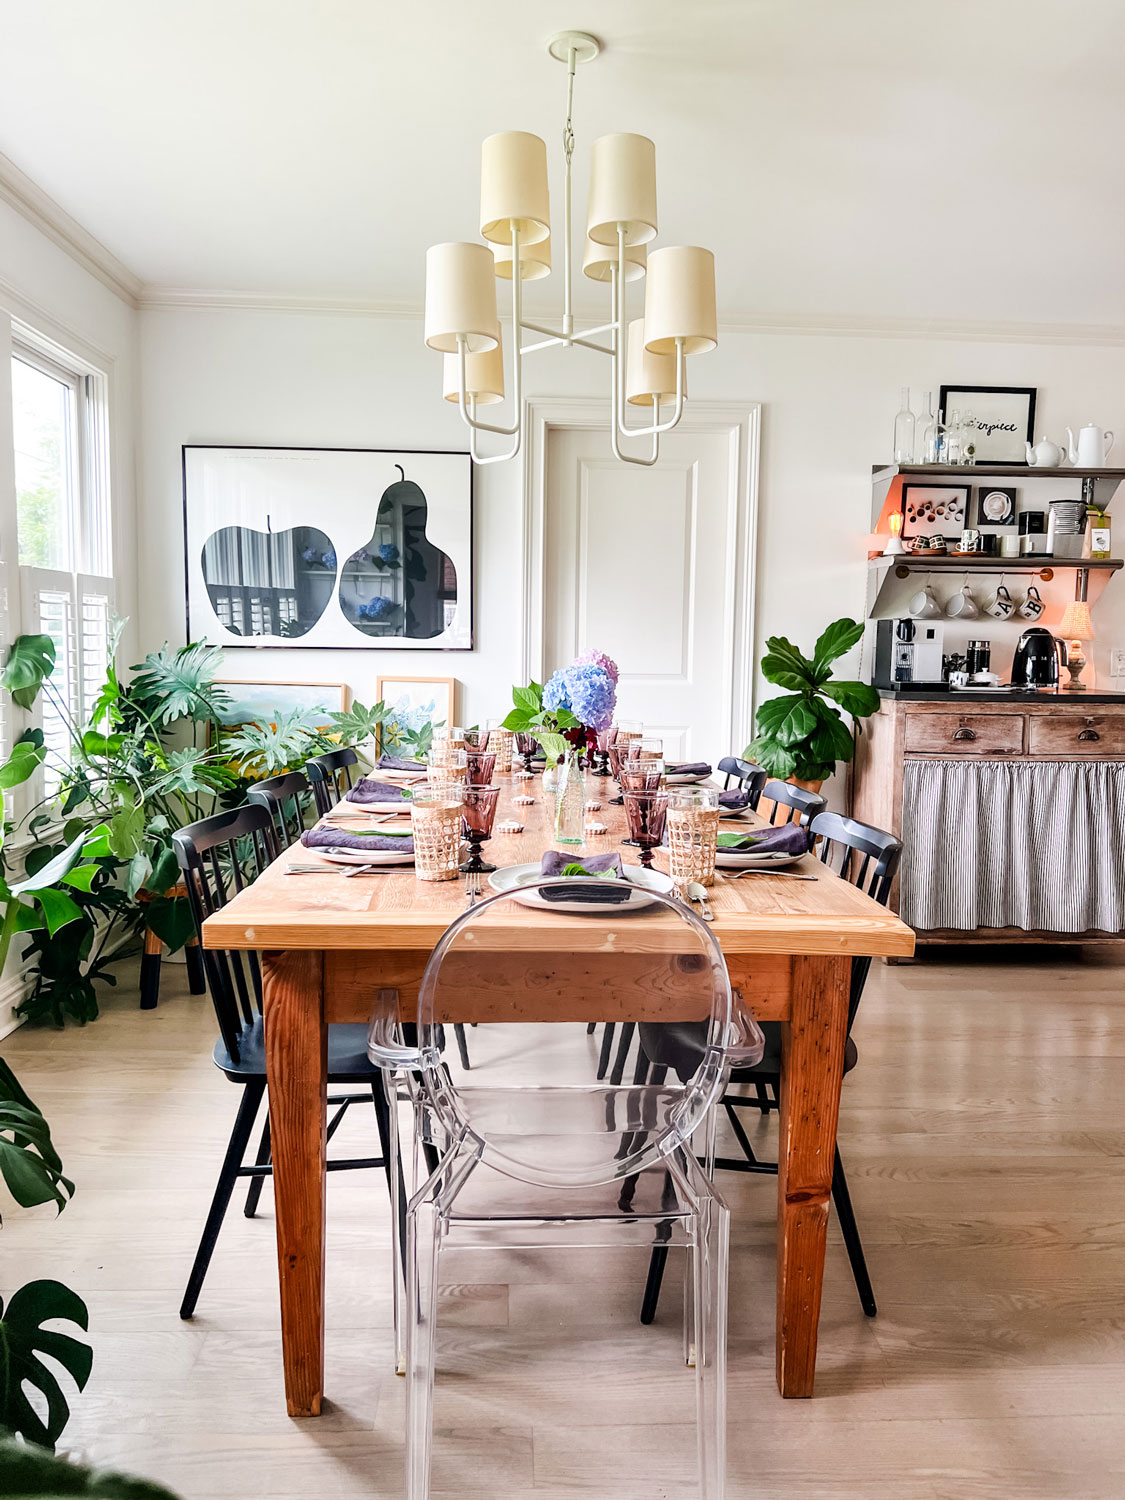
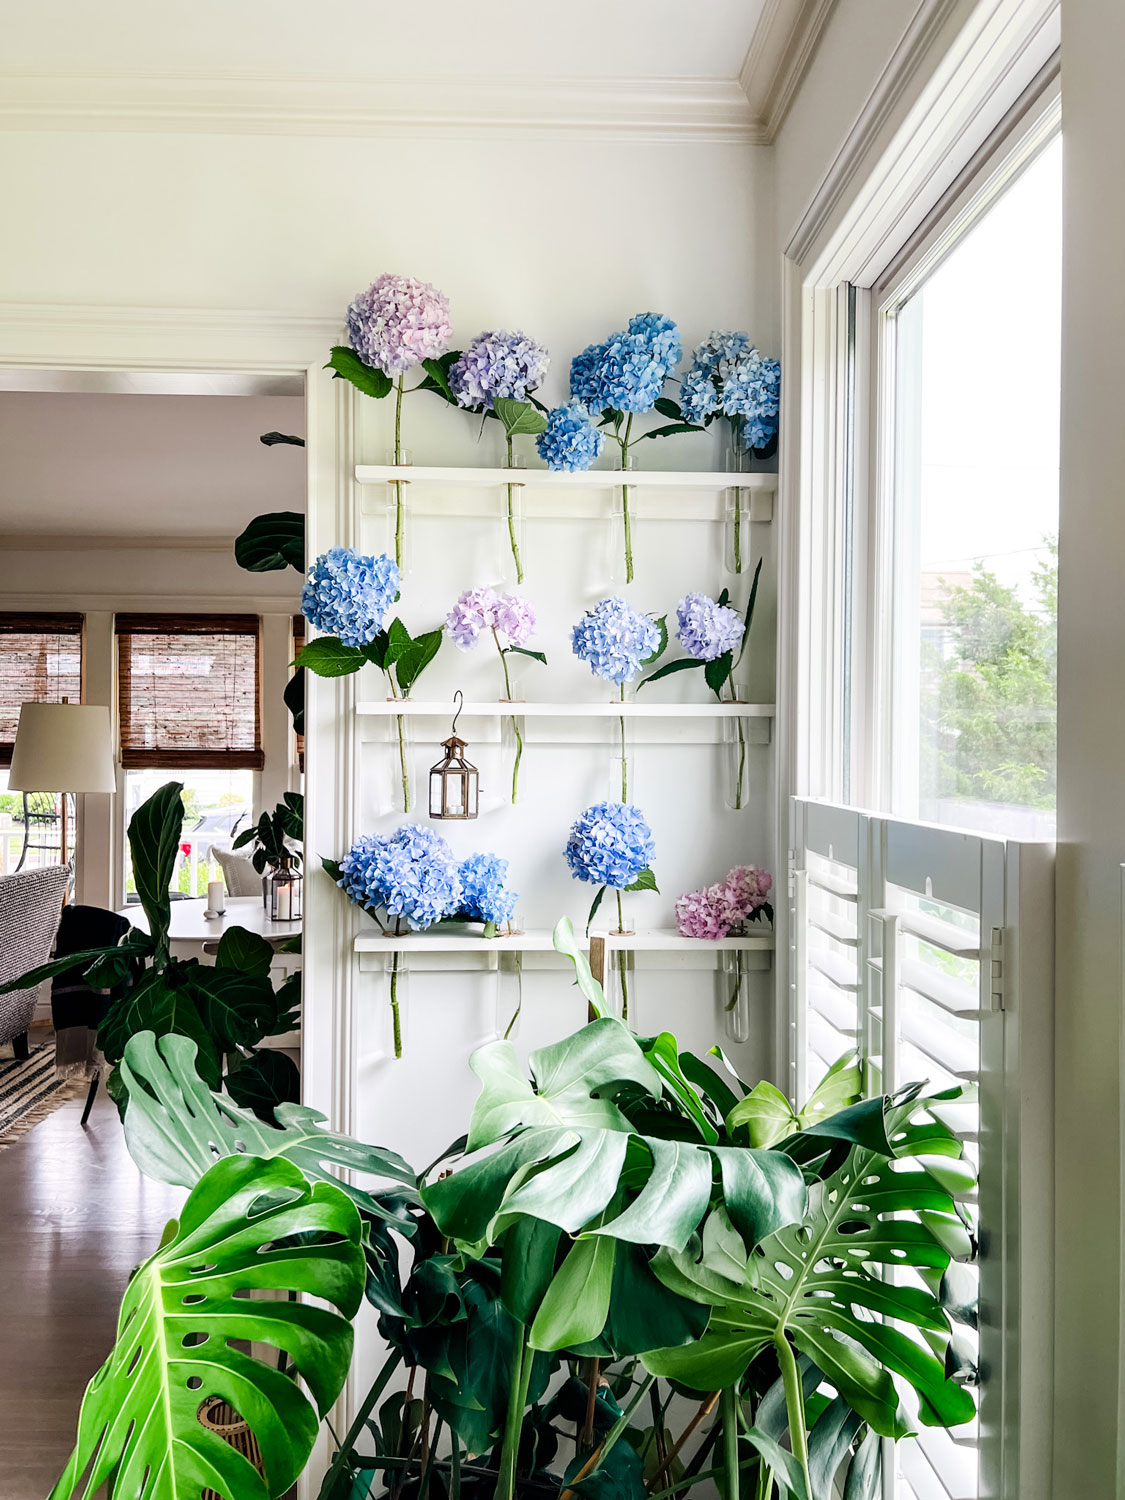
Endless Summer Hydrangeas & Black Dyed Vintage Napkins

Let’s answer a few common questions about dyeing fabric
While by no means comprehensive, here are some answers to a few of the most common questions about dyeing fabric. The Rit’s website is also a good source for answering many of your questions.
Will dye ruin my washing machine?
According to the Rit Dye company, it promises that Rit won’t permanently stain any metal component on your washing machine. They say that Rit dye has been used in washing machines dating back to the 1950s, when the electric washing machine was invented. However, you do need to clean up immediately after dyeing to ensure none of the plastic or rubber parts on the machine are stained.
That said, I like my white clothes white, so I decided against running black Rit dye through my washing machine, and I opted for the bucket method instead.
Is dye toxic?
According to Mount Sinai Hospital, in today’s world, it is rare to find poisonous ingredients in most household fabric dyes. Most common household fabric dyes are made from nonpoisonous substances such as mild soaps, pigments, and salt. Although these substances are generally considered not dangerous, they can cause problems if swallowed in large amounts, especially in small children.
As a precaution, do yourself a favor and wear rubber gloves, and when pouring the powdered dye into your bucket, be careful not to breathe in the powdered dye.
Does dye work on any color?
If the fabric you are dyeing is light-colored and you’re going dark, just follow the directions on the package. However, if you’re dyeing a darker piece of fabric, Rit Dye recommends using their color remover first and then following the directions on the dye packet.
Does dye work on any fabric?
Dye works on many kinds of fabrics. Natural fabrics like linen, silk, nylon, cotton, and wool absorb dye pretty well. Synthetic fabrics or synthetic materials like polyester and spandex usually won’t dye evenly, and some don’t absorb dye coloring at all.
The stitched logos on the hats I dyed did not absorb the coloring as the rest of the hats did. Which, in my case, is what I was looking for.
Does water temperature matter when dyeing fabric?
On the packaging, Rit dye says it’s best to use hot water (140 to 160 degrees F) when dyeing fabrics. Cool water or cold water does not work as well.
How long should I let the fabric sit in the dye bath?
The amount of time the fabric sits in the dye solution really depends on your desired color. For the best results and if you’re trying to match the color on the bottle or box of Rit Dye, they recommend 30 to 60 minutes. For lighter shades, 10 to 20 minutes seems to be the average time. Just keep in mind that the dye always looks darker when wet, and after dyeing, it usually lightens a bit.
Can I soak the fabric in the dye bath overnight?
The answer is yes. If you’re looking for a deeper, more intense color, leave the fabric in the dye bath for a longer period of time. This allows the fibers to absorb more of the dye, resulting in a more intense and longer-lasting color.
What can I use to set the dye?
Rit Dye sells a color fixative to set the dye. However, salt and vinegar are both natural fixatives and can be a good alternative. One-fourth cup of salt, one cup of vinegar, and one gallon of water seem to be the norm.
How much fabric can I dye at once?
A general rule of thumb is one box (1-1/8 ounces) in powder form or 4 ounces of liquid dye will color approximately one pound of dry fabric. If you mix the correct amounts, the size of your container is the only limitation.
What do I do with the excess dye?
The best option for disposing of the excess dye is to simply pour it down the drain. Since it is non-toxic, you can also pour it outside in an area that won’t be affected by the color of the dye. You don’t want to pour near any plants or vegetation.
Gathering the supplies
The first thing you need to do is gather all of your supplies. Here is my list:
- 1 packet (I used 2) of powdered Rit all-purpose dye (non-toxic Rit liquid dye in a bottle works, too) for every 1 pound of fabric that is dry
- A bucket large enough to hold the two gallons of hot water and the fabric you are dyeing
- Tongs
- Rubber gloves
- Salt
- Vinegar
Preparing the fabric
From mordant soakings to scouring the fabric, there are a lot of different theories on how to prepare fabric for dyeing. The easiest way is just to follow the Rit Dye directions and wash the fabrics, but without using fabric softener. This worked well for me.
Setting up your workspace
Since it is summer and nice outside, that’s where I did my dyeing. I was using black dye, so I used our black asphalt driveway as my workspace. Once the fabric was done in the dye bath, I could remove it, lay it on the driveway, and rinse it with a hose before running it through the washing machine.
By doing it outside, I didn’t really have to worry about any spillage or drippings; You can do it indoors. However, you just need to be a lot more careful.
Mixing and applying the dye
I had two pounds of dry fabric I was dyeing, and followed these easy steps:
- Pour two small boxes of Rit Dye powder form into a large bucket
- Add two gallons of water (enough water so all the fabric is submerged)
- Mix well (I used a paint stir stick)
- Add fabric to the dye bath
- Use the paint stir stick to make sure the dye bath covers all the fabric
- Let sit for one hour
Setting the dye
- Remove fabric, empty container
- Pour one-fourth cup of salt and one cup of vinegar into the bucket, add water, and mix thoroughly.
- Add fabric to the bucket and let it sit for approximately 30 minutes
- Rinse the fabric with cold water
Washing the fabric
Run the fabric through your washing machine on a gentle cycle.
With the wide range of colors and the versatility of dye, you can achieve fun and sometimes unexpected results. By following the simple dyeing process, you’ll be able to dye the fabrics of your choice confidently.
Set up your workspace, choose the right fabric and color, and carefully follow the instructions for preparing and applying the dye. And with just a little bit of care and maintenance, your dyed fabrics will retain their vibrancy and charm for years to come.
Pin for Later


I never really thought of dyeing because it “seemed” like a lot of trouble, but love the results you got. Thanks for the tip and especially for the step by step directions.
Susan! I know! I felt the same way and am now ready to do it again. Nothing is safe in my house….I have a stack of old linens just waiting for me! haha
Thank you for sharing this information and a beautiful idea. I’m going to look through my old linens.
Marsha, it’s especially great for stained linens! Nothing to lose! What color are you thinking?
Great, great info here! I have been wanting to try this, but have just kept putting it off. You provided much more information than I have found elsewhere. Many thanks and enjoy your summer!
Believe me, beth, I put it off for so long, and now I’m ready to do it again! I have another stack that I want to dye! Once I start something, I cannot be stopped! haha
thank you Annie! I have some boxes of Rit Dye. once purchased, it seemed intimating, and was hesitant to use my washing machine. cannot wait to try!
Debra
I know, Debra, I thought my new washer would be stained forever, but it was fine! I’ll bet you have some cool stuff to dye from all your travels!
I remember Rit dye sold at the grocery store in white plastic bottles and doing tie-dye stuff! Very cool project! PS:I am kinda old so the tie dye comment will age me. Doing everything in a bucket or basin sounds like the best option. I feel young again! Many thanks!
Elle! We do so much tie-dye during the pandemic! But we bought a kit…which was probably ridiculous! Tit dye is still sold that way—both in little bottles and boxes. I don’t think it has changed all that much!
Your blog is a very good knowledgeable blog about synthetic dyes colors, engaging, informative and high quality. I have learned a lot from your blog. thanks for sharing blog.
this article is very useful, thank you for making a good article
Annie
I haven’t dyed anything in years but I love the look of the damask napkins you have dyed. You have encouraged me to try again!
Annie, the dyed linens are really lovely. I am inspired to try it! Thank you for the tips and instructions to make the entire process easier. Love your blog!
Hi Lynn! I’d love to hear if you give it a go! It was much easier than I anticipated! I had been thinking about doing it for years!