
How to make an easy farmtable cheese and meat board
How to make an easy farmtable cheese and meat board. If you enjoy hosting gatherings with good company, savory cheeses, and delicious meats, we’ve got a fun project that will add a touch of rustic charm to your next get-together.
In this DIY guide, we’ll walk you through the steps to create your own farmtable cheese board and charcuterie platter. It’s an easy and fun project that will make what you’re serving look even better.
We got the idea one day while shopping at Hudson & Grace. We found a beautiful farmtable plank and immediately thought of a cheese and charcuterie board. We looked at the price tag, over $200 dollars, and thought that seemed a little high, but still reasonable. Then we had the idea of creating our own. After a little research, we realized we could probably recreate it for around $25.
It’s been such a hit at our gatherings that we even made one for a dear friend.

A little cheese and charcuterie board trivia
- Turns out, charcuterie has been around for a long time, I mean a really long time. According to Wikipedia, there are accounts of the Romans trading cured and salted meats as far back as the first century AD.
- The French, of course, were way ahead of their time as well. They formed charcuterie guilds as early as the 15th century.
- But cheese and charcuterie boards, at least in the U.S., really started gaining popularity around 2015, and that trend hasn’t slowed down since. Around that time, both the New York Times and Bon Appetite wrote extensively about the new trend that was catching on.
The supplies you’ll need:
- One 2″ x 10″ x 8′ fir plank (we purchased at Home Depot and had them cut in half for putting it in the car). Cost: $12
- Black Stain (Sherwin Williams Tricorn Black) – A quart will be more than enough.
- Leather bootlace for hanging $12
- Sand Paper (Medium-smooth grit)
- Food Grade Mineral Oil for finishing
Tools needed:
- Jigsaw, miter, or table saw (you could ask Home Depot to make the length cuts for you)
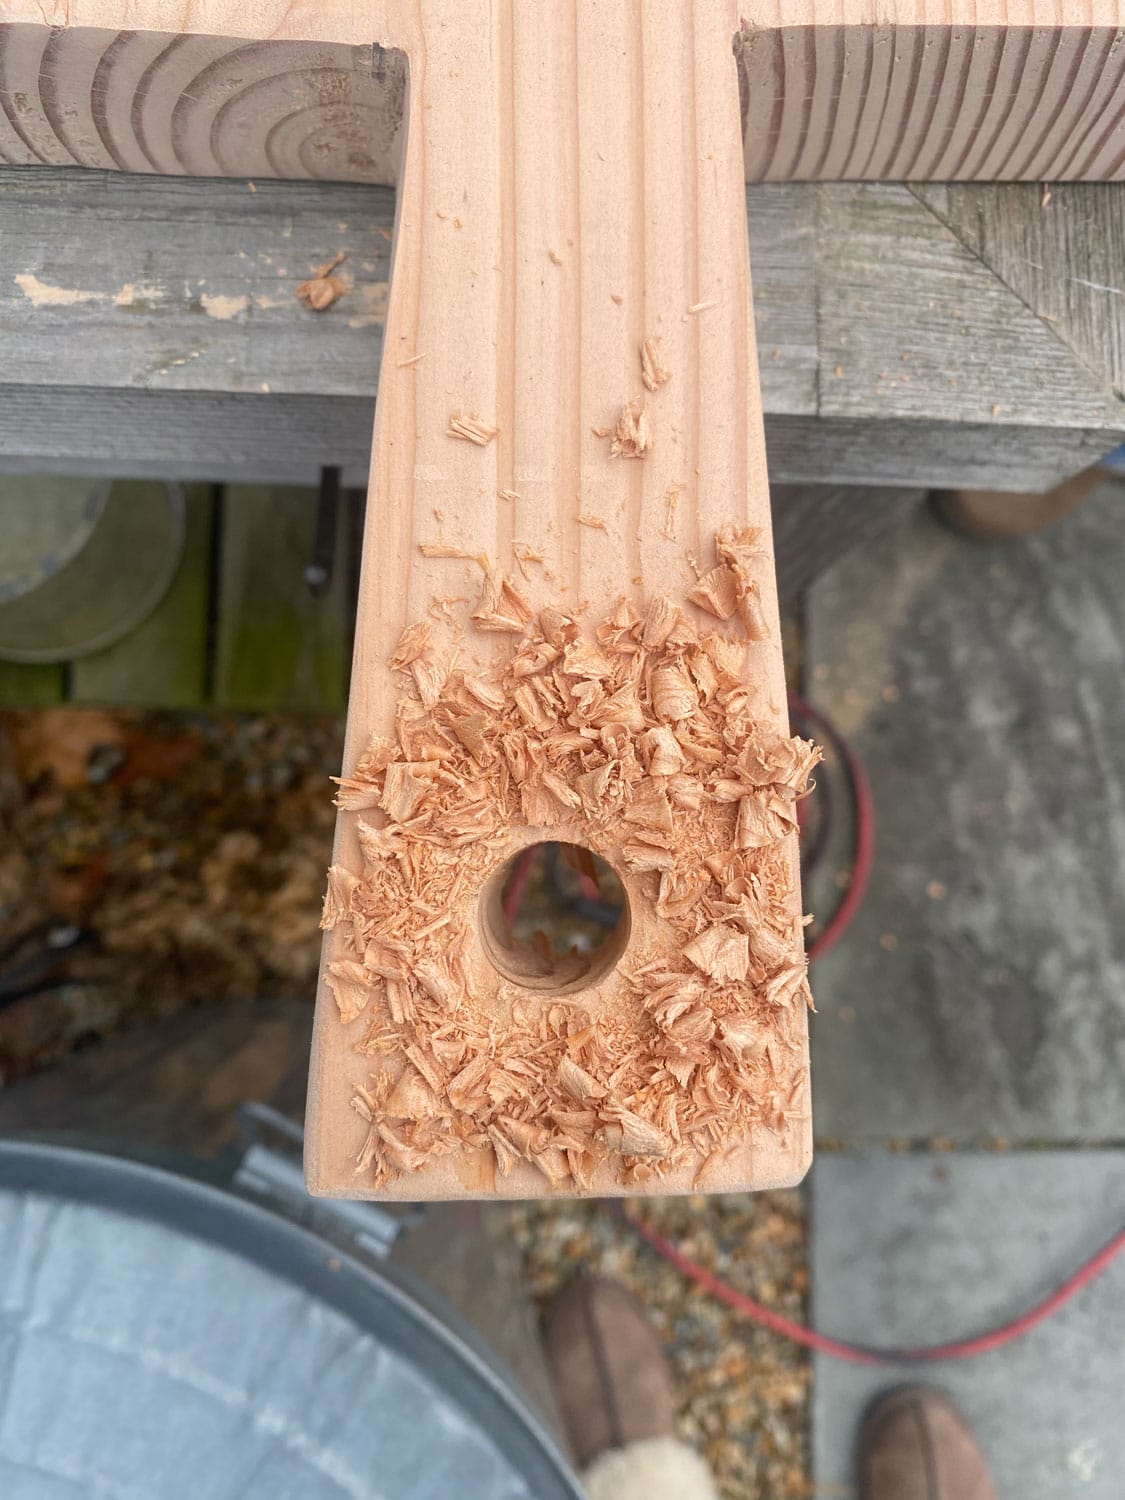
- Drill with a 1/2″ drill bit
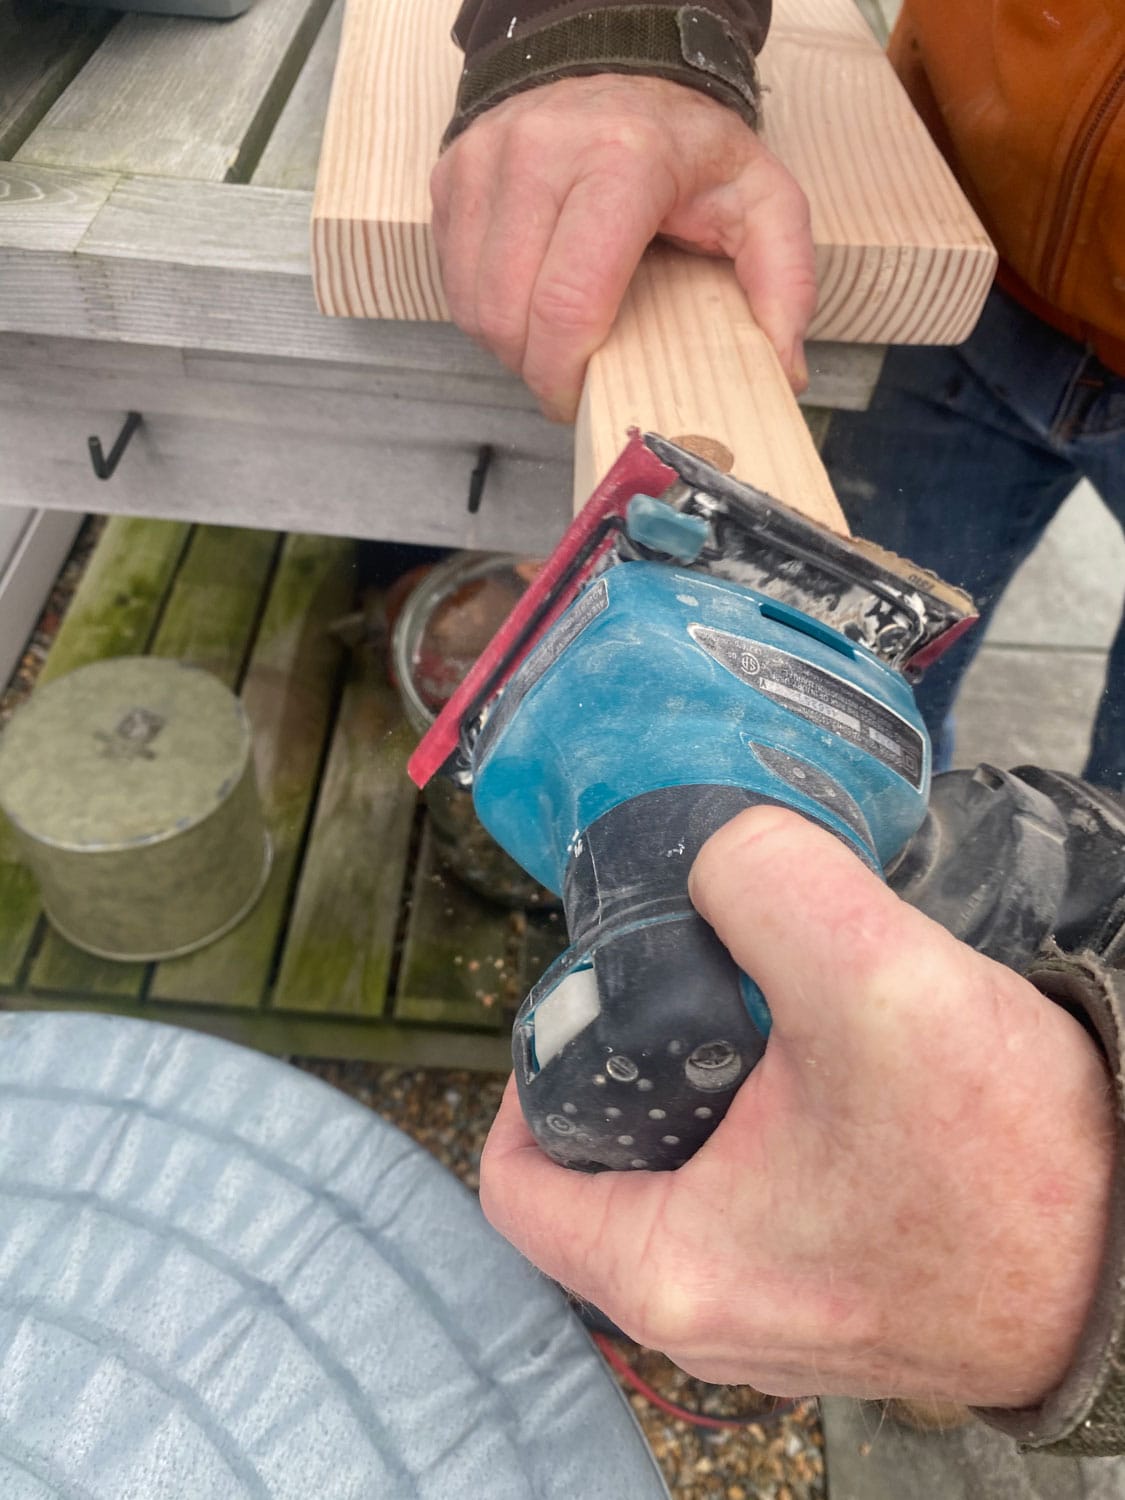
- Electric sander or a block of wood for hand sanding
Step-by-step instructions
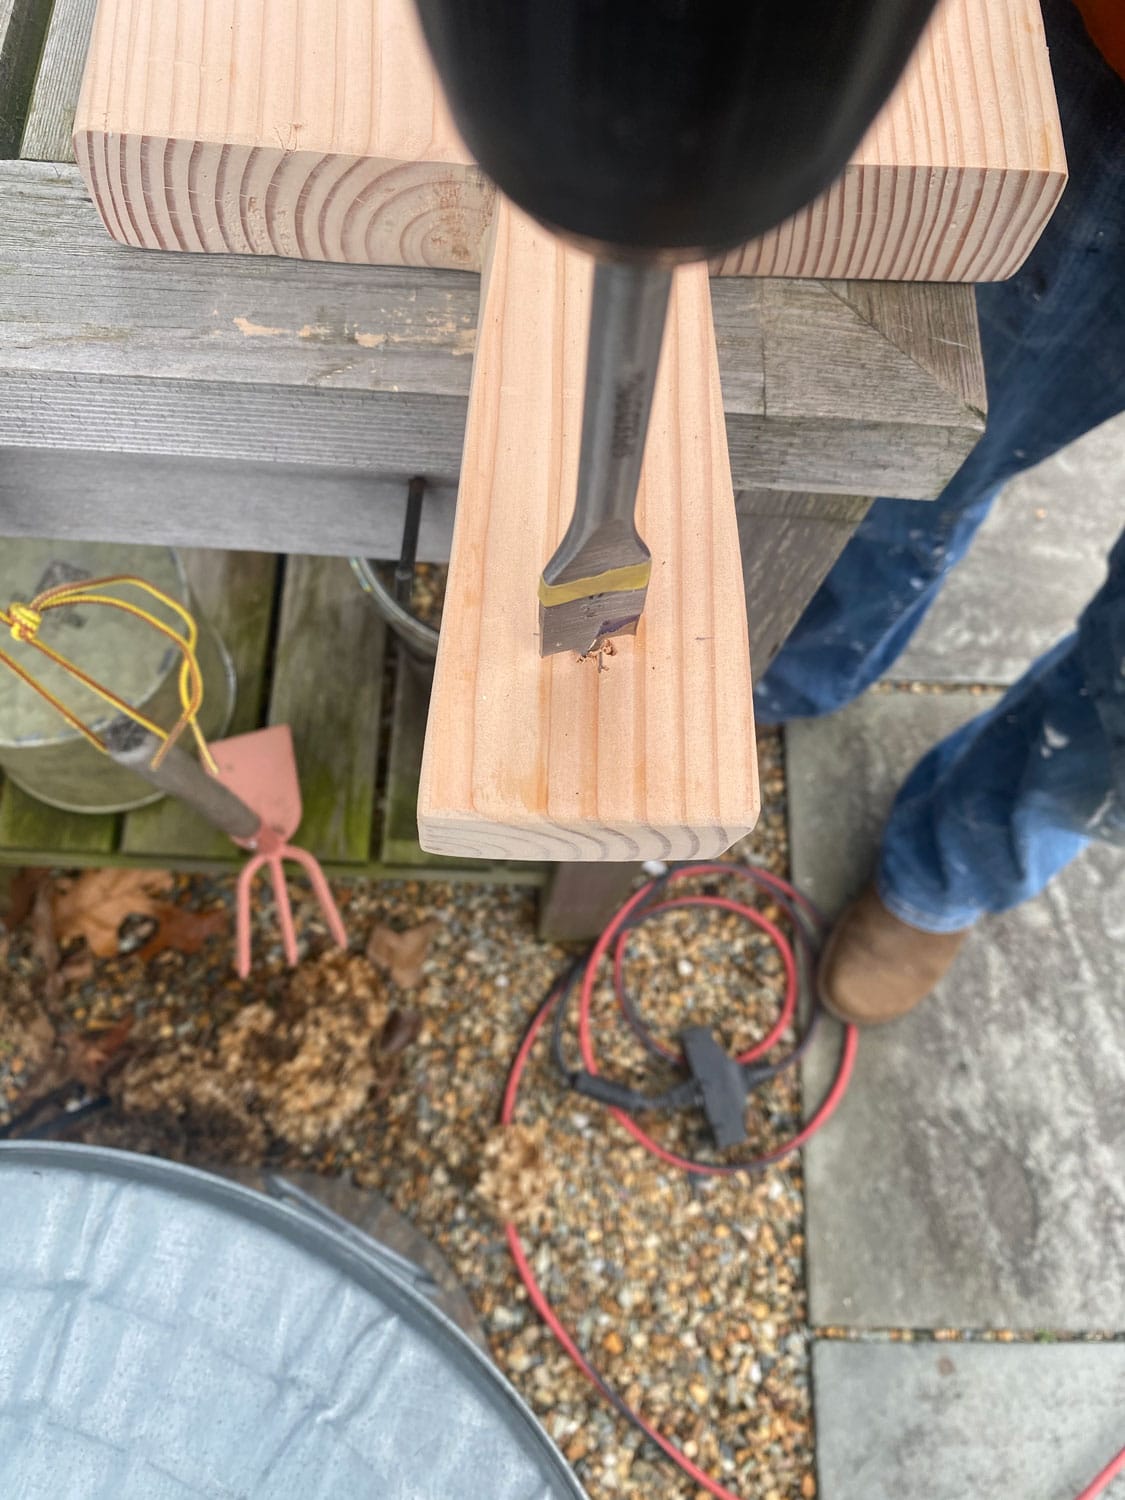
- Cut wood to 40″ or 48″ long (we made one of each)
- Measure and draw the handle, it is 2 1/4″ wide at the top and 2″ wide at the bottom
- Carefully cut the handle with the jigsaw (the more carefully you cut it, the easier it will be to sand and finish)
- Choose the smoothest side of the wood and sand that side, the ends, and the sides of the plank Note: We left the bottom side a little rough but not so rough that you would get a splinter if you run your hand over it
- To drill a hole in the handle, measure 1 1/2″ down, which will be your center point for the hole, and drill the hole and sand around the hole as needed
- After sanding and when you’re happy with the smoothness, wipe down with a damp cloth
- Once the wood is dry, you are ready to stain; carefully brush on the stain, trying to avoid brush stroke marks, and repeat with a second coat for full coverage
- When completely dry, apply mineral oil with a soft cloth (something like an old t-shirt that will not shed)
- Attach leather lace to hang when not in use
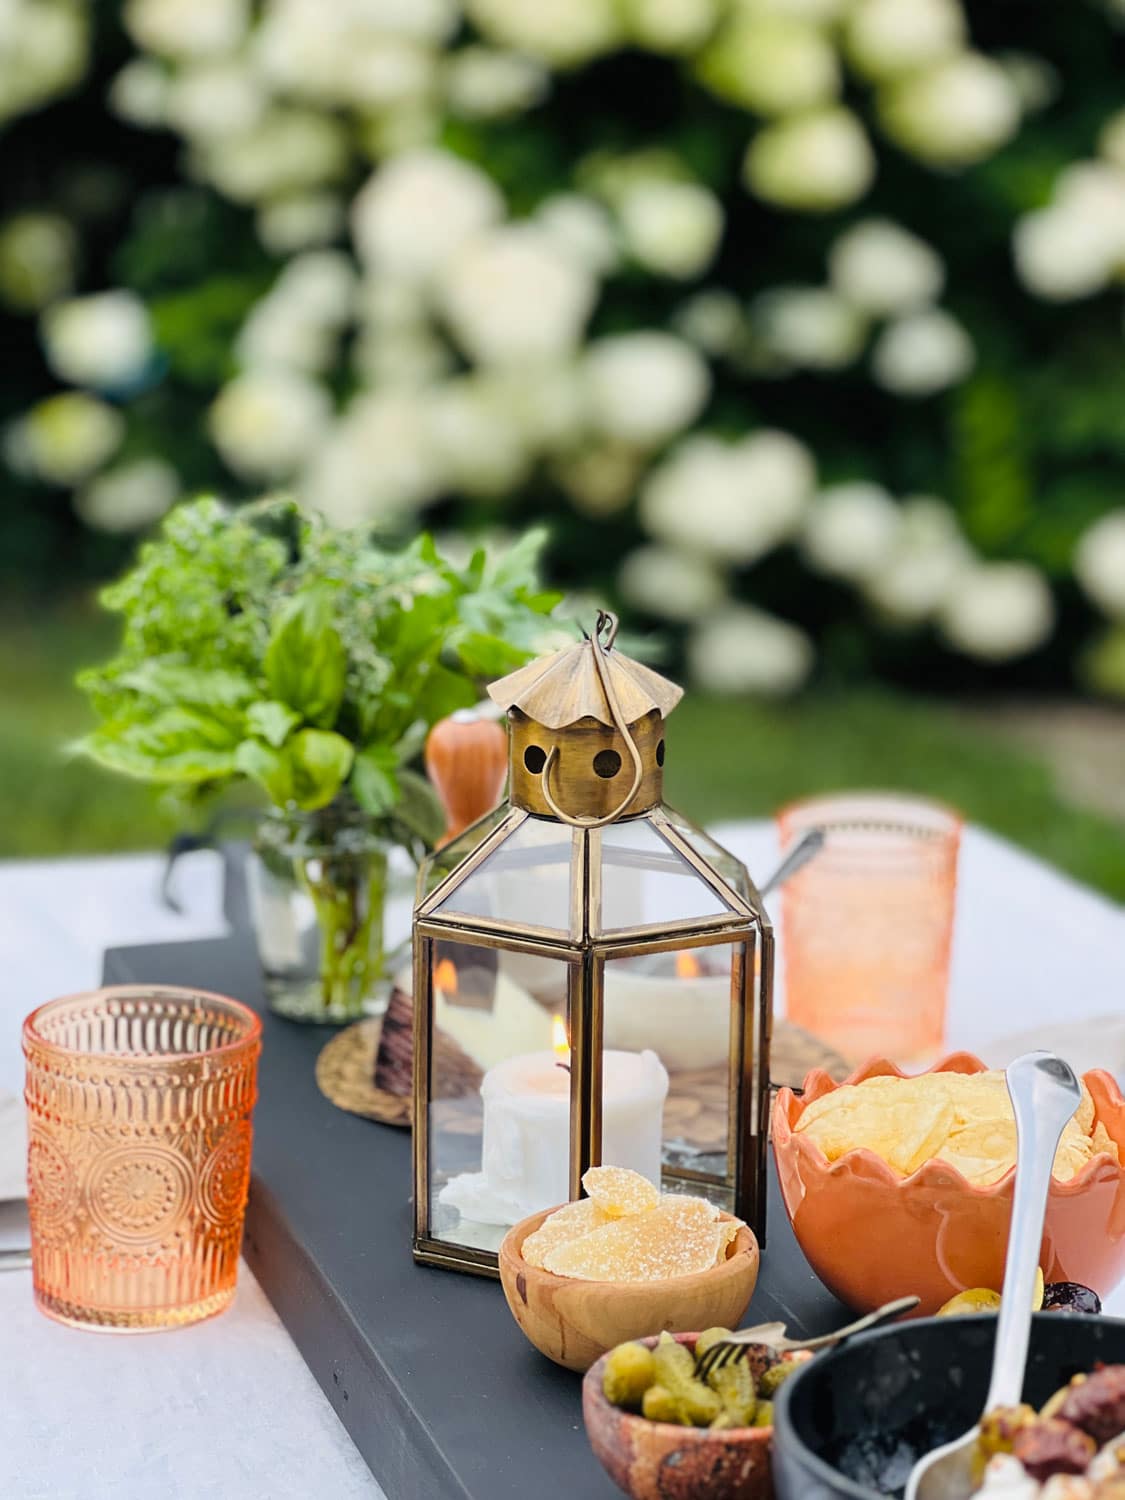
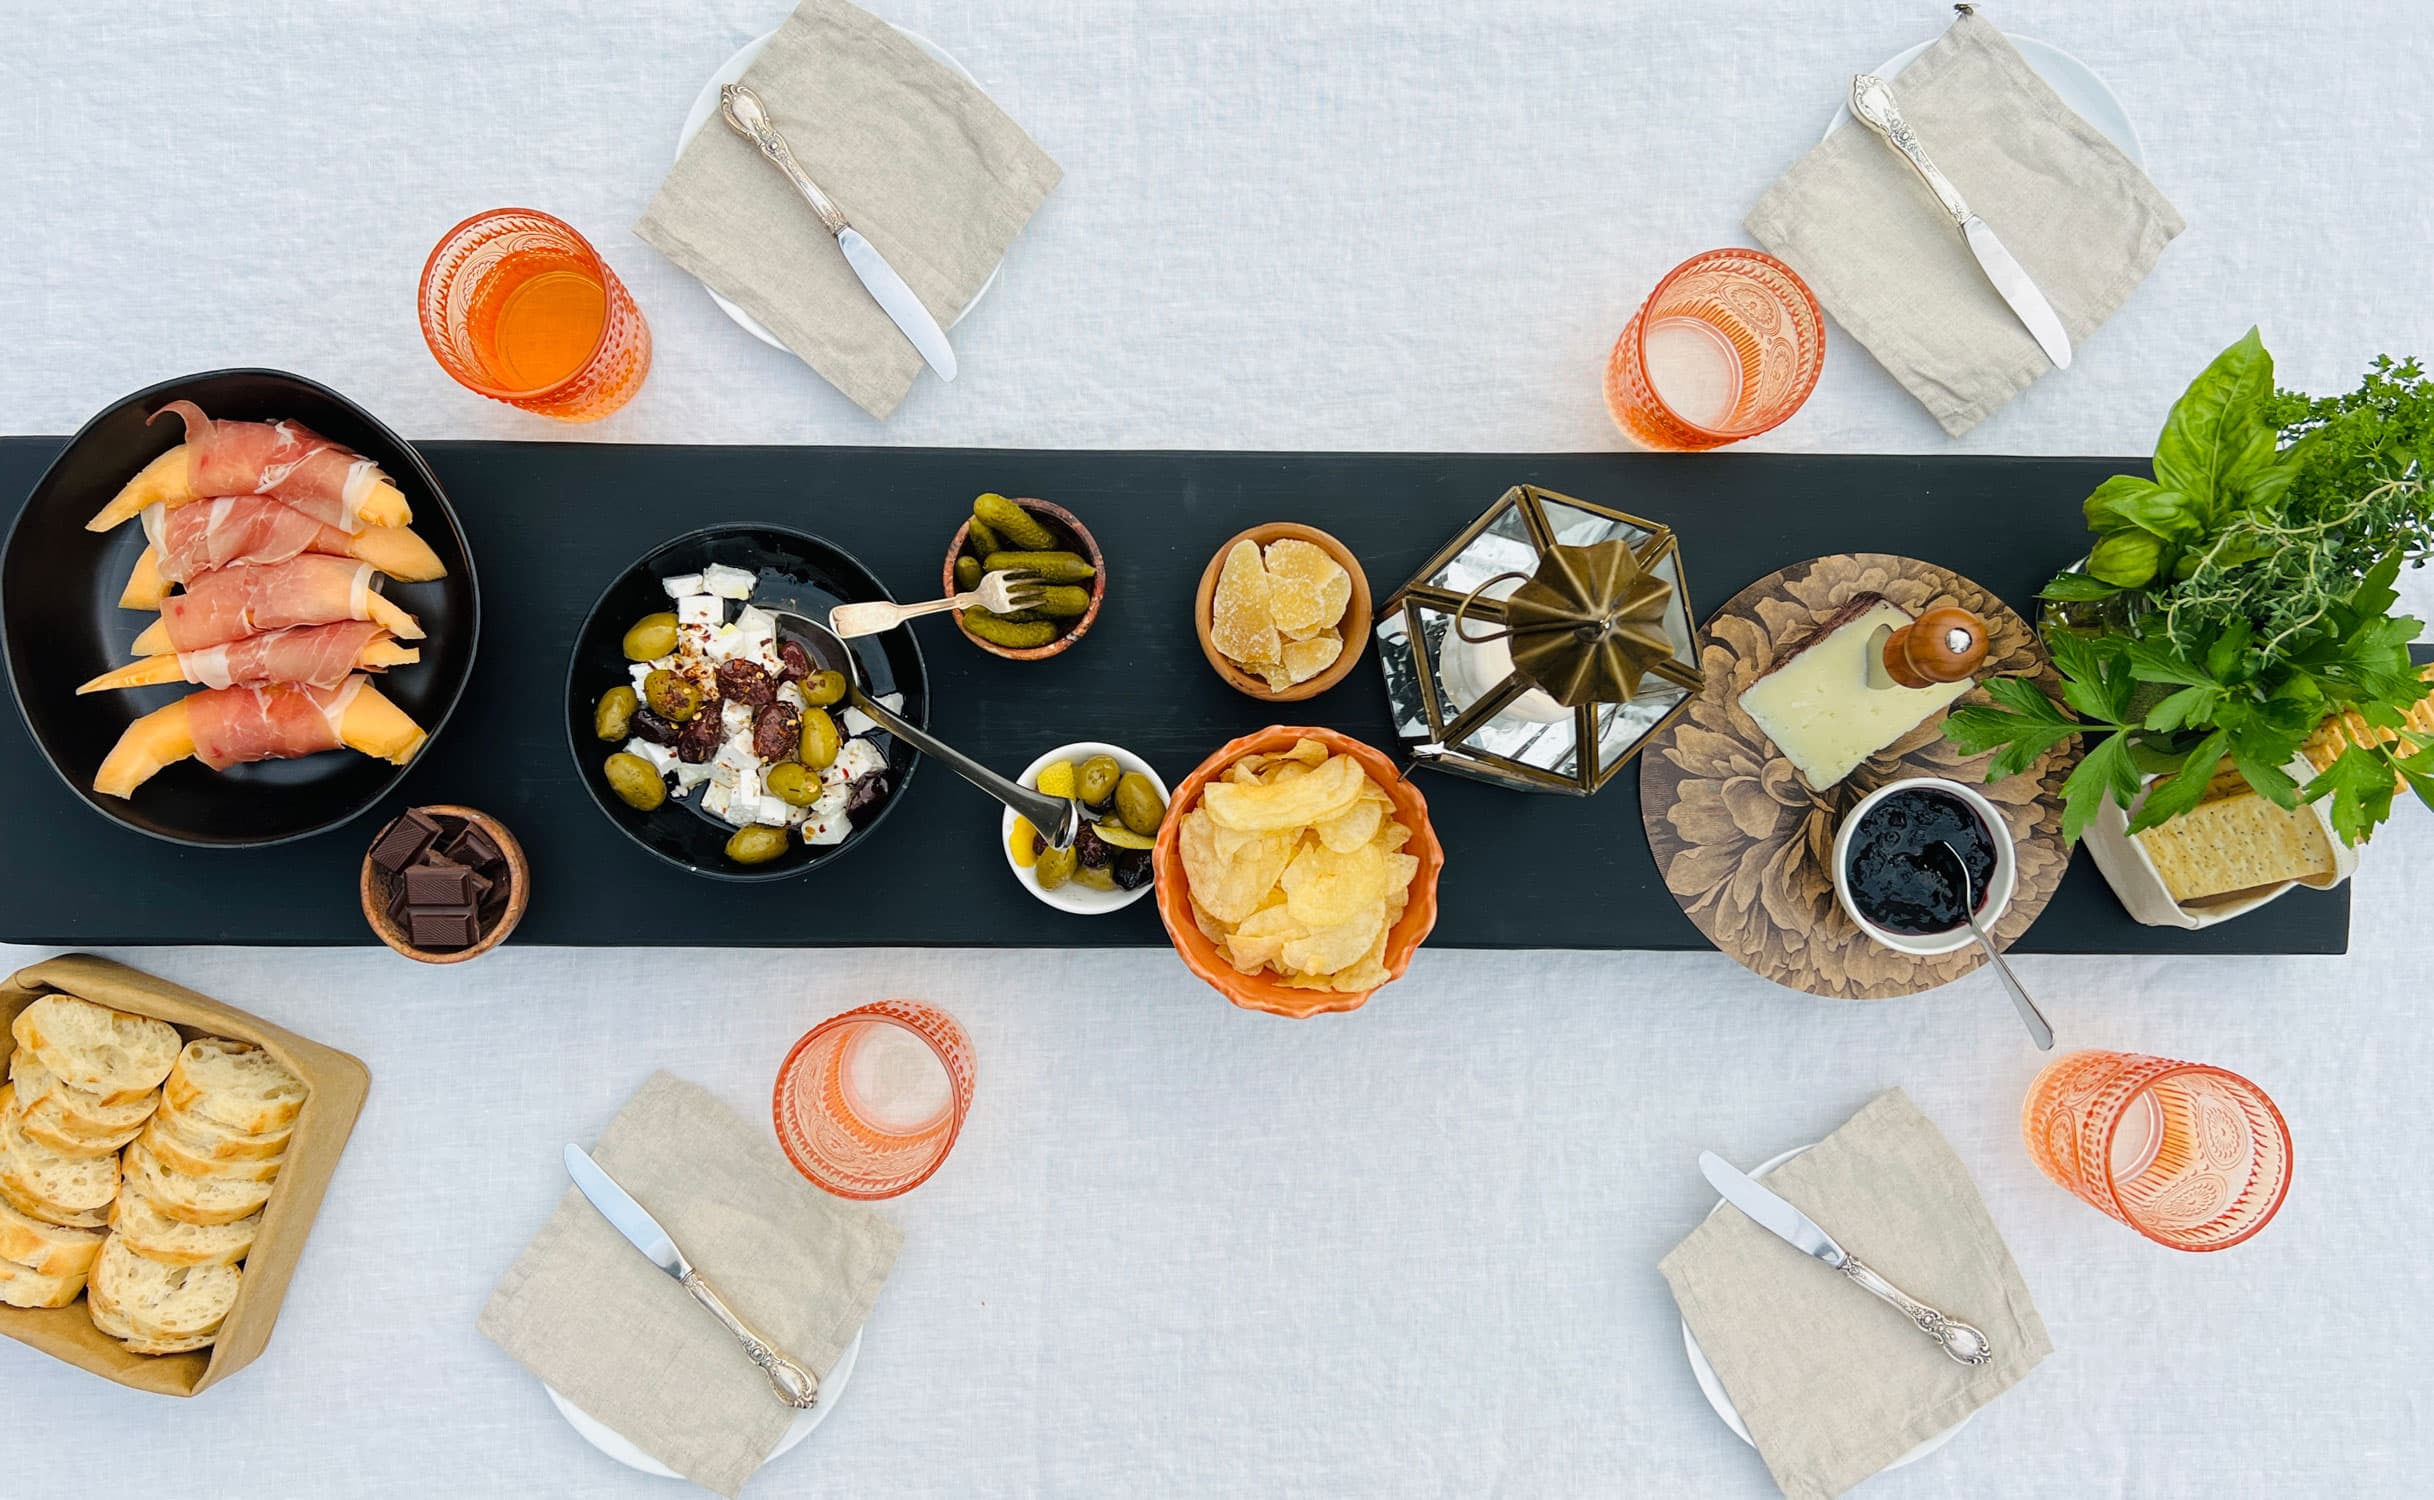
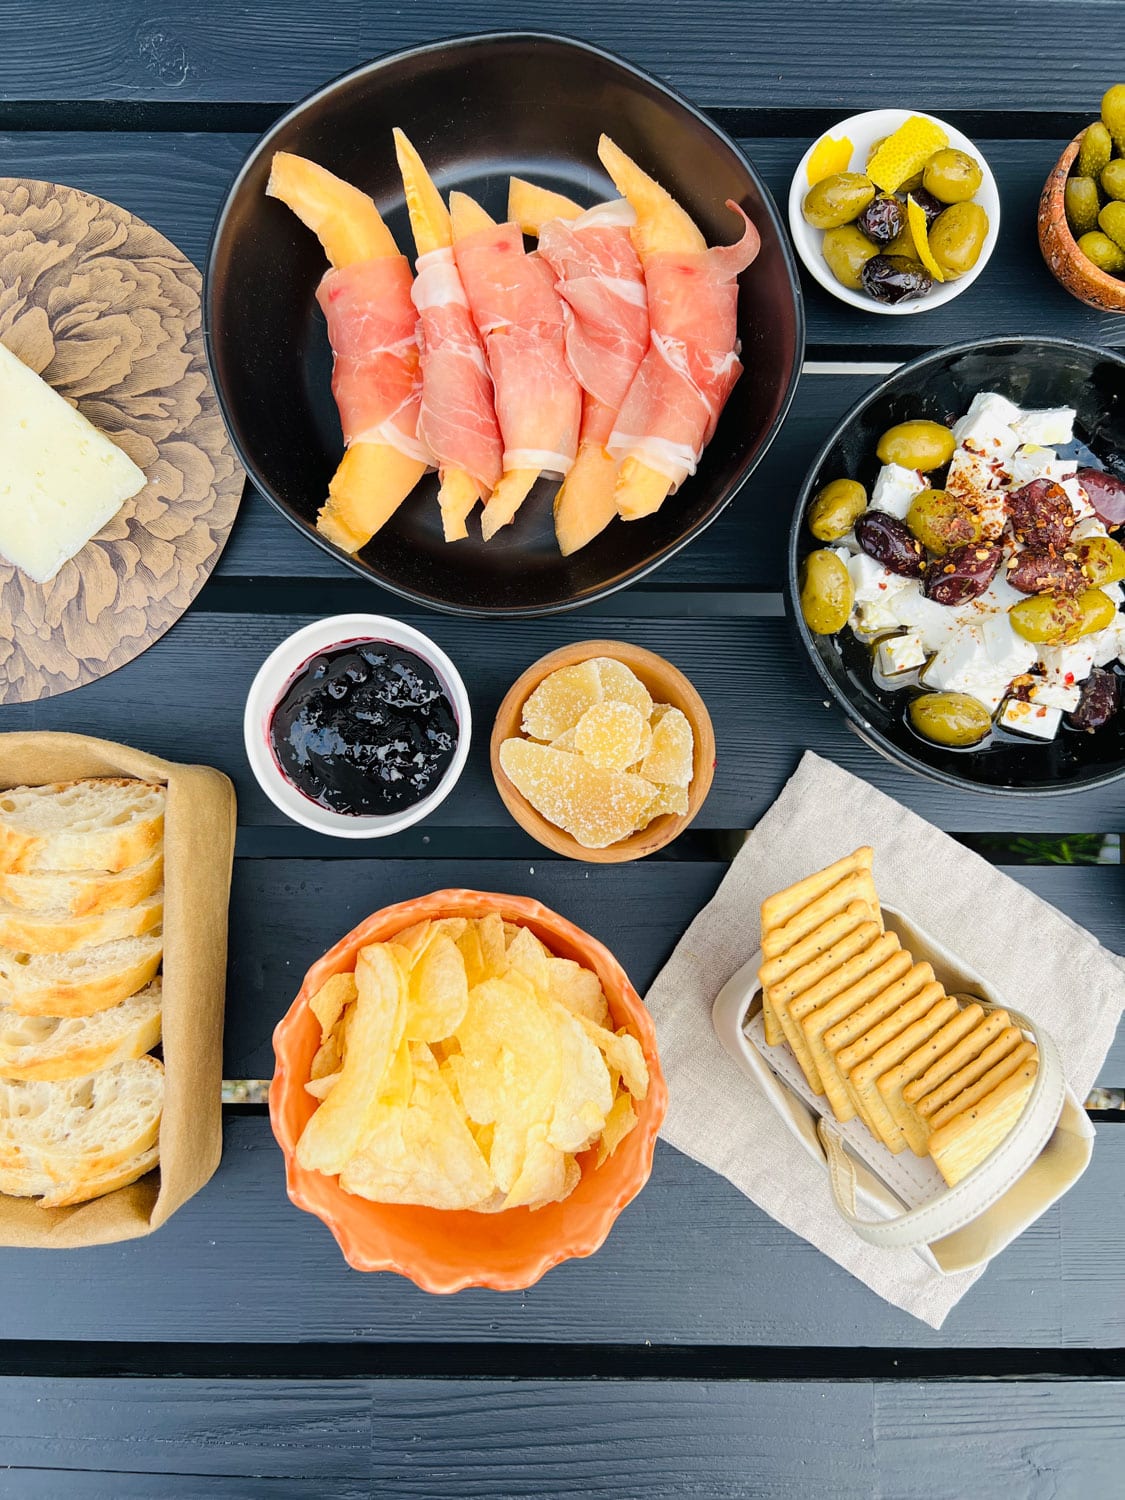
Making the perfect presentation
One of the things I love most about cheese and charcuterie boards is that there is no right or wrong way of doing it or a specific recipe to follow. And there are so many ways to create it. You can use flowers from your garden, herbs in a jar, or as a garnish, or arranged between the food.

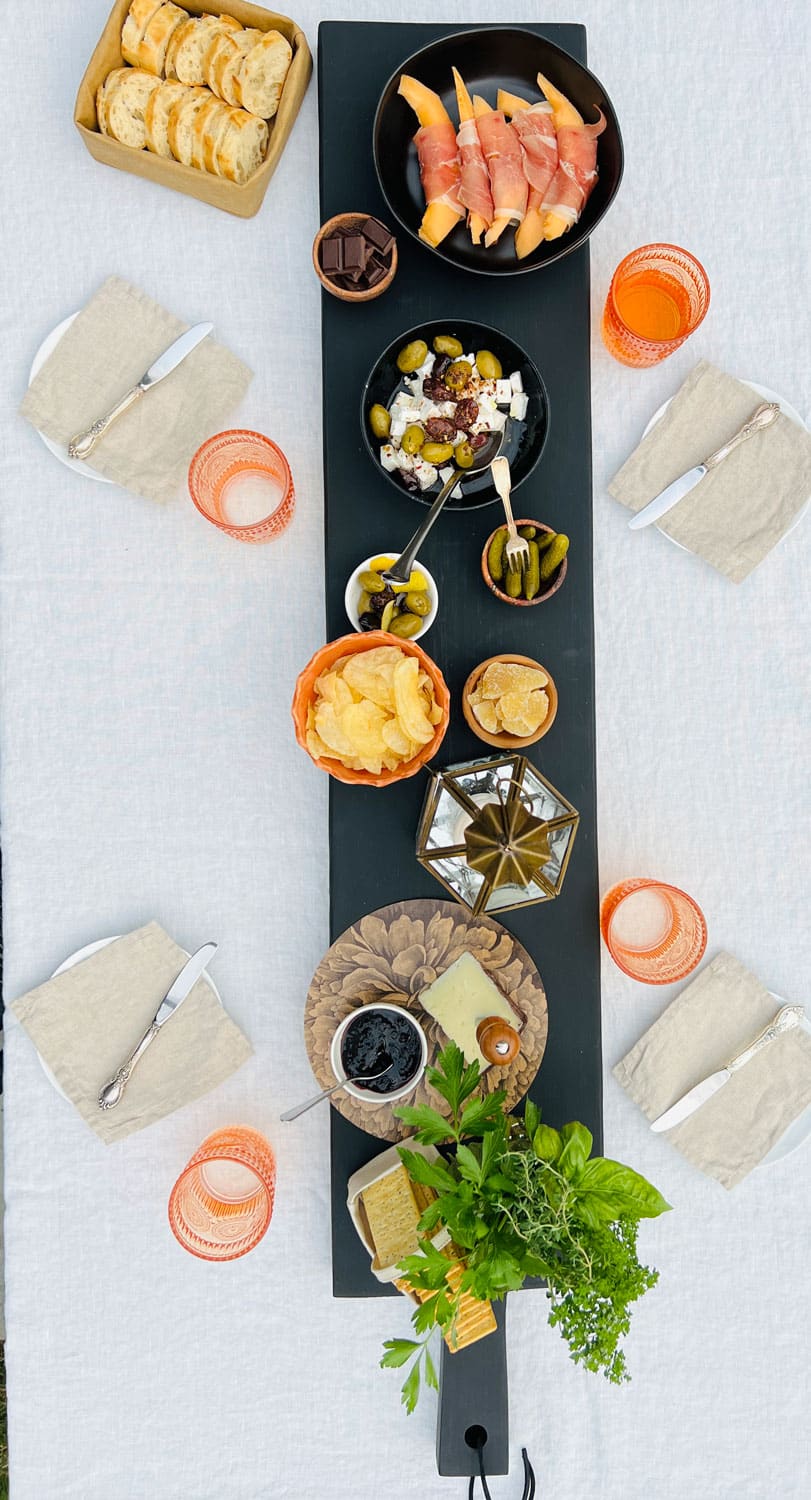
However, there seems to be one common rule around making cheese and charcuterie boards. It’s called the 3-3-3-3 rule. I don’t love rules, especially when being creative. So I call it a rule of thumb to consider but not necessarily strictly adhere to. But it basically means 3 kinds of cheese, 3 types of meat, 3 starches, and 3 accompaniments. Personally, I keep that rule in mind but don’t follow it directly. I like to use what I have on hand, what looks appetizing, and what I find that day. The fun part for me, no two cheese and charcuterie boards are alike.
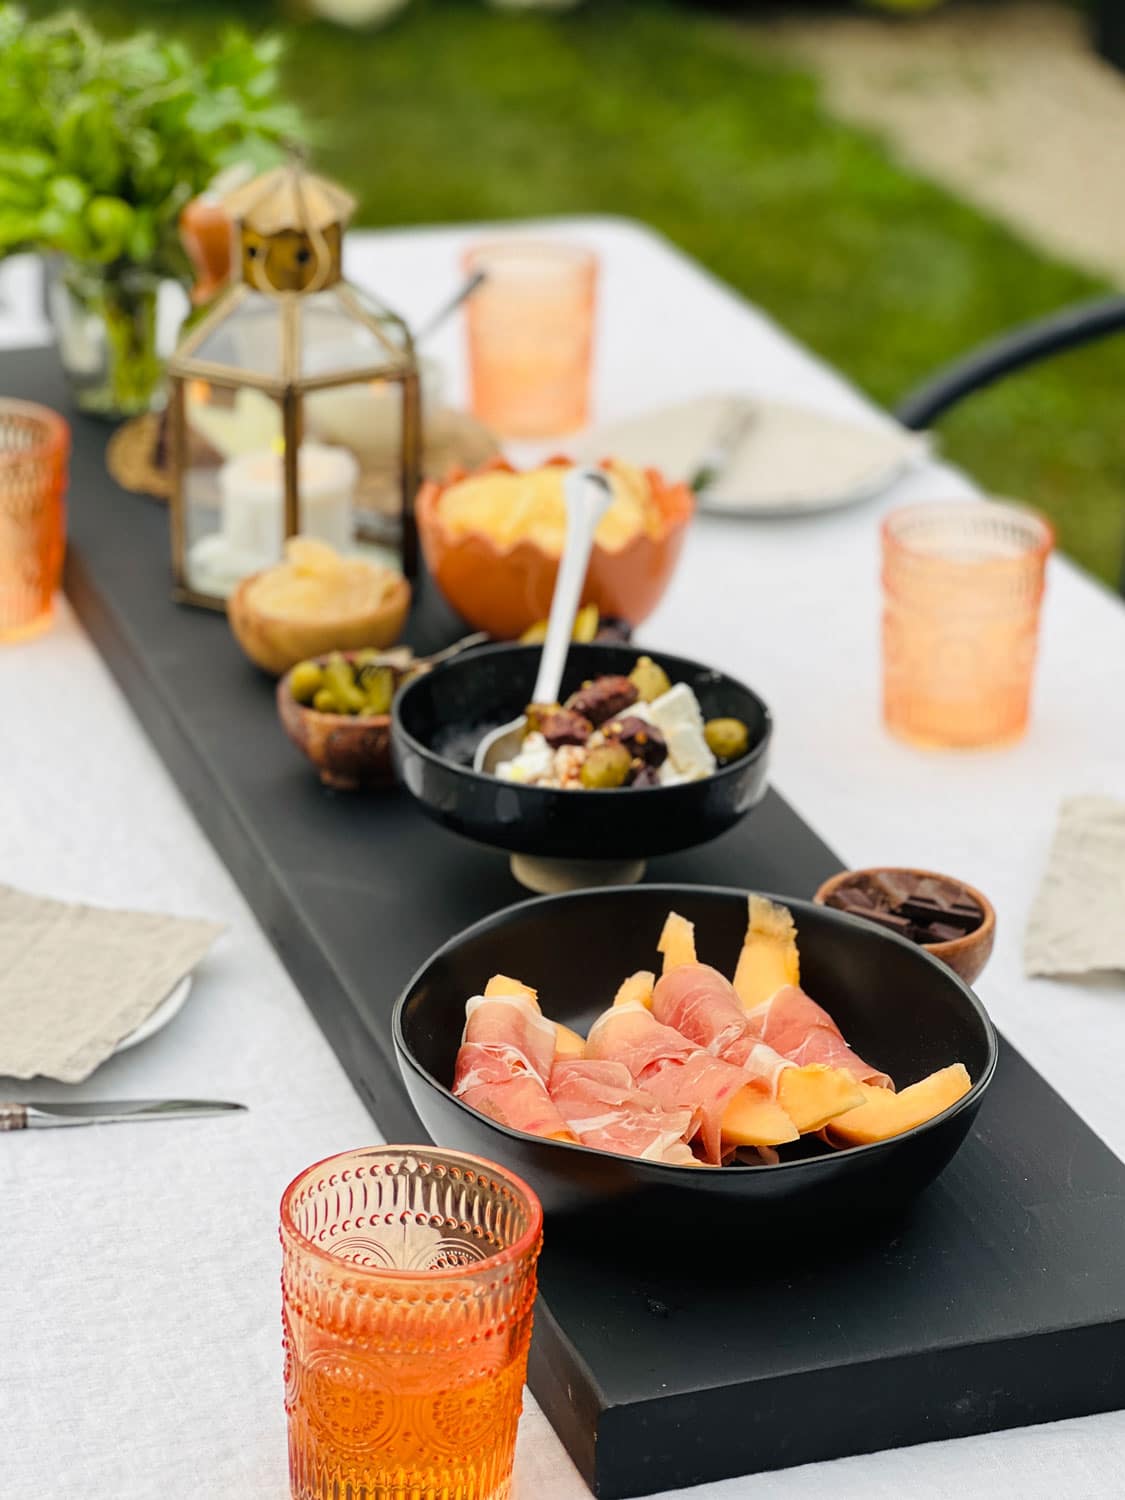
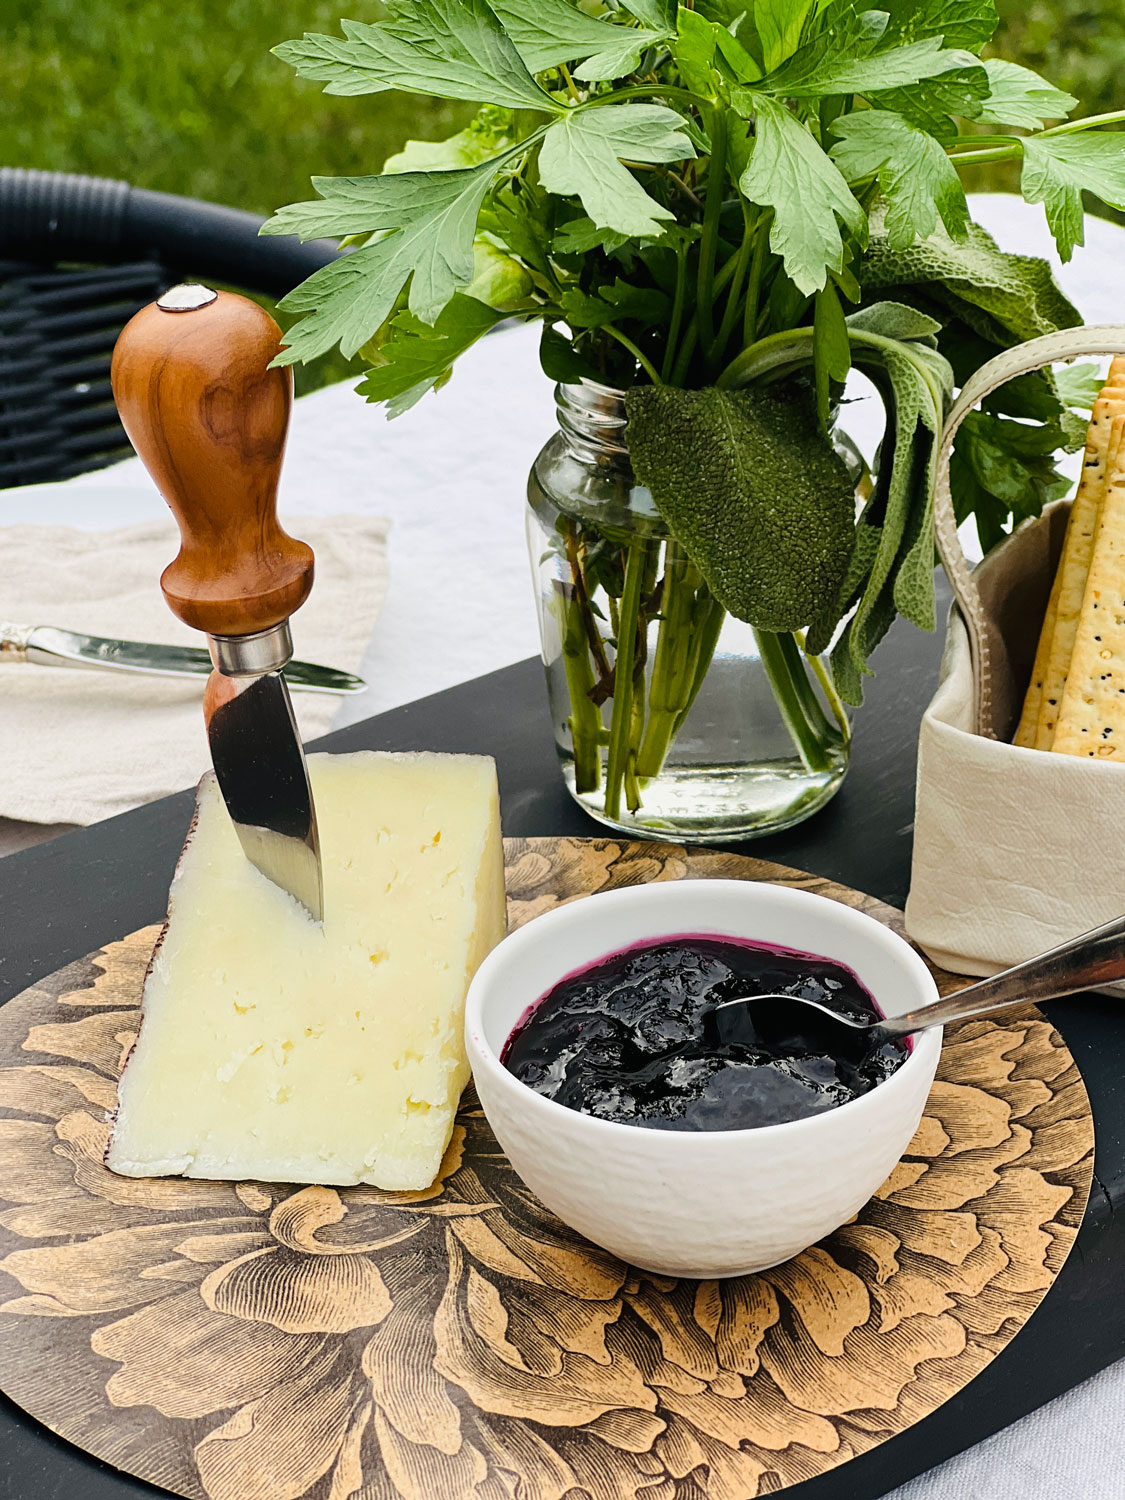

Suggested Ingredients
Here are some of the things I include:
- A fun selection of artisan cheese (soft like goat cheese and hard like a Gruyère)
- Salami
- Prosciutto (French or Spanish selection of good, thinly sliced ham works as well)
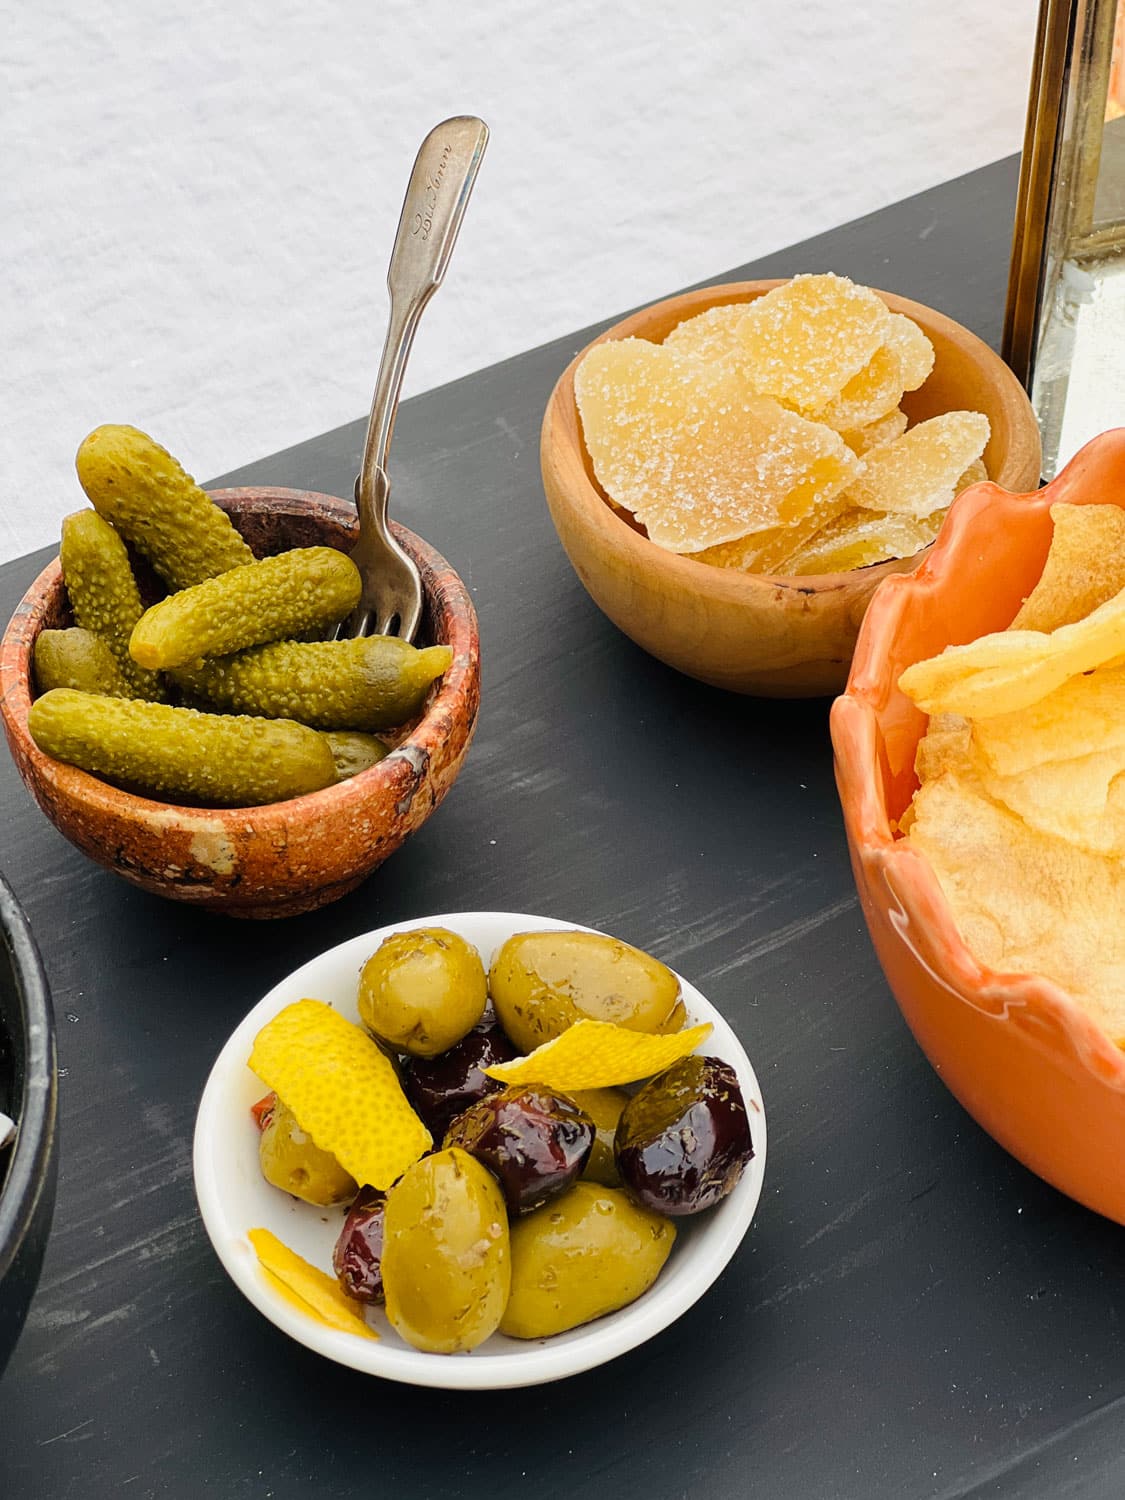
- Olives
- Bread
- Crackers
- Chips
- Nuts
- Dips or sauce
- Salted butter
- Grapes, berries, or dried fruit
- Tomatoes
- Melon
- Vegetables
- Cornichons (or pickles)
- Jam (something fun like fig or shallot jam)
- Fresh herbs
- Pickled red onion
- Honey
- Chocolate
Shop the Post


Annie this is just fabulous!! We have an old board that we use for the same thing! You have reminded me to get it out and use it!!