
How to Keep Your Porch Planters from Leaking Water

Our house was built in 1920, and the porch is made of wood, typical of homes of this age and style. Keeping a porch clean is a chore. So, when planting porch pots, there are a few things to consider to keep your porch planters from leaking water.
Why it matters that your porch planters don’t leak
If you are using planters with drainage holes, they will leak every time you water them, making a complete mess on your porch. This post talks about the importance of drainage so your plants will thrive, as well as how to prevent your planters from making a mess on your porch.
Why drainage is important for your plants
When your plants drain properly it keeps them healthy and looking good. And plants that get waterlogged or are overwatered can’t grow the way they should. If there’s too much moisture in the soil, the plant’s roots will begin to decay or rot and can also cause fungi to grow. So how do you know if your plants get too much water? Look for yellowing leaves, spots on the leaves and the stems, and slow growth.
Always use high-quality potting soil or potting mix, as it promotes proper drainage. Avoid using regular garden soil in your pots. The drainage needs of outdoor plants in the garden can be very different from those of container plants.
How do I fix an outdoor waterlogged plant?
First, check the drainage. If it’s not draining, the best thing is to repot the plant using fresh potting mix and discard the waterlogged potting mix.
How do I seal the bottom of a pot with drainage holes to stop my porch planters from leaking water and making a mess?
You want your plants to drain properly to look good and grow. But if your potted plants are on a wood deck or nice surface, the water draining out of the plants can stain the surface or, worse, actually rot the wood. And if you use saucers or water catchers, moisture can still linger under them and cause stains or damage. Plus, a saucer or tray might not be the look you want with your planter.
There are a few simple tricks to keep your planters from leaking water. If the pot I’m going to use has a drain hole in it, here’s what I do. I use two layers of high-quality duct tape to cover the drainage hole in the bottom of the pot. But keep in mind, duct tape is a fabric, and it’s not meant to be waterproof. I also use a plastic pot or plastic liner inside my regular pots. Then, when it’s time to water my plants, I remove the liners with the plants in them, place them in the grass or driveway, and give them a good soaking. Once most of the water has drained, but the potting mix is still moist, I put the liners with the plants back in the pots. The duct tape over the drain holes in the bottom of the pot will keep the little bit of extra water that drains into the pots from leaking onto your deck.
Another good, more permanent solution is to cover the holes in the bottom of the container with a product like Flex Seal or any other silicone-type sealant that is meant to be waterproof. Applied properly to the bottom of your pot, any water build-up will stay in the pot. You’ll just need to empty the excess water occasionally to keep the pot from smelling swamp-like.
Should I put rocks in the bottom of my pots?
Contrary to some popular beliefs, if you use good potting mix and don’t overwater, you don’t need to put rocks or layers of things in the bottom of your containers that don’t have drain holes, as some people suggest. The water will collect under the rocks and keep the roots wet, which can lead to root rot.
Should I use plastic liners in my pots?
Yes! I like using plastic nursery containers for several reasons. I can seal the bottom of the pot I place them in, so it doesn’t leak on my wood porch. They are also easy to water, and I know they’ll drain properly.
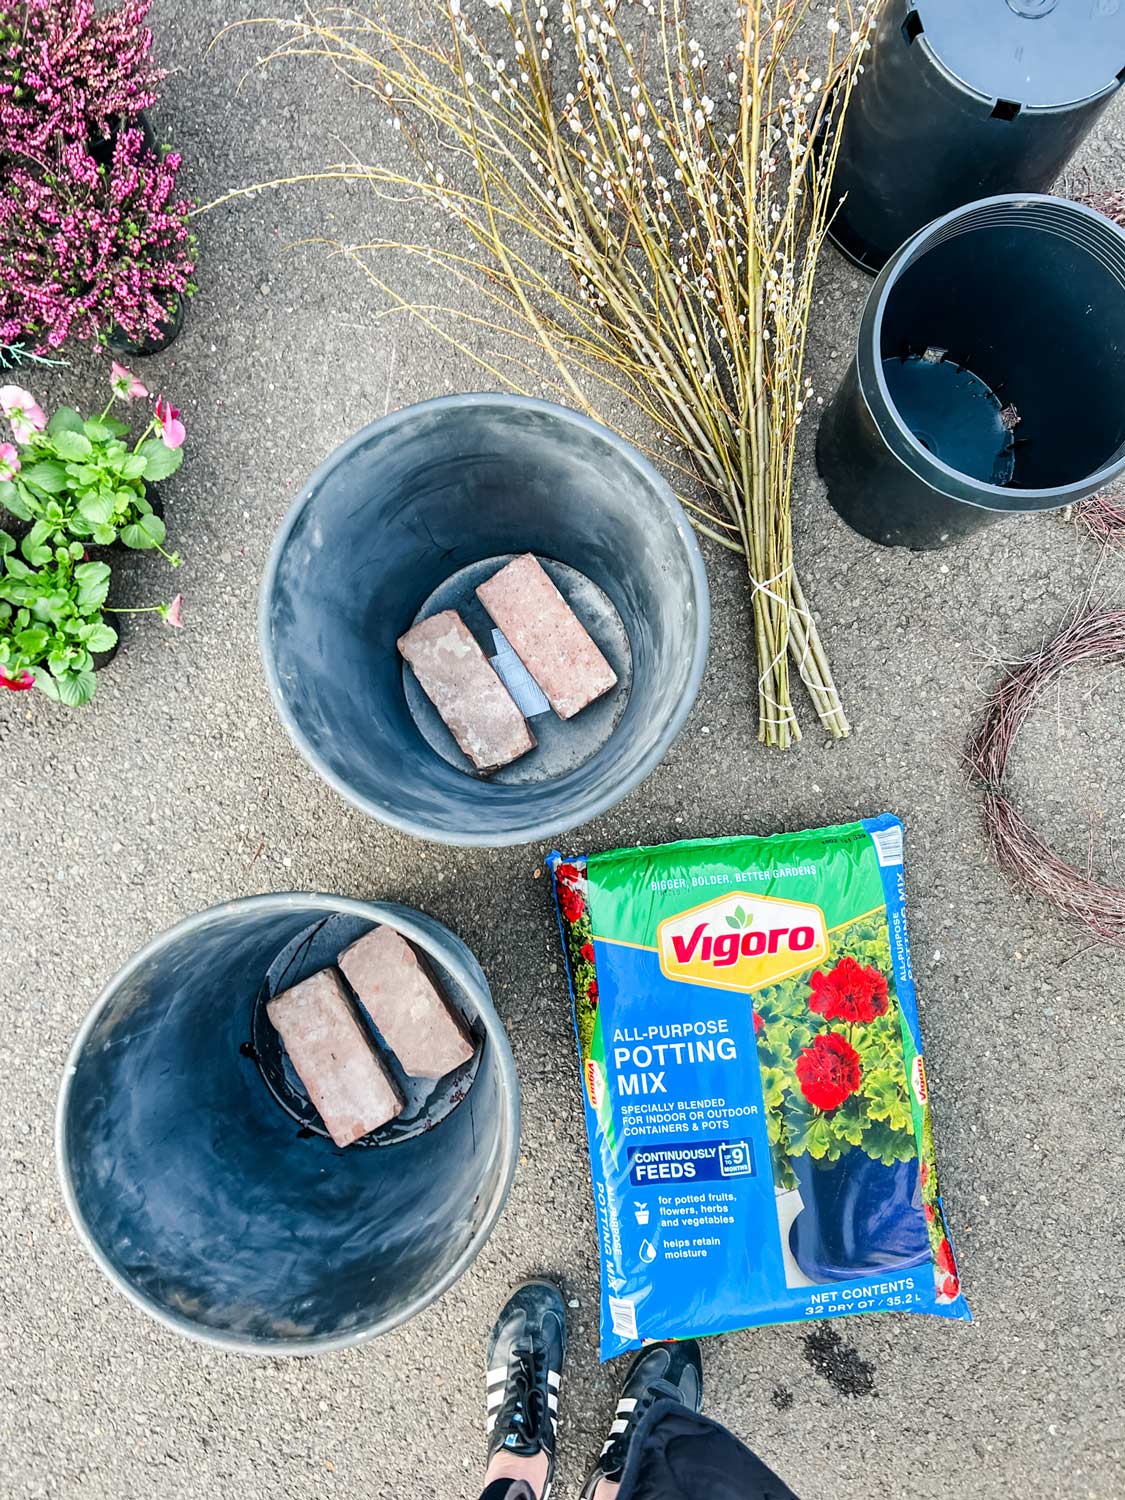
If you’re planting in large containers without plastic liners and want to conserve potting soil/mix, the easiest way is to make a simple false bottom. Doing so will require much less potting soil. I’ve used two bricks at the bottom of a pot, or a clay saucer turned upside down at the bottom of the planter, to take up volume. These two methods still allow the plantings to drain properly and keep your soil healthy and your plants flourishing.
Deciding what to use at the bottom of your pot depends on your liner size. You want the liner to come close to the top of the planter but not above it. It takes a little experimenting using bricks, clay plant saucers, or even small bowls in the bottom of a planter to raise the liner pot to the right height for your planter. (See step 3, below.)
Is there a difference between potting soil and potting mix?
These terms are often used interchangeably, but there are differences. Potting soil may or may not contain soil, depending on where you buy it and what brand it is. Potting mix, on the other hand, is a soilless product. The benefit of the potting mix is that it’s sterile and does not contain fungus or other diseases, which leads to healthier, thriving plants. However, both are suitable for planting in containers. And if you use fresh potting mix each time you change out your plants, you don’t need to worry about soil amendments.
Here’s a step-by-step guide on how I plant in my outdoor containers to keep my porch planters from leaking water
Step 1 – Clean the bottom of your pot with warm, soapy water, rinse thoroughly, and allow to dry.
Step 2—Place one strip of duct tape over the hole in the bottom of the clean pot. Then, place a second strip of duct tape horizontally.


Step 3 – I’m using fairly large pots here, so I placed two bricks on the bottom of the container. The liner will rest on the bricks and sit just below the pot’s surface edge. Finding the right size inserts and bricks or saucers takes a little trial and error to get them to just the right height.
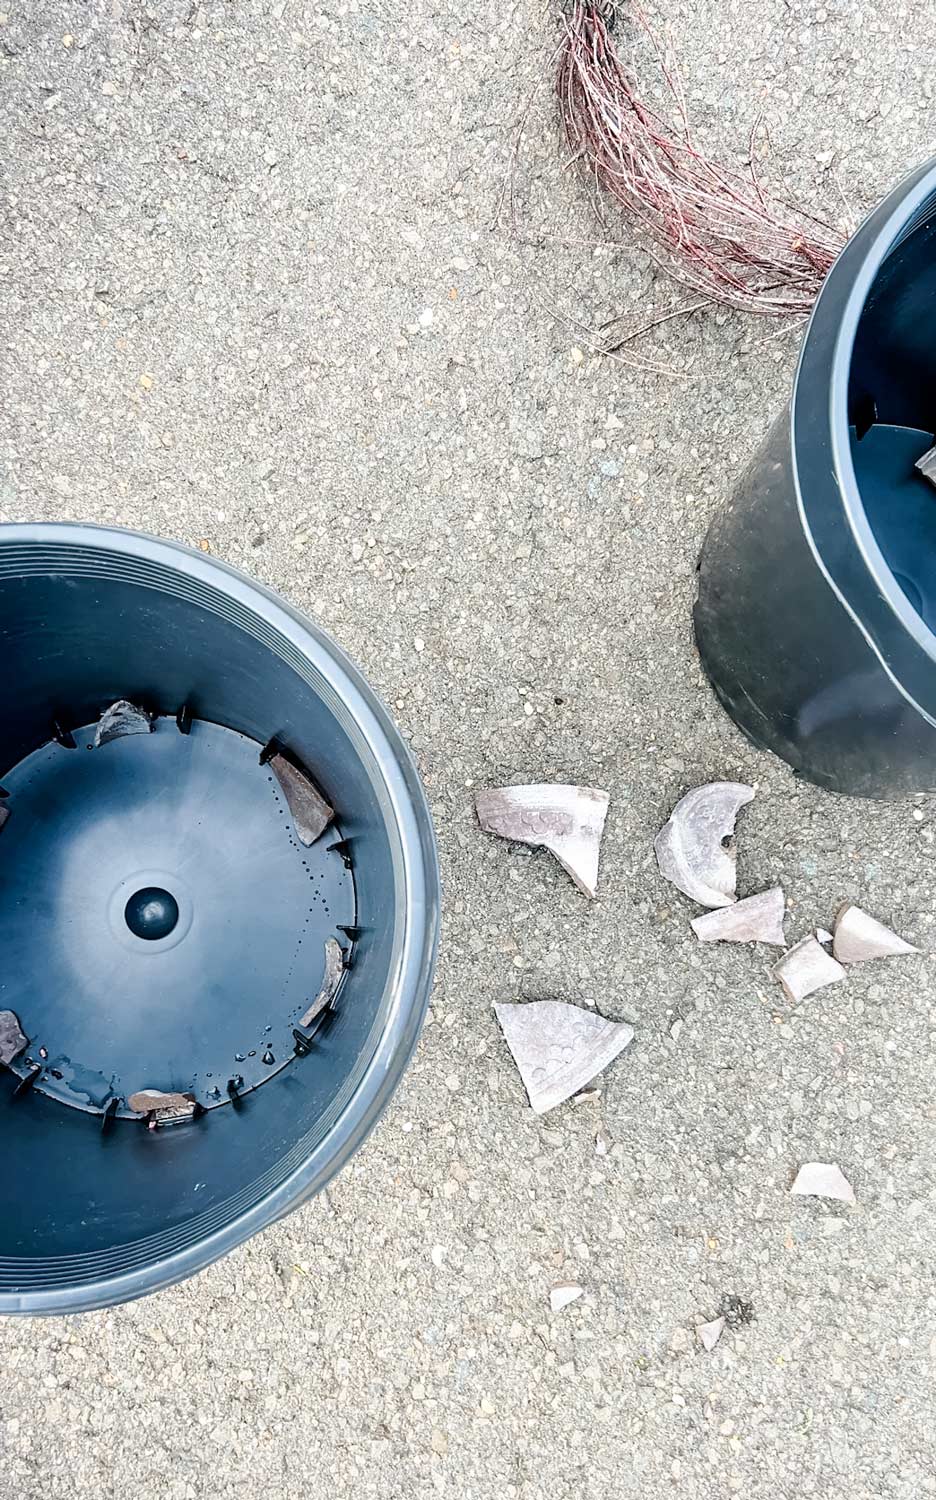
Step 4 – If you’re using liners for your pots, place rocks or broken pieces of clay pots over the drainage holes. Since rocks or pieces of clay pots don’t fit tightly around holes, this still allows the water to drain, but it keeps the potting mix from falling through or seeping out of the drainage holes.


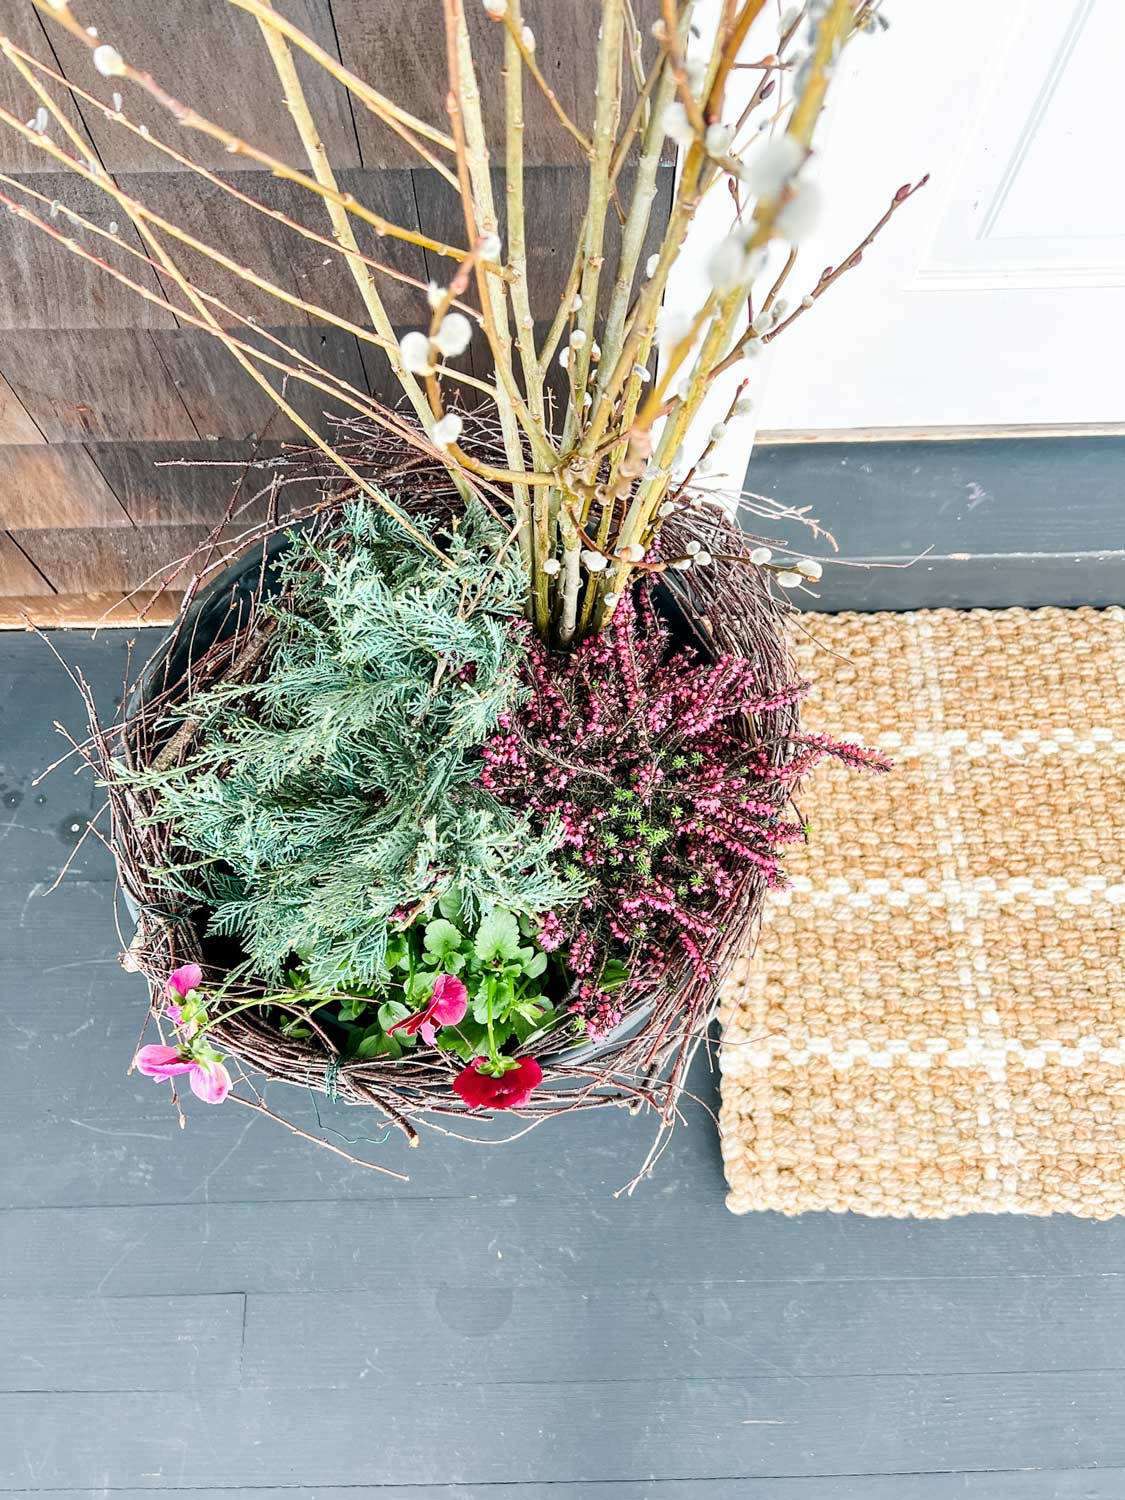
Step 5 – Remove plants from their containers and place them in the plastic liners. Use potting soil to fill in and around the plants.
Step 6—Once you’ve planted your plants inside the plastic liner, place the liner in the pot and adjust the height as needed. I added bricks at the bottom of my planters. Not only does this add a little height to raise the liner to the correct height, but it also adds weight to the pot so it won’t blow over in the wind.
Step 7—Once you have the correct height, remove the liner with the plants, give them a good soak, and let them drain for a few minutes. Then, place the liner back in your pot.
Step 8—Every time you water your plants, remove the liner to the grass or driveway (away from the wood porch or deck) and give it a good soak. Allow it to drain for about 30 minutes before placing it back into the container. Some water may still drain into the planter, but not enough to cause any problems. This may seem like an extra step, and it is, but it helps keep your plants healthy and your porch or deck clean.
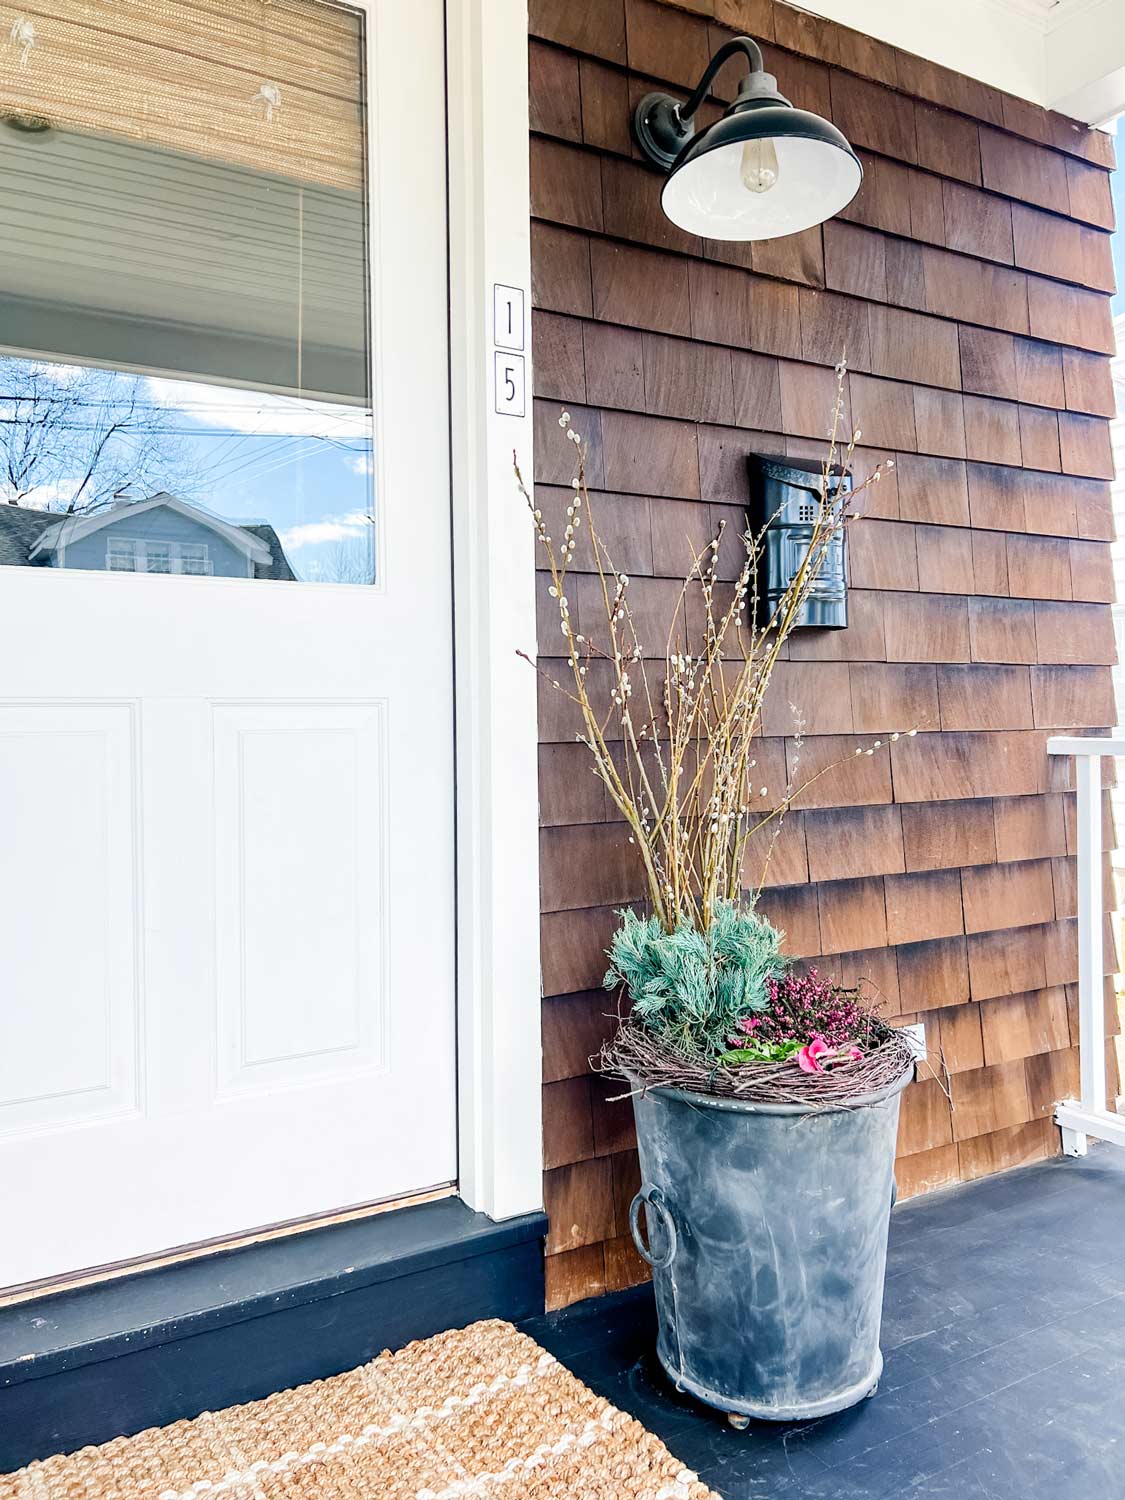
Shop the Look


The lights are Carson Gooseneck Wall Sconces, and the Door hardware is from Emtek–You can read more in this post.


Great tips Annie!
We have a brick porch and when the water leaks the bricks calcify and get dirty. I will have to try this tips when I plant them next.
Have a lovely weekend.
I put large and small pieces of styrofoam packaging in the bottom of the pots. Keeps them light for lifting and saves on potting soil, You can use the same styrofoam for years, just hose it off at the end of the season.
Kathyn, that’s great to know! Thank you for taking the time to leave a comment!