
Paper Bag Flower Garland (Using a Trader Joe’s Bag)
I’m joining a few friends to share a flower craft. And since we just received about 18 inches of snow, I needed to use what I had on hand. It just so happens that I love a craft that uses something you already have. This one starts with a simple paper bag from Trader Joe’s and turns into the sweetest little flower garland. It takes just a few supplies and doesn’t require perfection, which might be my favorite part.
The flowers are made from strips of the paper bag, and the centers are just watercolor circles. It’s simple, a little nostalgic, like something I would have made with my kids on a snow day when they were little.
What You’ll Need
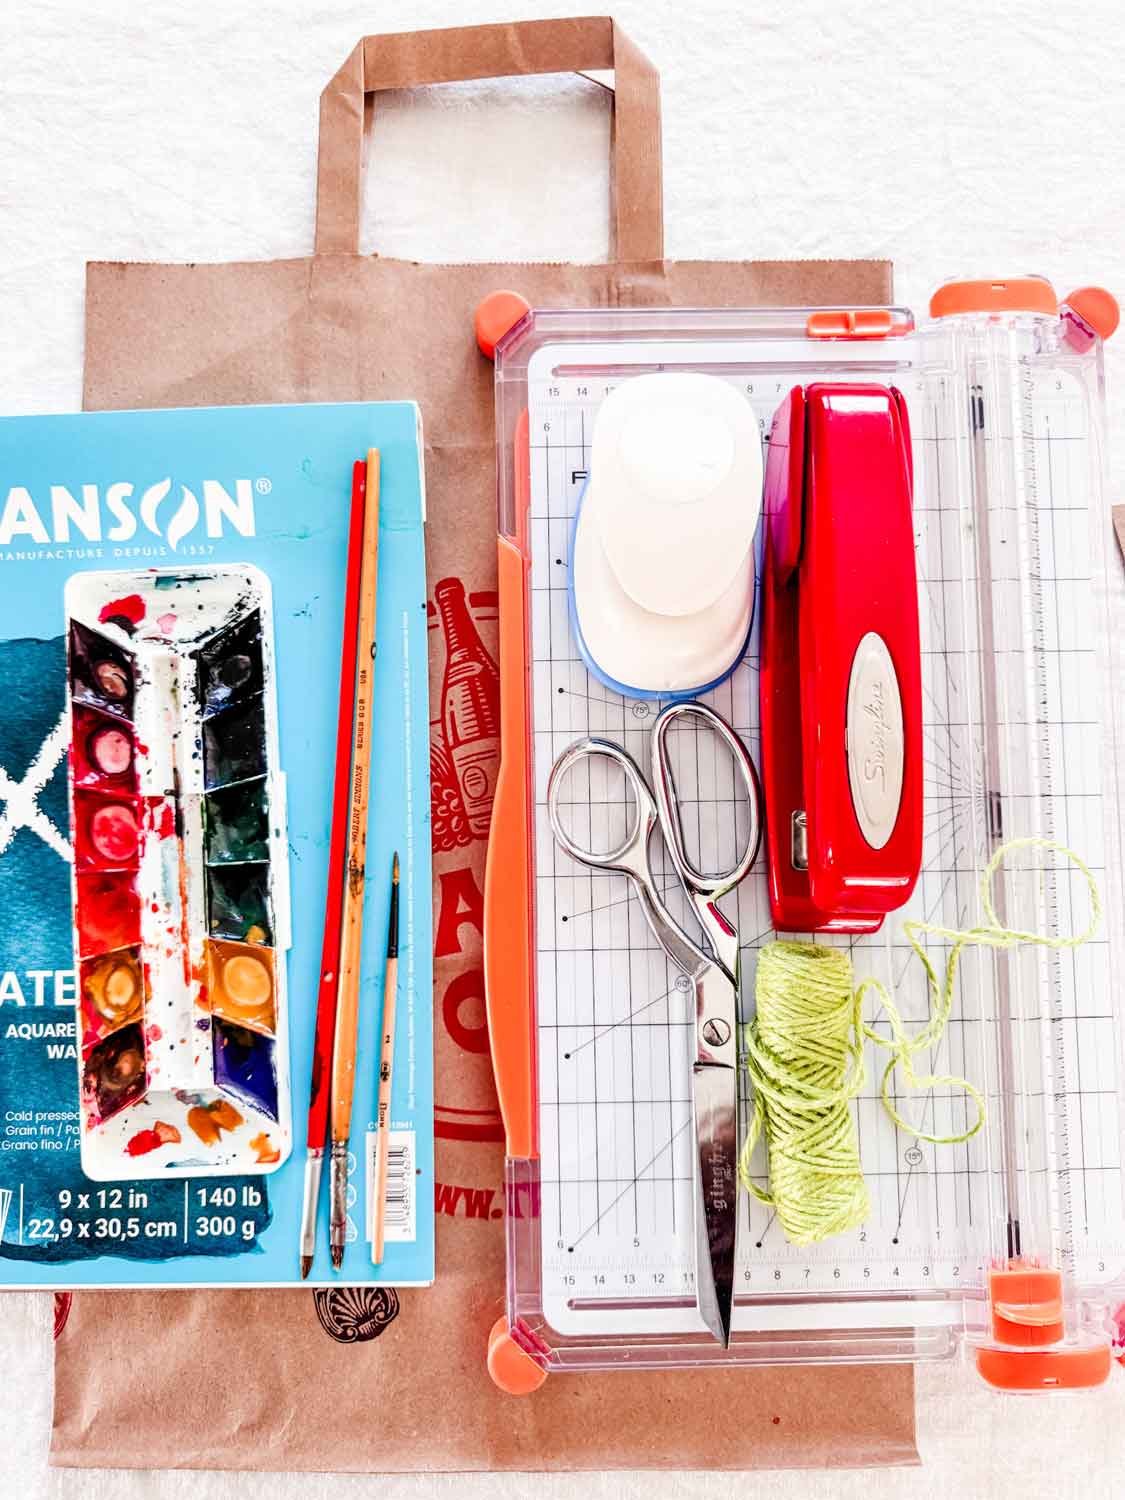
- A Trader Joe’s paper bag
- Watercolor paper or heavy white cardstock
- Watercolors (I used warm gold tones)
- Paintbrushes
- A circle punch (about 1½”)
- Scissors
- Stapler
- Glue stick
- Green twine (I have this little crate of 24 different colors of twine)
Step 1: Paint the Centers
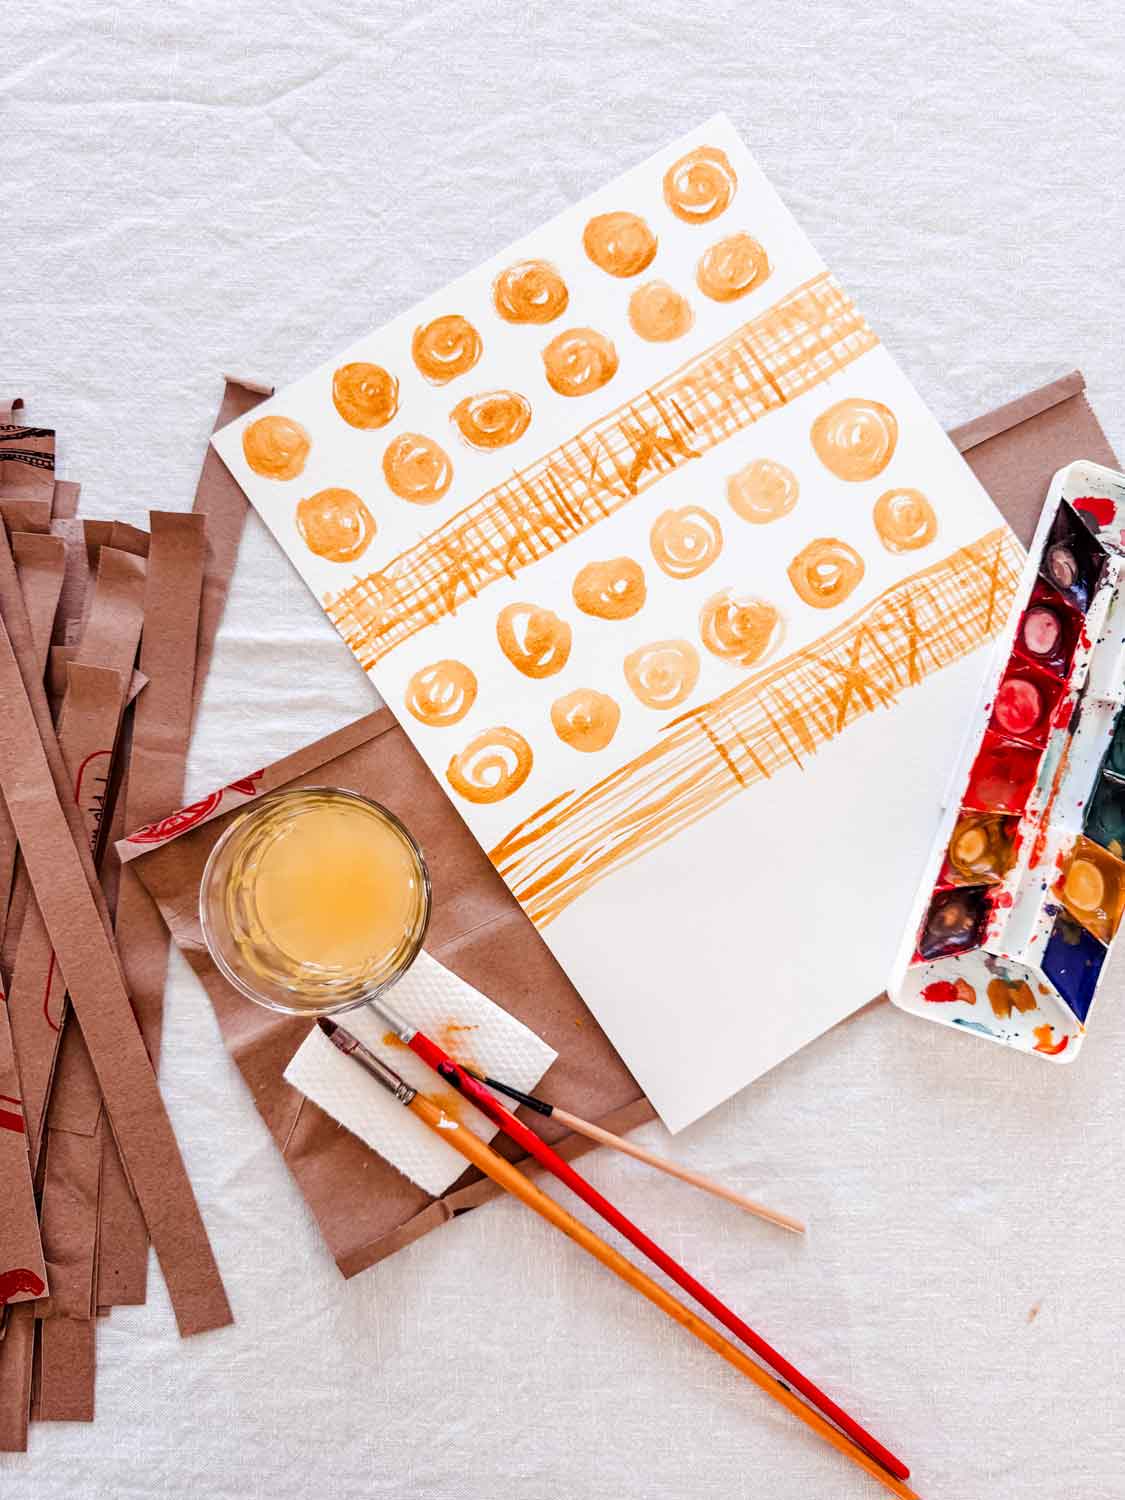
Start by painting loose watercolor circles on white paper. Don’t overthink them — just simple swirls, dots, or even a little crosshatch pattern. I stayed in warm gold tones, but you could use any color and mix it up.
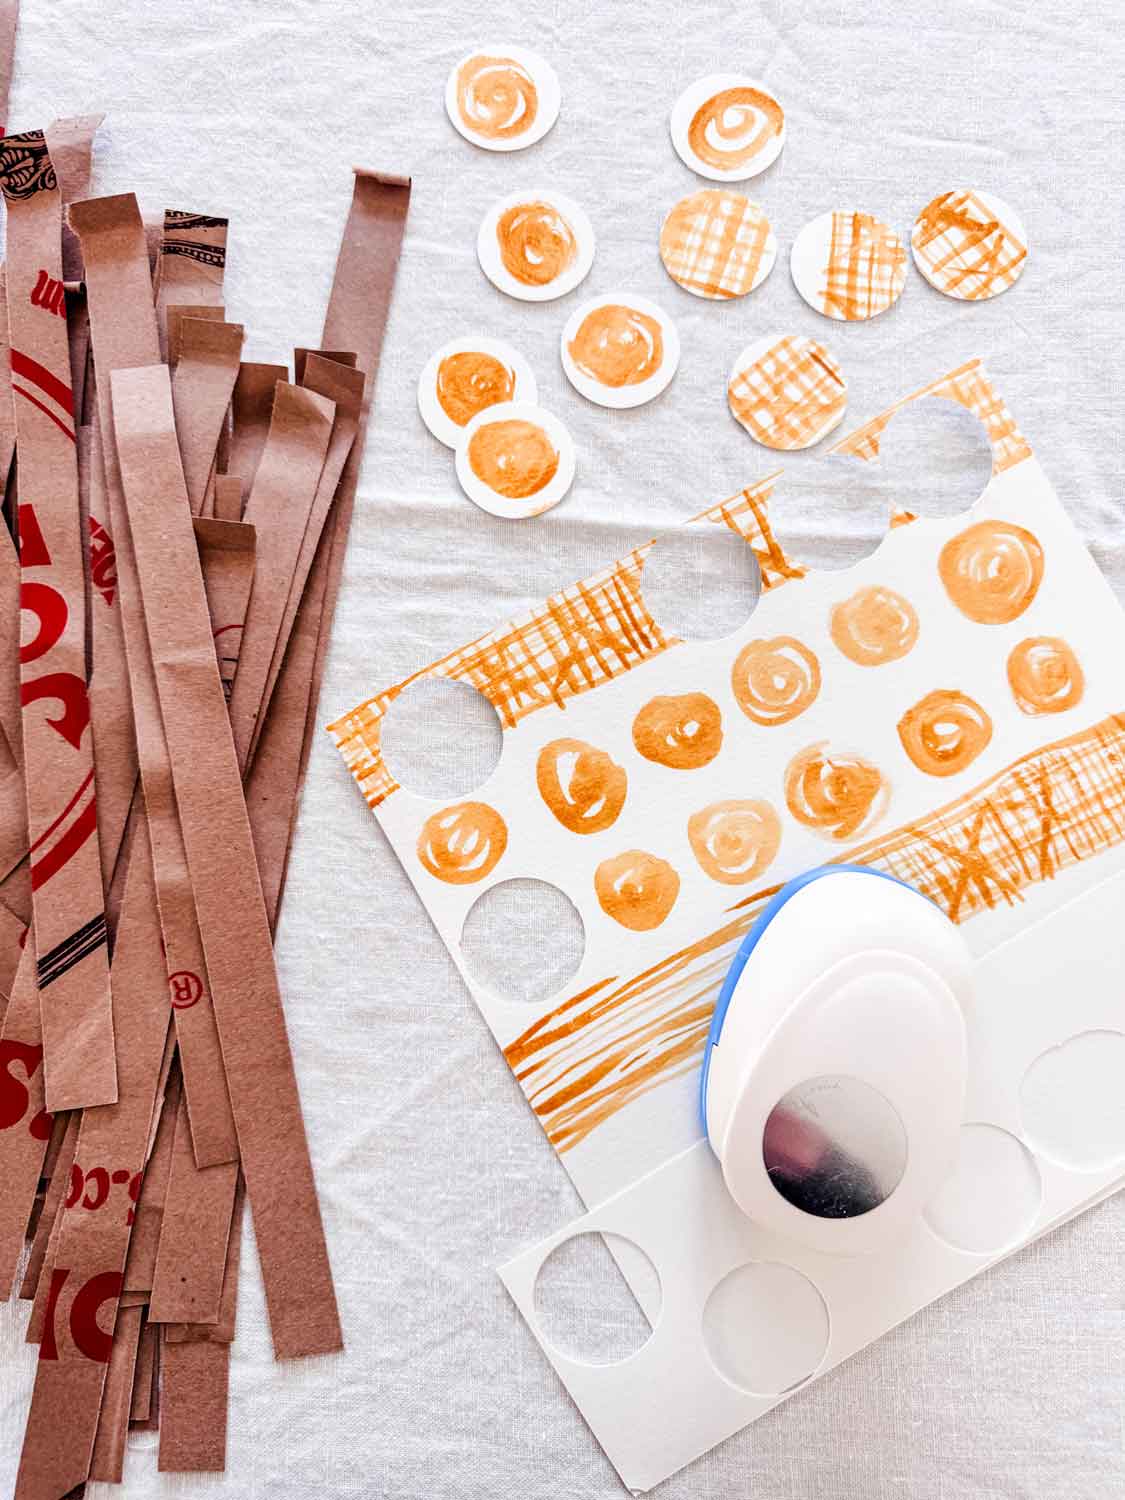
Let the paper dry completely, then use a punch or scissors to cut out a circle for the flower centers.
Step 2: Cut the Paper Bag Strips
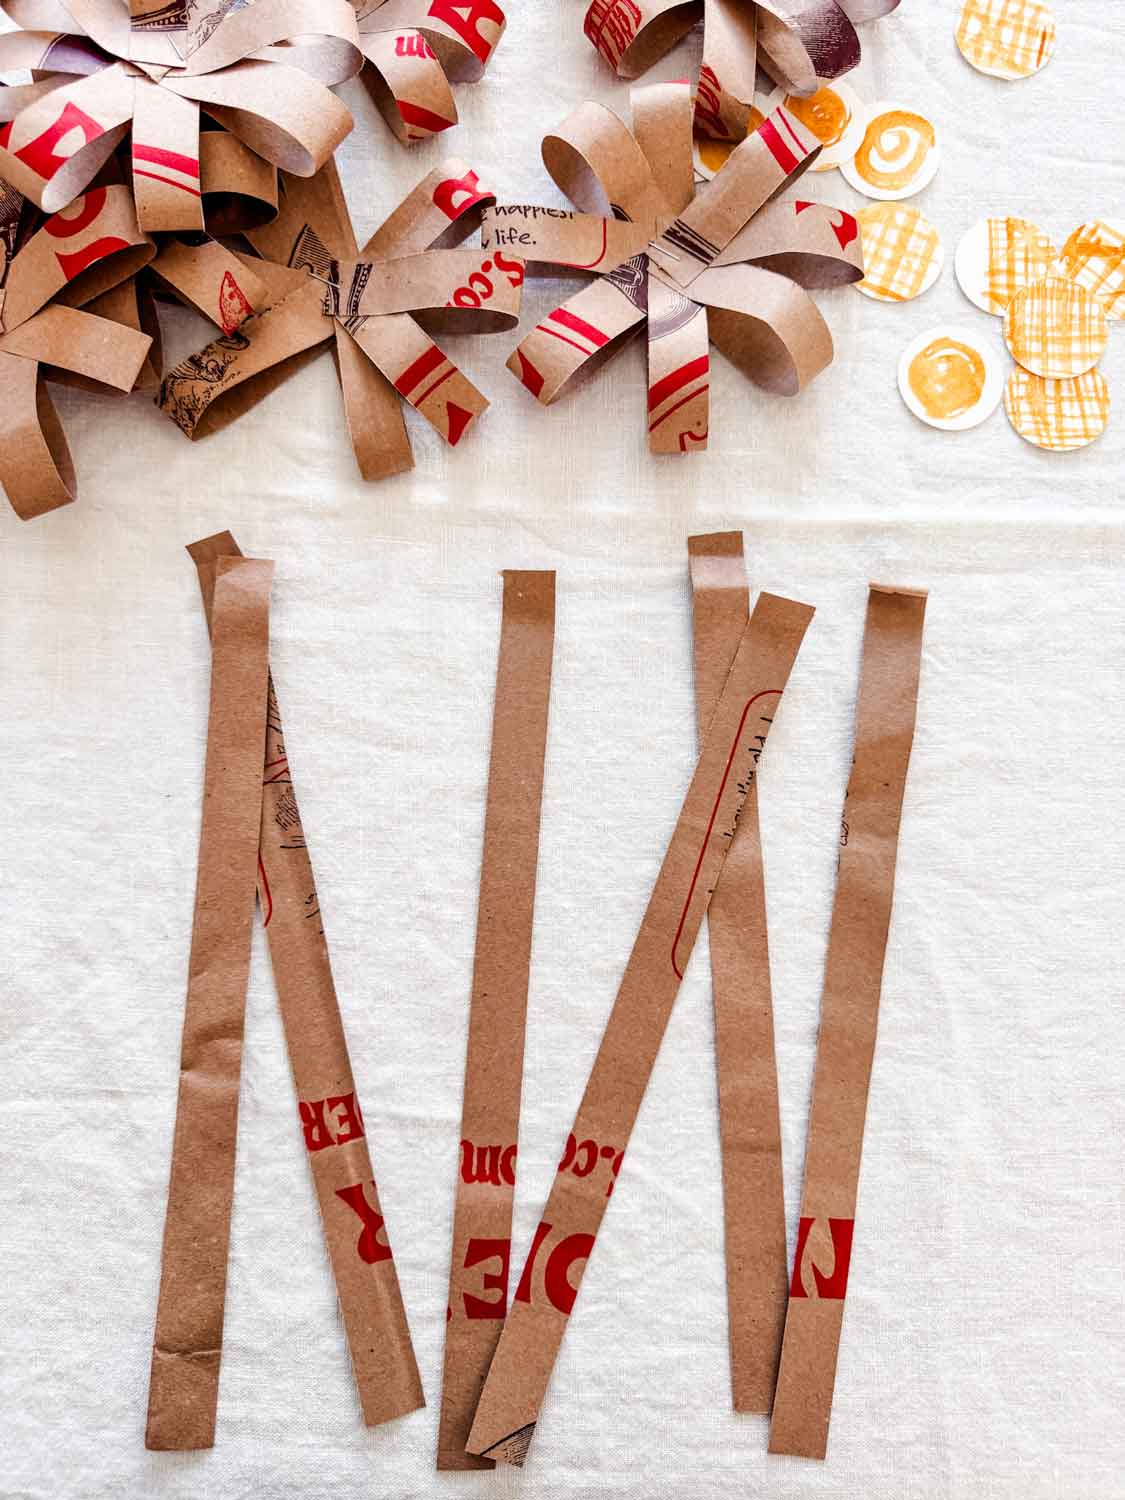
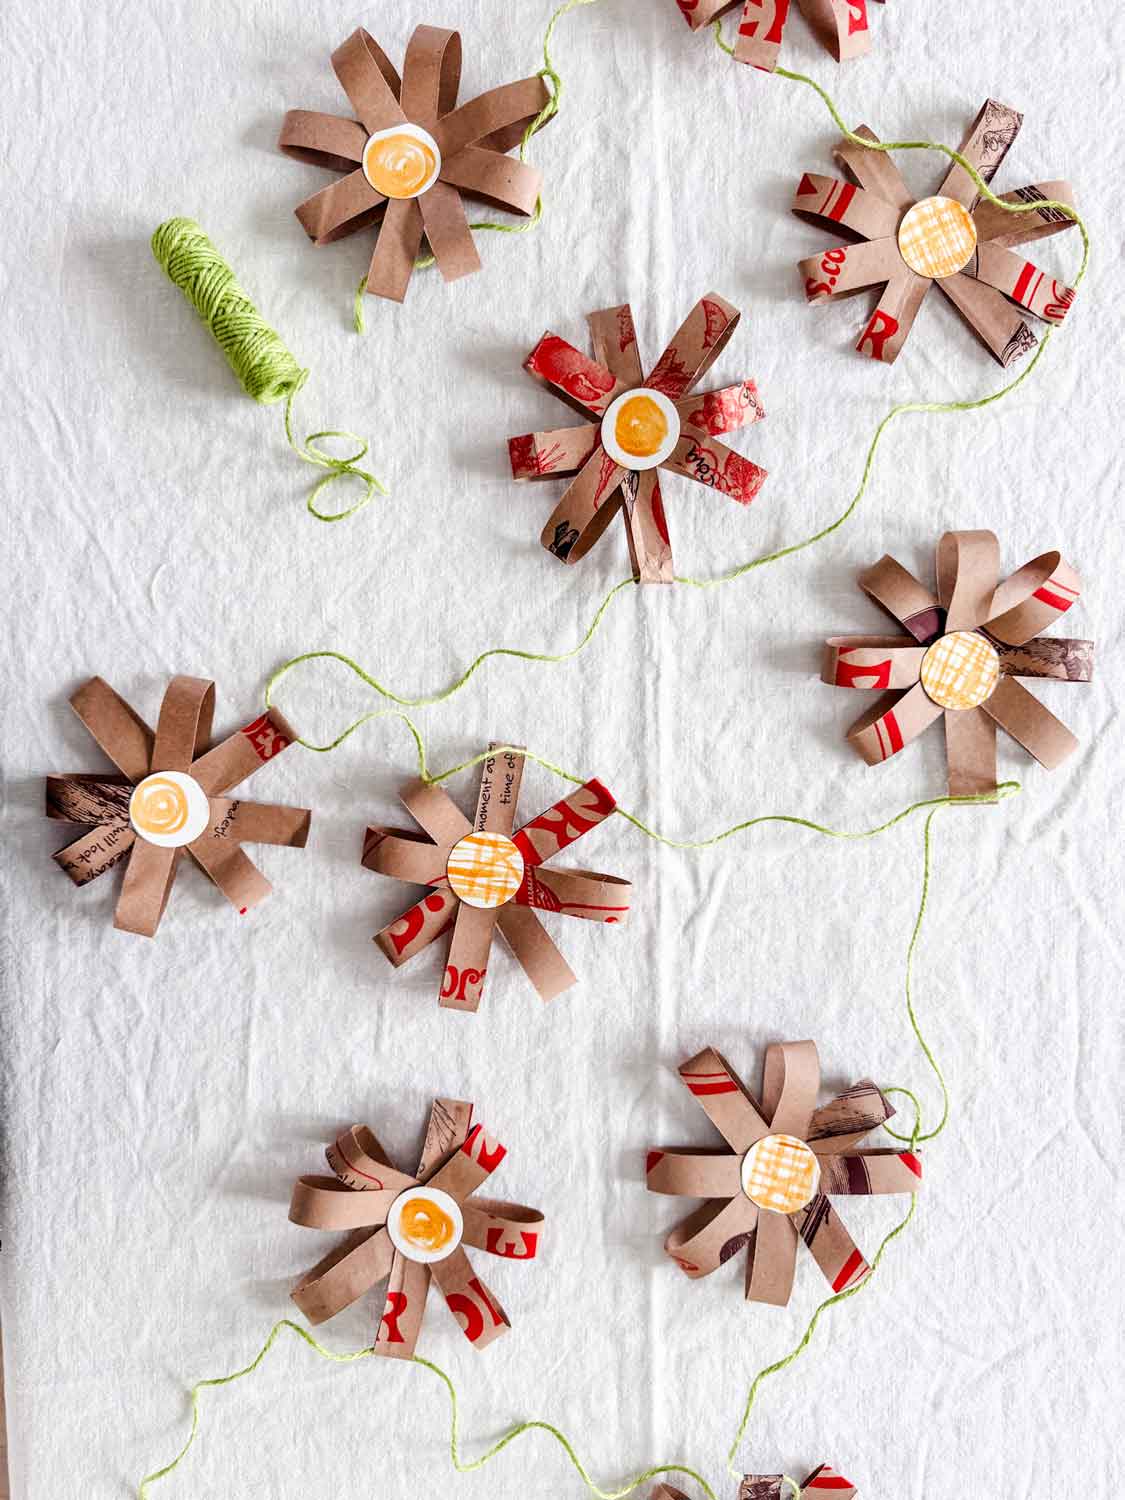
Cut the Trader Joe’s bag into strips about 1/2 inch wide. Some of mine include the red and brown lettering of the graphics, which adds a little interest. Others are just plain brown — I like mixing both.
Each flower uses 4 strips that are about 11″ long.
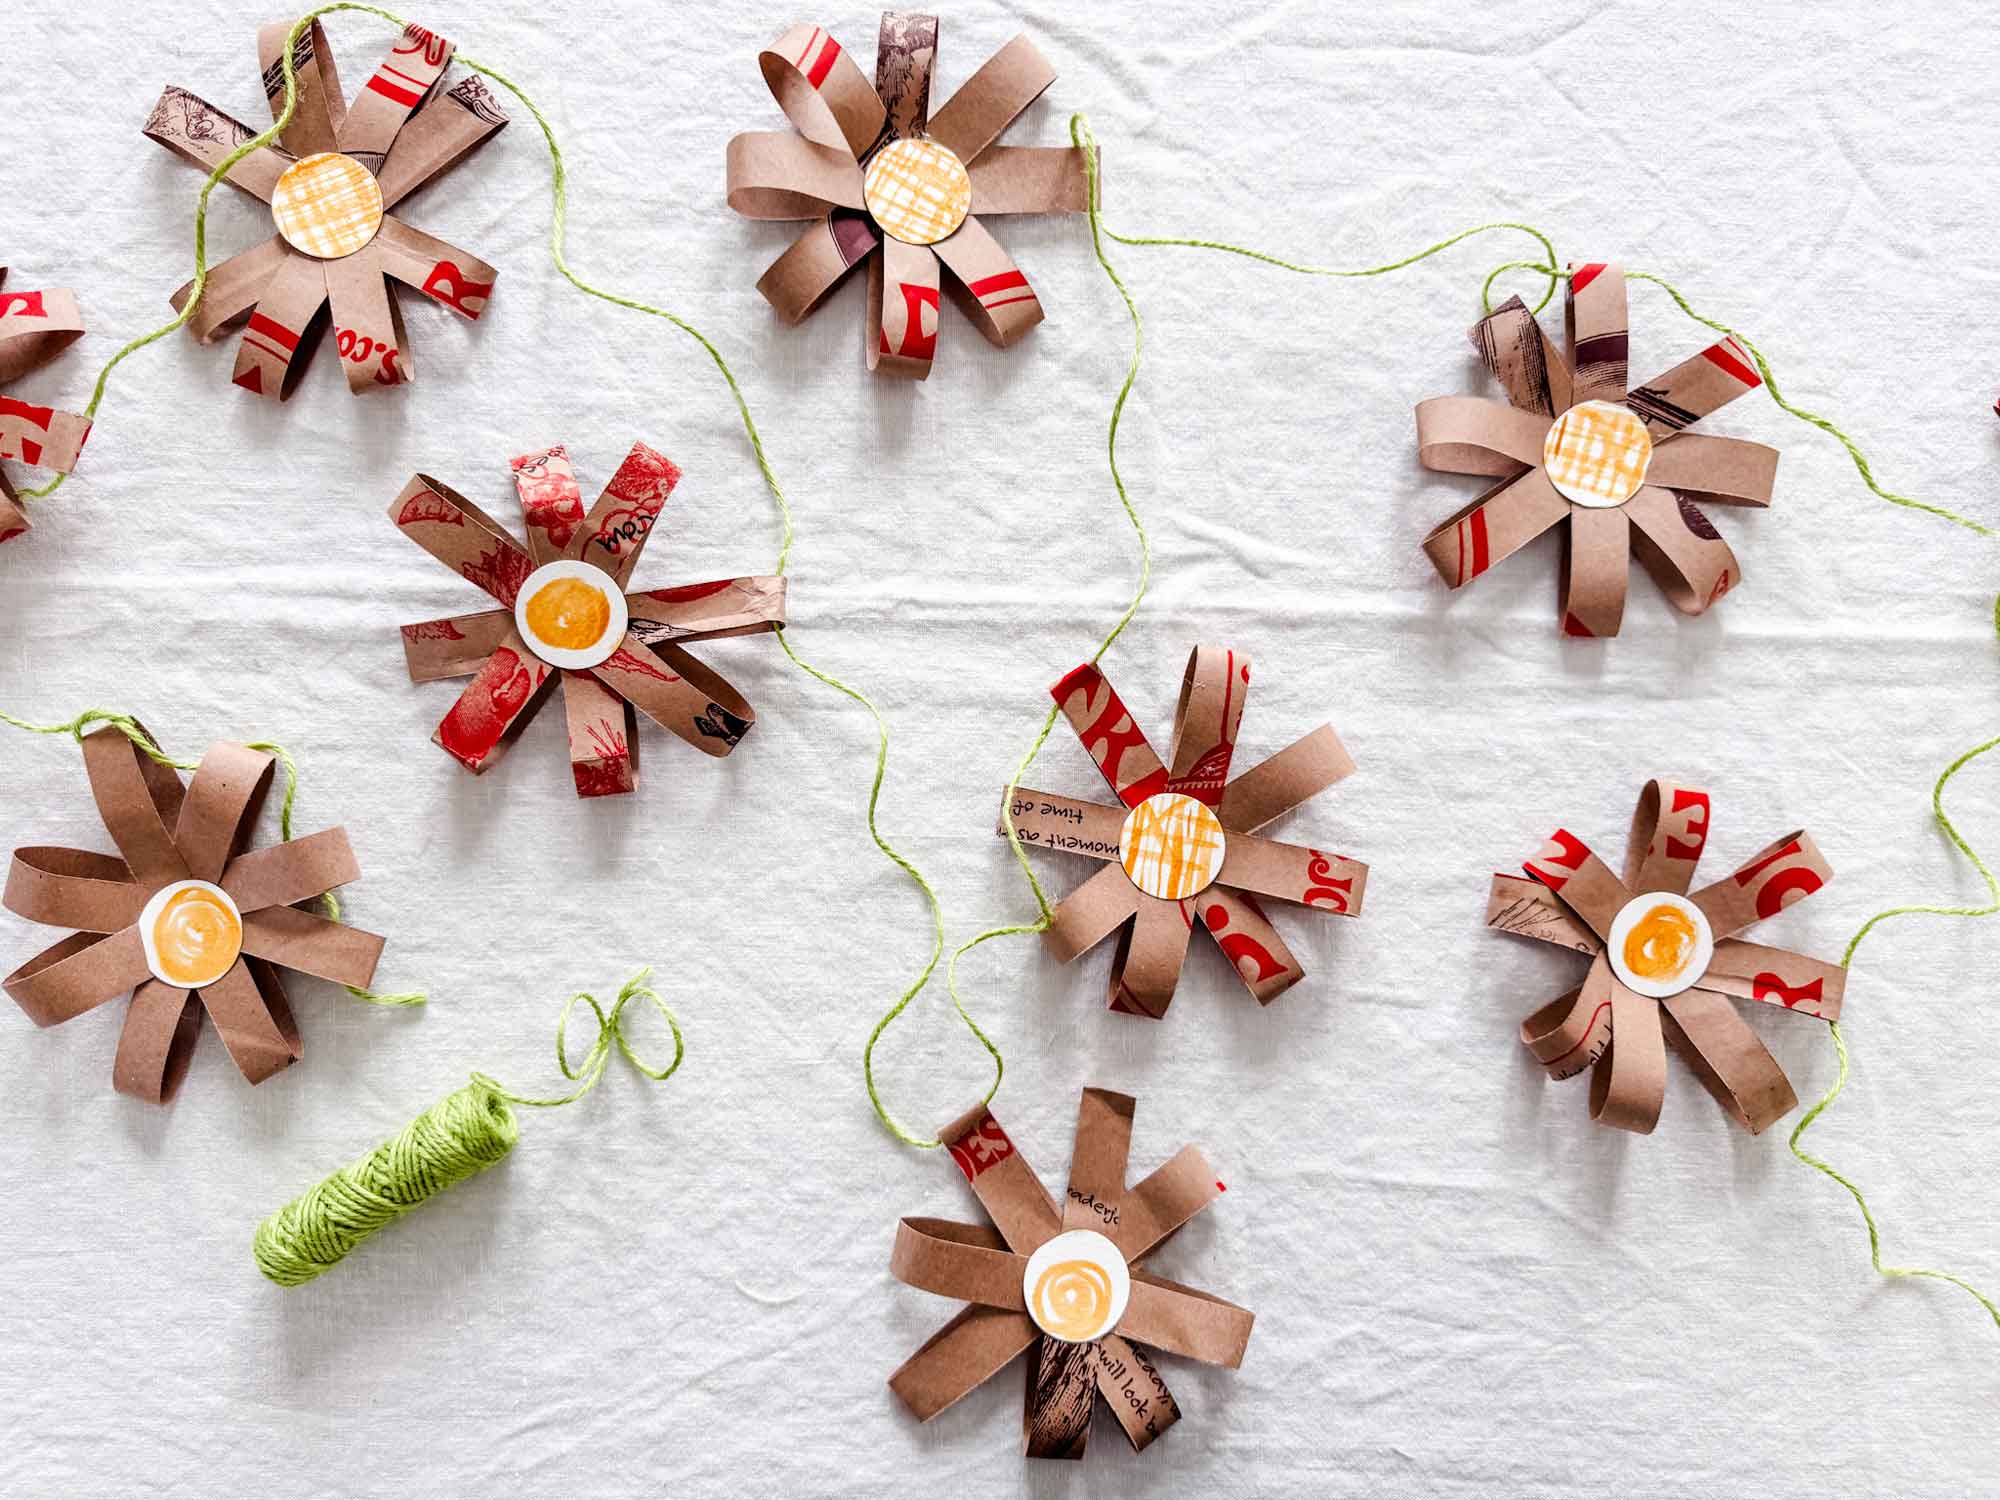
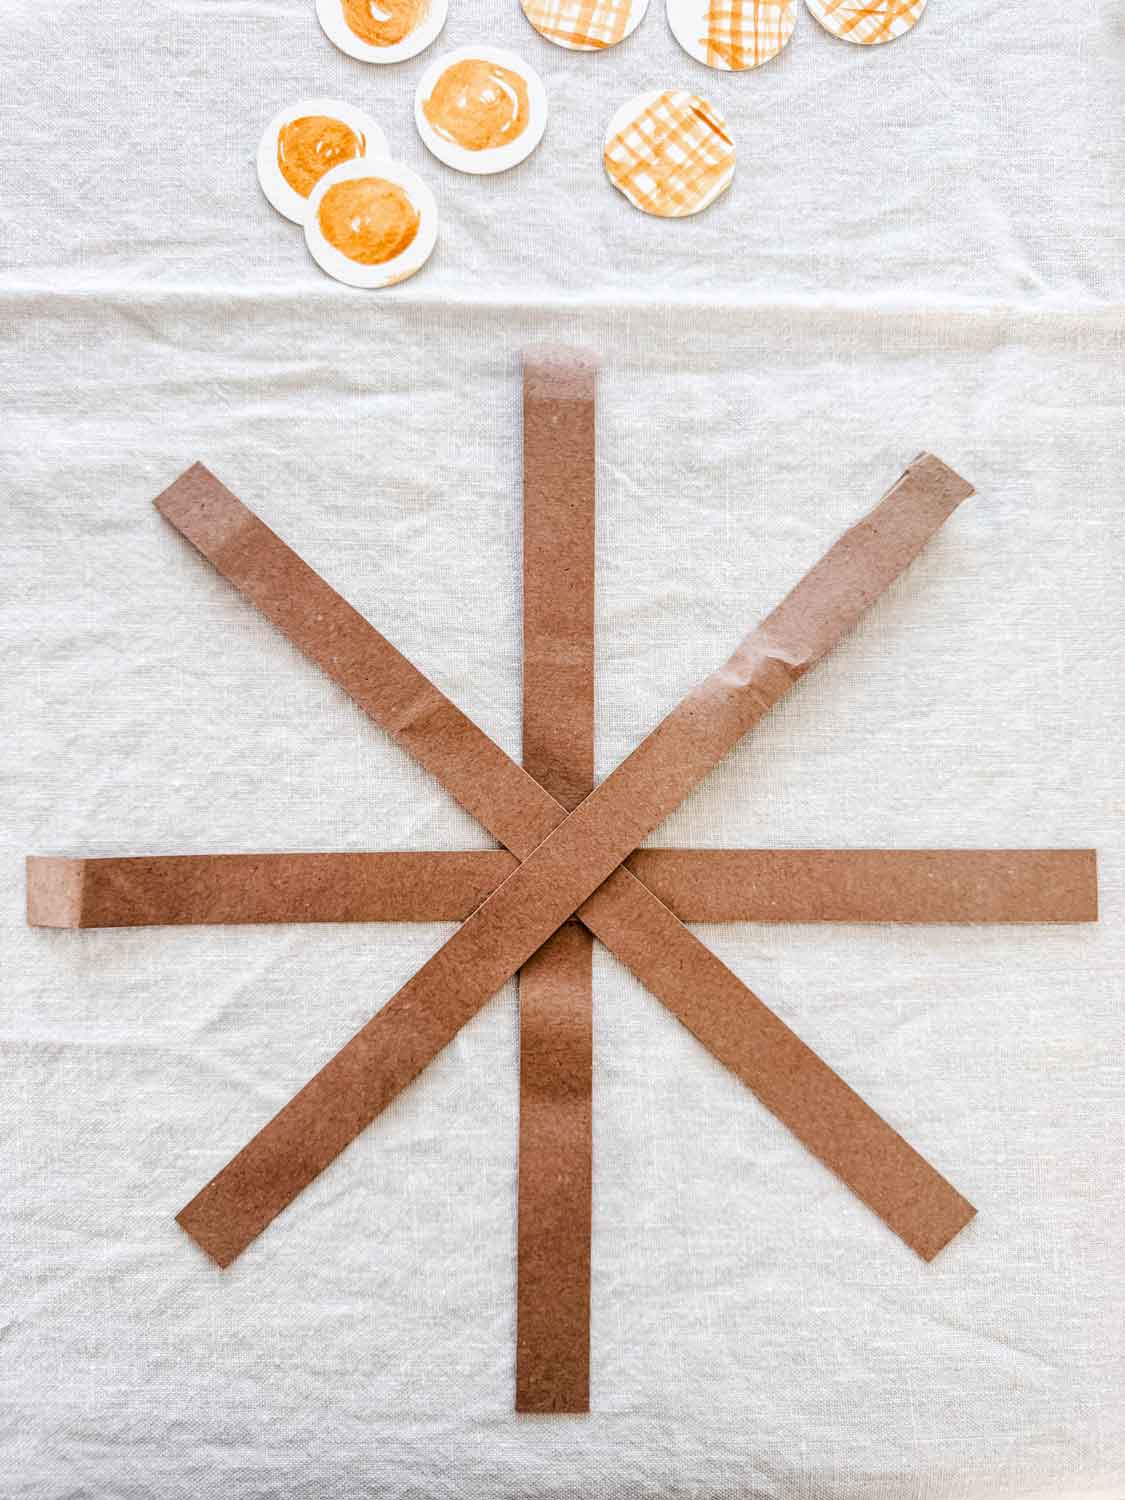
Step 3: Form the Flower
Layer the strips in a starburst pattern, overlapping them in the center. Staple right through the middle to secure them.
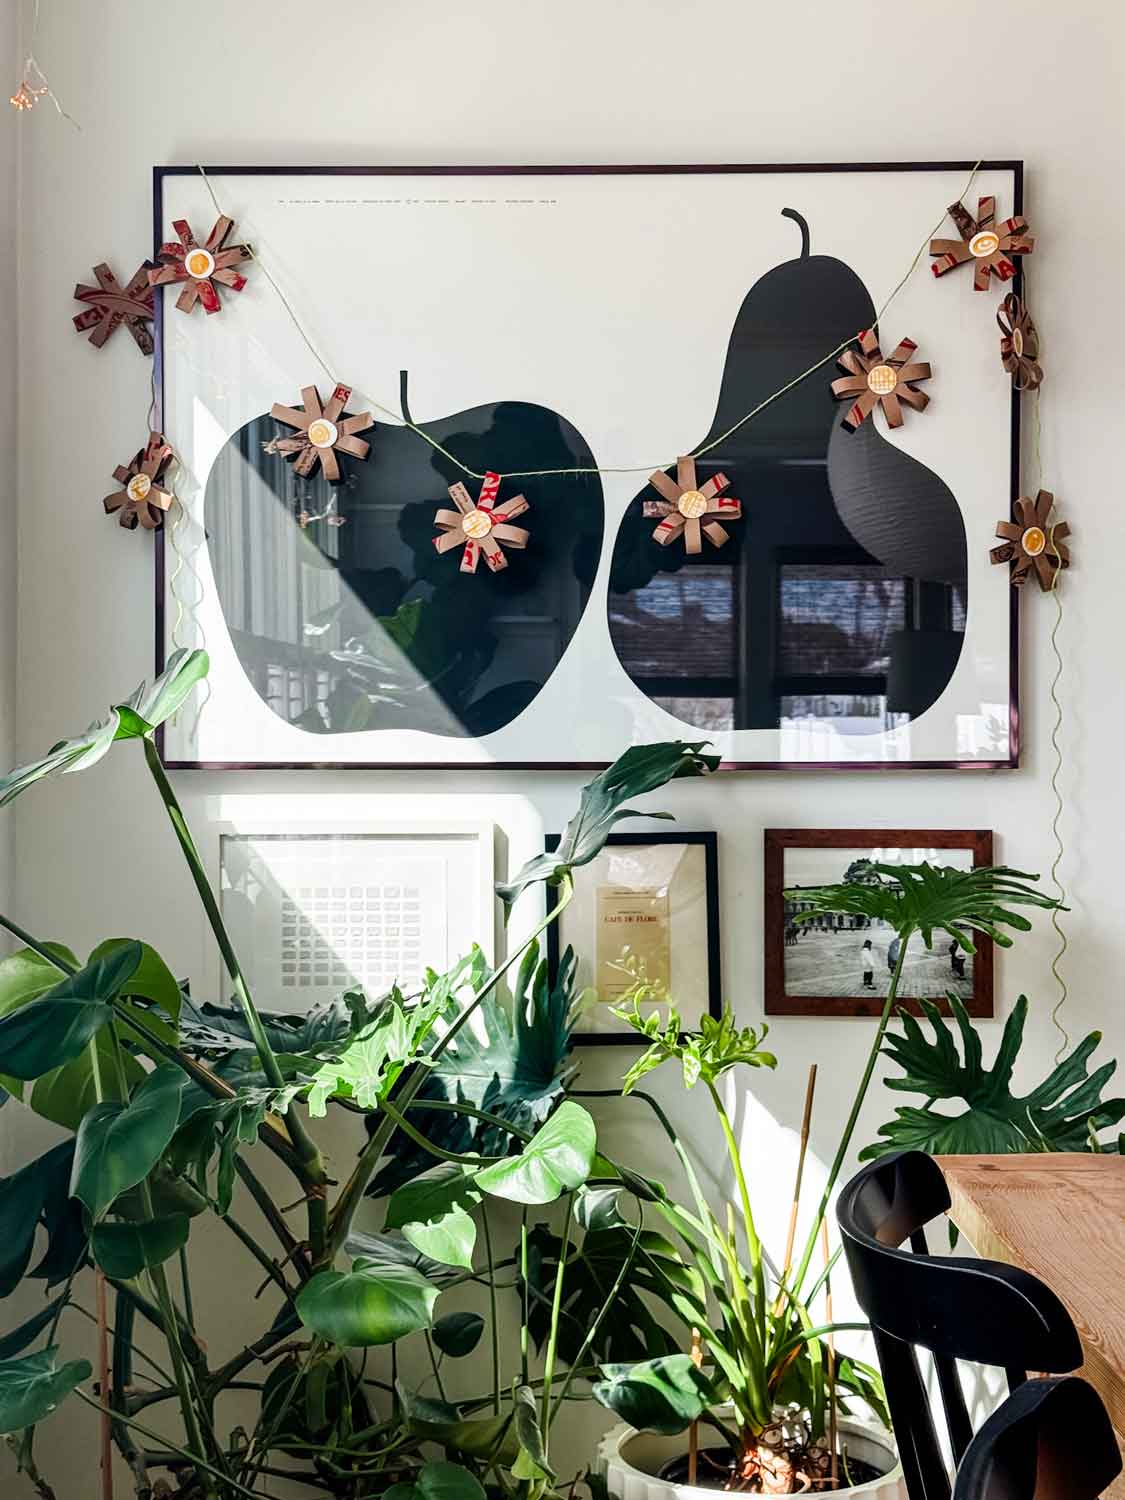
Then gently loop each strip upward and hold the ends closer to the center, forming petals. The paper bag has just enough structure to hold its shape. Then staple in the center to secure the shape.
Once your petals are formed, glue one of the painted watercolor circles over the stapled center.
Step 4: Make It a Garland
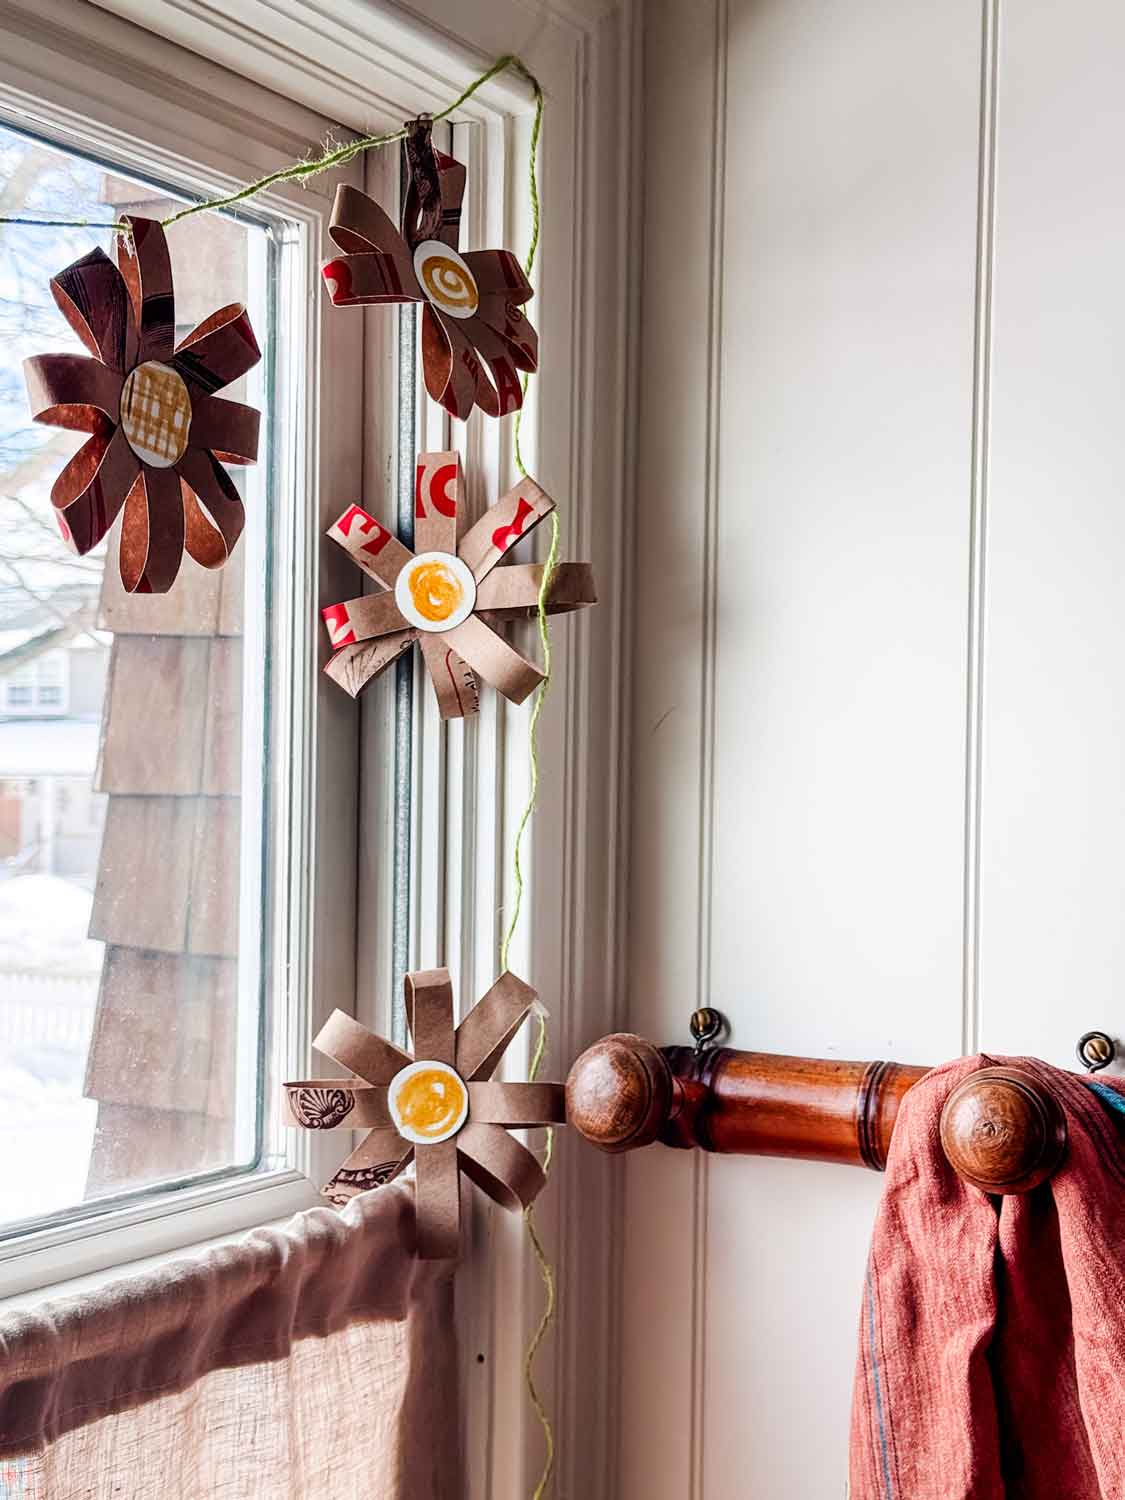
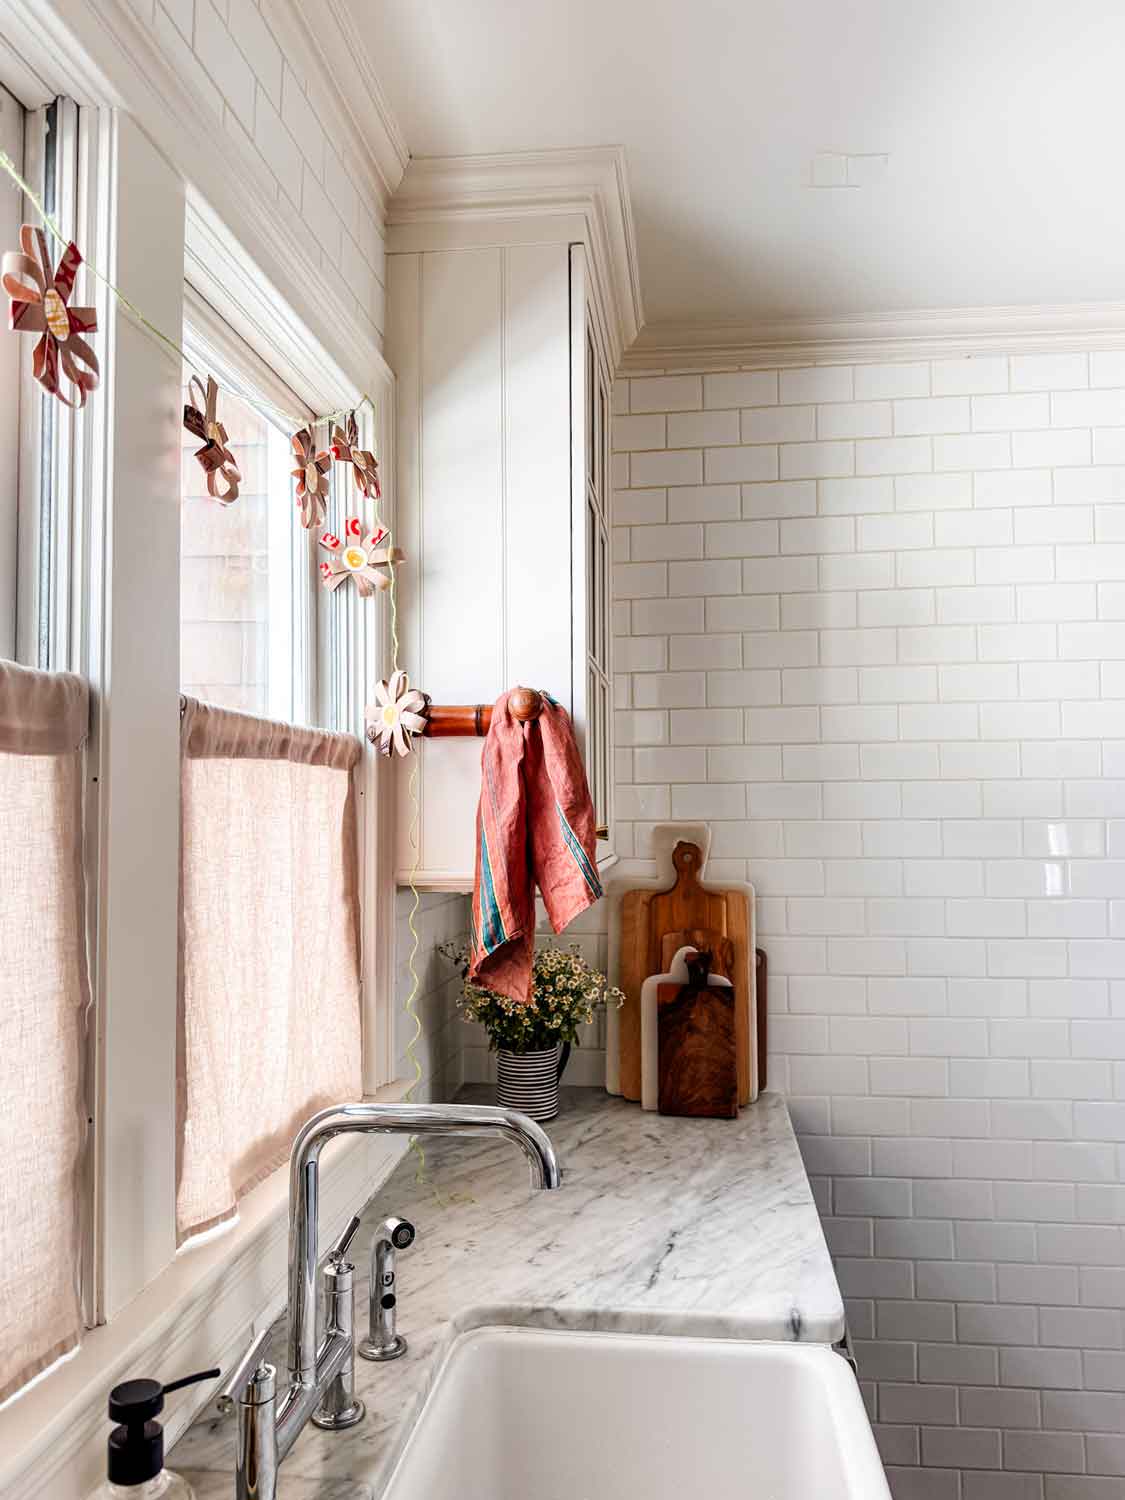
To turn the flowers into a garland by threading green twine through them. Space them evenly and let the twine drape naturally. I used bright spring green to represent a vine or stem.
It’s sweet, hung across a kitchen window or draped on my modern black-and-white Enzo Mari Apple Pear poster.
I love that this uses something that would normally be recycled. There’s something satisfying about turning a grocery bag into something you want to keep, at least for a little while.
It’s simple, imperfect, and easy — which might be exactly what we all need right now.
You may also enjoy these simple craft ideas:
How to Make Beautiful Flowers Using Coffee Filters
Simple Summer Table Runner with Ink & Butcher Paper
Make Your Own Scalloped-Edge Terra Cotta Pots with Air-Dry Clay
DIY: How to Make Flower Frogs Using Air-Dry Clay
How to Decorate a Wine Bottle for a Hostess Gift
15-Minute Spring Centerpiece DIY
Blogger’s Best DIY Flower Crafts
Floral Embroidered Handmade Cards | My 100 Year Old Home
Floral Embroidered Handmade Cards are one of those projects that combine creativity, storytelling, and meaningful making in the most beautiful way. Using fabric scraps, simple stitching techniques, and a little imagination, I created a collection of stitched cards that feel personal, artistic, and truly special to give.
Candlestick Holder Floral Arrangement | Craftberry Bush
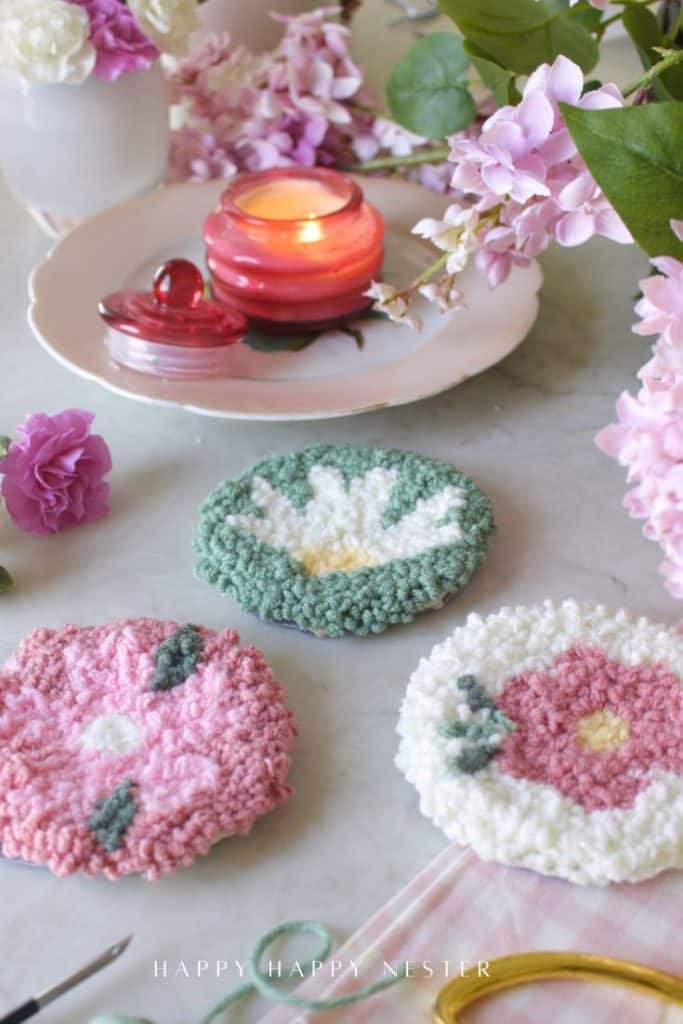
Punch Needle Crafting DIY | Happy Happy Nester
Punch Needle Crafting DIY is a cozy, beginner-friendly craft, and I had the best time making these three adorable coasters from a simple kit. This project comes together quickly and is perfect for adding a handmade touch to your coffee table or gifting to a friend. If you’ve been wanting to try punch needle embroidery, these cute little coasters are a fun and easy place to start.

Paper Bag Flower Garland (Using a Trader Joe’s Bag) | Most Lovely Things
A simple paper flower garland made from a Trader Joe’s paper bag and hand-painted watercolor circles — an easy, charming craft that turns everyday materials into something unexpectedly sweet.
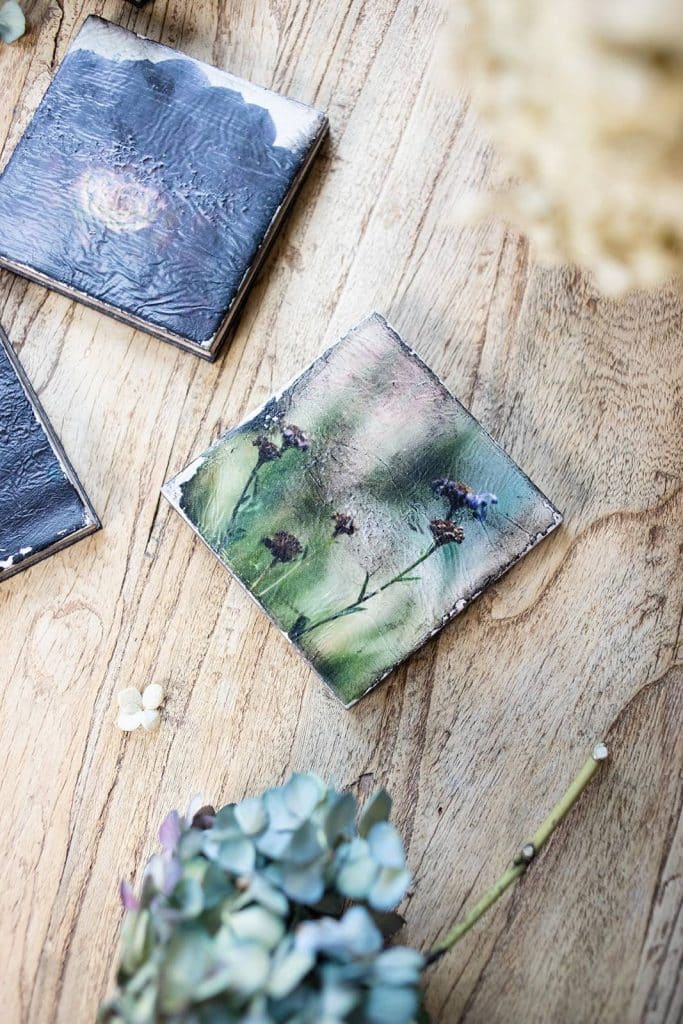
Floral Decoupage Tile Coasters | My Sweet Savannah


YOU ARE SO CREATIVE AND I LOVE HOW THIS IS BASICALLY FREE!