
How to Make Giant Paper Snowflakes 2023
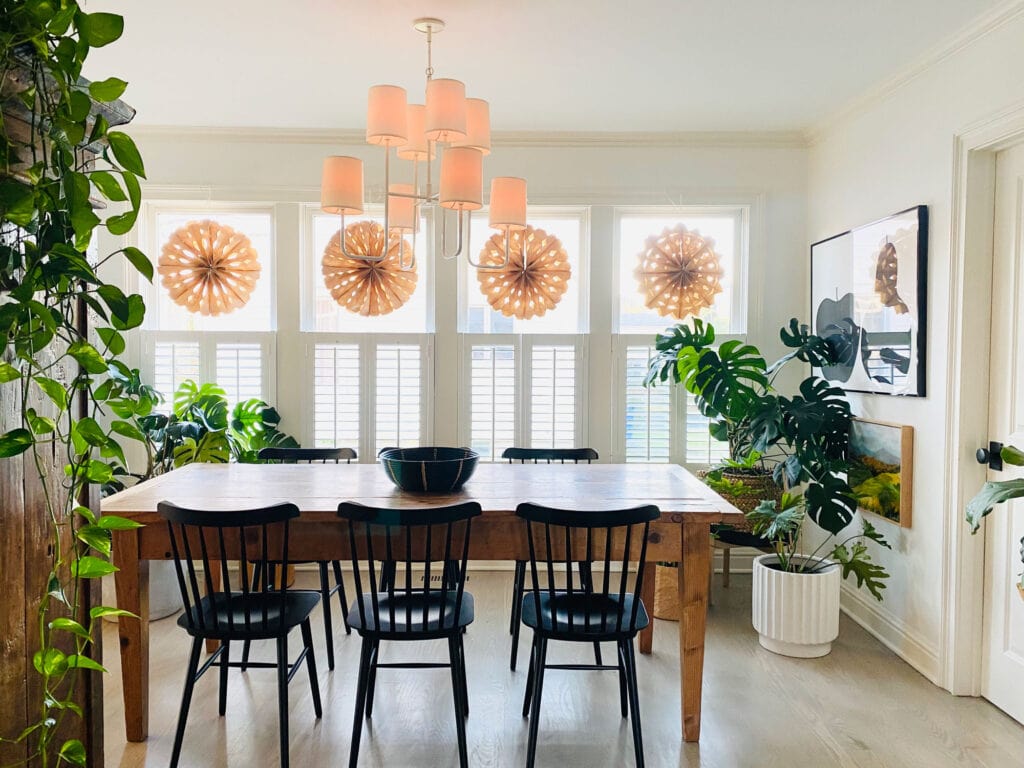
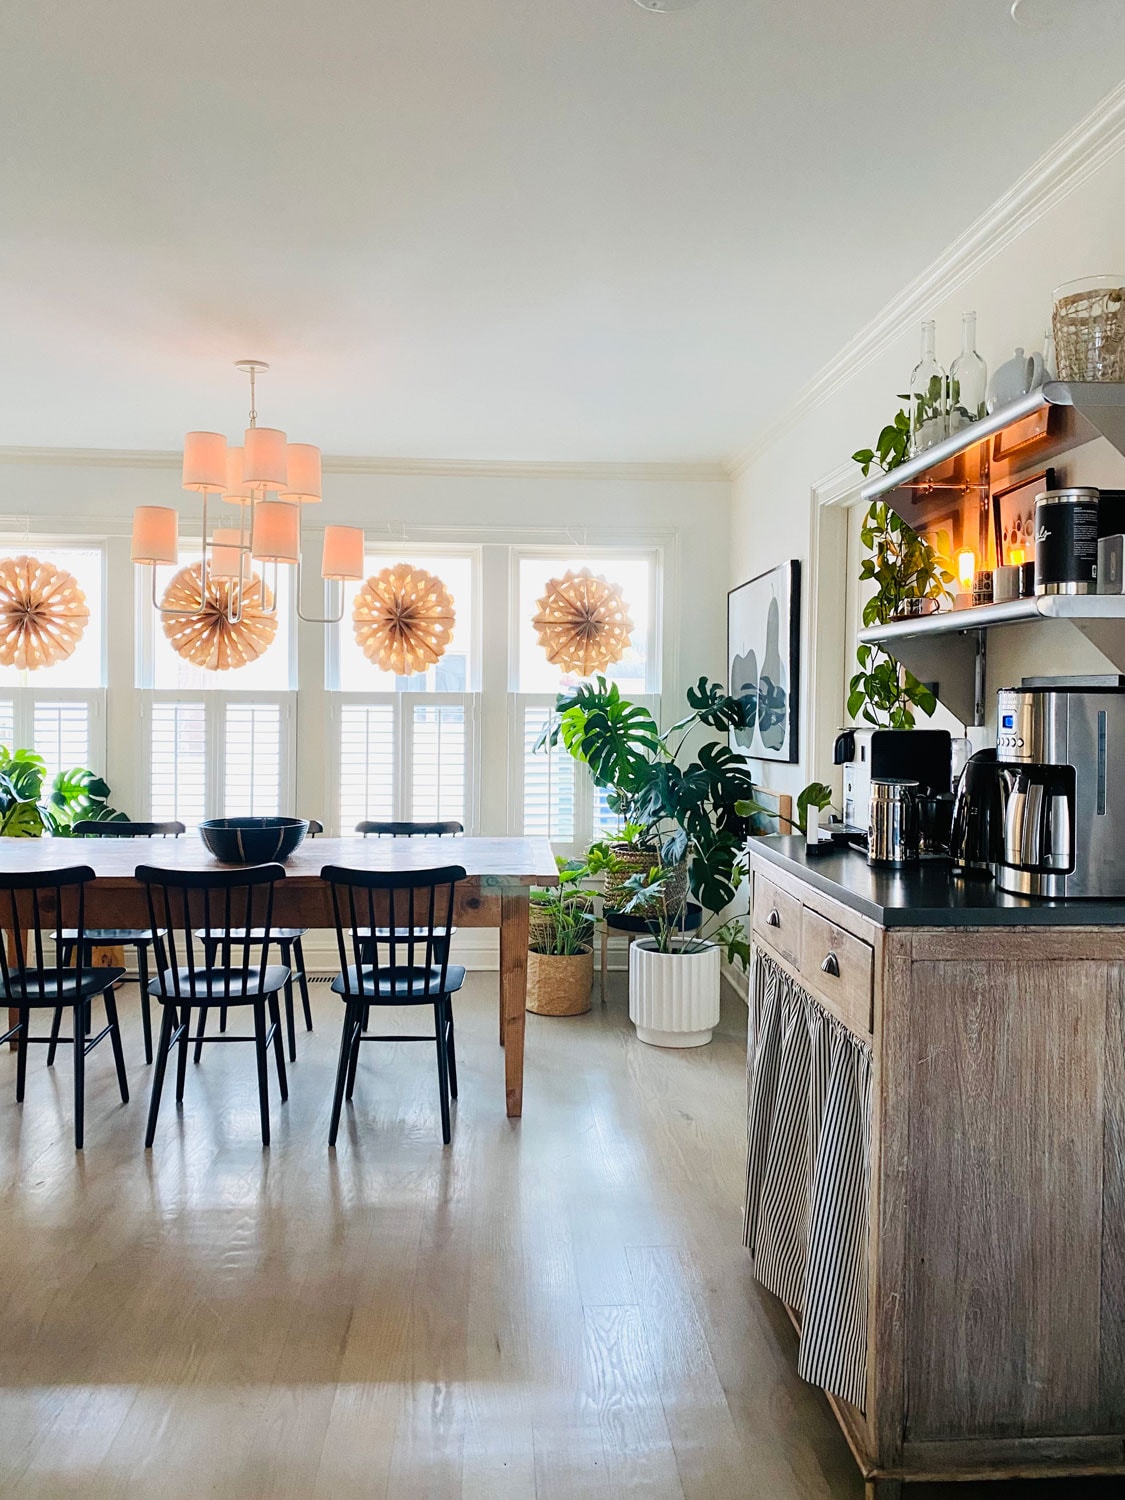
How to make giant paper snowflakes that you’ve seen all over Pinterest! These snowflakes are so easy to make and so fun! You can make them using nothing but brown paper bags, a hot glue gun, and a good pair of strong scissors. You can make smaller snowflakes using small brown paper lunch bags or white paper bags too! You can simply change the snowflake patterns of each based on the cuts you make. They really do make fun holiday decorations
Today I’m showing you the simple steps for this DIY Christmas craft along with a short video.

The Supplies you’ll need to make giant paper snowflakes
- Eight Paper lunch bags/sacks
- A mini hot glue gun and several glue sticks
- A good pair of scissors
- A piece of twine, string, or fishing line to hang the snowflakes
Instructions that are as easy as 1, 2, 3…9

- Take 8 paper bags (less than 8 and you won’t have enough to fan the bags out in a circle, any more than 8, and it’s hard too hard cut through that many layers).
- Stack the bags with the open end of the bags at the top and the folded bottom area at the bottom
- With the first bag, take a hot glue gun and starting at the top of the bag make a T shape down the center of the bag and across the flap
- Stack the second bag on top of the first bag, smoothing it out so that the glue fastens the bags together forming the entire stack
- Repeat until you’ve glued all 8 bags together
- Then using good scissors, cut out half circles and triangles on the side of the bags making sure to cut the corners on each side symmetrically creating a pattern (feel free to cut different shapes on each one to form different patterns)
- Take hold of the first and last paper bag and open it in a circular motion fanning the bags open to create your one-of-a-kind giant snowflake.
- Using a hole punch, make a hole at the top of the first and last bags and insert a strand of twine, string, or fishing line for hanging
- See the video below if the above doesn’t make sense!
What is the best glue to use for paper bag snowflakes?
I like to use a hot glue gun. It makes a little bit of a mess but the blue goes on evenly and it dries very quickly. You could use any kind of clear or white liquid craft glue but the glue does take a while to dry. I’m not that patient. You could also use a glue stick but it also takes a while to dry and doesn’t bond quite as well as the glue gun or craft glue.
Can I substitute coated color bags for uncoated brown bags?
Coated bags come in many different colors which is why people often ask that question. Technically you can use coated bags, but I would recommend against it. Coated bags are thicker and therefore harder to cut. Even with a good pair of sharp scissors, it’s difficult to cut through eight brown paper bags. Eight bags have sixteen layers. That is a lot of paper to handle for even the sharpest, best scissors. Just use any size or any color of uncoated paper bags and it will make the project much easier.
If you’d like to add some color to the bags, try painting them with watercolors. Watercolors are not quite as bright and vibrant as other paints, but they won’t leave a thicker coating which will make it much more difficult if not impossible to cut through.
Can kids do this craft project?
I would suggest doing this project with your kids. The little ones will struggle by themselves.
First, you have sharp scissors cutting through eight bags. Kids will have a hard time doing that and could cut themselves. Second, there’s the hot glue gun. It would be really easy for them to get burned.
But if you have the patience and want to do it with your kids, you tackle the scissors and the glue gun and they can help).
You could use a glue stick or liquid craft glue instead of a glue gun. However, the adhesive of the glue stick takes much longer to dry and sometimes doesn’t quite hold the bags together.
Fun ideas for decorating the snowflakes
You can decorate the snowflakes in several different ways. You could coat the front of the snowflake with spry adhesive (sold at most art supply stores) and sprinkle with some fake snow. If you don’t mind the mess of glitter, you could also sprinkle some of that on the snowflakes. However, when spraying with adhesive, just make sure you do it outside and lay some paper or cardboard down to protect whatever surface you’re doing it on. Aside from the mess it creates, the fumes from spray adhesive can be pretty toxic so outside in the fresh air is a much better choice.


Those sponges are so cool…I would love to win the annual supply!!! But I will settle for buying three boxes with the promo code.
I love the Garnet Hill bedding! And your gift guide is awesome. What a fun post.
The sponges are the greatest idea , since no bacteria buildup.
Thanks for the chance to win.
Those giant paper snowflakes are so cool! Makes me think of grade school when we used to make the white ones out of small bags. They were not nearly as cool as these! I think Summer would have fun with these! I love that mini fire pit. So many of them are so big for most spaces…so clever!
You have a lot of good stuff in this post, the sponges sound great. I had to laugh about Patrick and the floral pillowcases. I’ve had the same issue in my house, it is like they think floral sheets and pillowcases emit estrogen overnight or something!
Those sponges are soooo intriguing. I would love to win ! Big fan of planters from Terrain and you have inspired me to try the Walmart DIY. Fingers crossed.
Annie!! Love the snowflakes because they offer reasonably priced craft for families. They can also stay up into January.
Thank you once again for offering sustainable alternatives.
Diney on Camano Island
I love them too Diney! And you’re r9ght…they are more winter than holiday!
Love those giant snowflakes. Going to make those.
Solo stove is on my Christmas wish list. Hope Santa brings me one.
The sponges, I just added to my wish list. Winning would be great too.
THose Solo stoves are great! And the sponges…haven’t used another kind of sponge since starting to use them! They are fantastic!
WELL I LOST THE BET!
I WATCHED YOUR VIDEO ON INSTAGRAM AND MADE THE ITALIAN WATCH IT TOO!
BECAUSE I THOUGHT YOU ONLY HAD TWO BAGS AND HE SAID NO HAD TO BE WAY MORE!!!!
WHY IS HE ALWAYS RIGHT?
I THINK THESE ARE FANTASTIC…………………I don’t have a house where they would look as good as yours but just for the CREATIVITY ASPECT of it I think I need to TRY!Definately a wonderful project to do with LITTLE PEOPLE!!!
HAPPY HOLIDAYS!
Ha! The Italian is right! In fact I tried making them with seven bags and it wasn’t enough to make a full circle! xx❄️
The snowflakes with the grands are happening this weekend!
Looking forward to trying out the sponges.
I hope you and your grandchildren enjoy making the snowflakes! ❄️
Would love to win the giveaway for free disposable sponges. I may not win the giveaway but I bet I could win a prize for the nastiest sponge! Yuck!
Annie,
The people at “Scrub and Throw” were prompt in responding to my emailed question. The order has been sent; I look forward to trying them out.
Thank you again for featuring this product as one of your “Sunday faves.”
Kim! You are going to love them. It’s the only sponge we use now! I can take yesterday’s sponge and clean my shoes, then clean my sink and start fresh with a clean new sponge everyday!!
Where is the video to be found to make the giant paper snowflakes?
Hi Paula! It was on innstagram!
https://www.instagram.com/reel/CV_PvuzJOjd/?utm_source=ig_web_copy_link