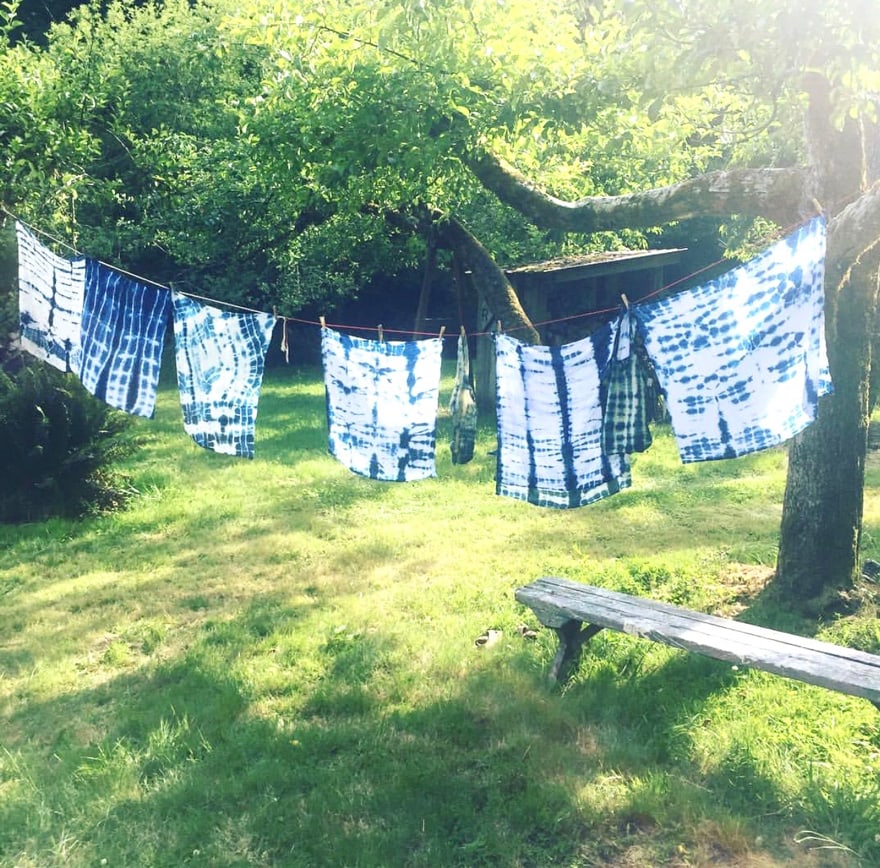
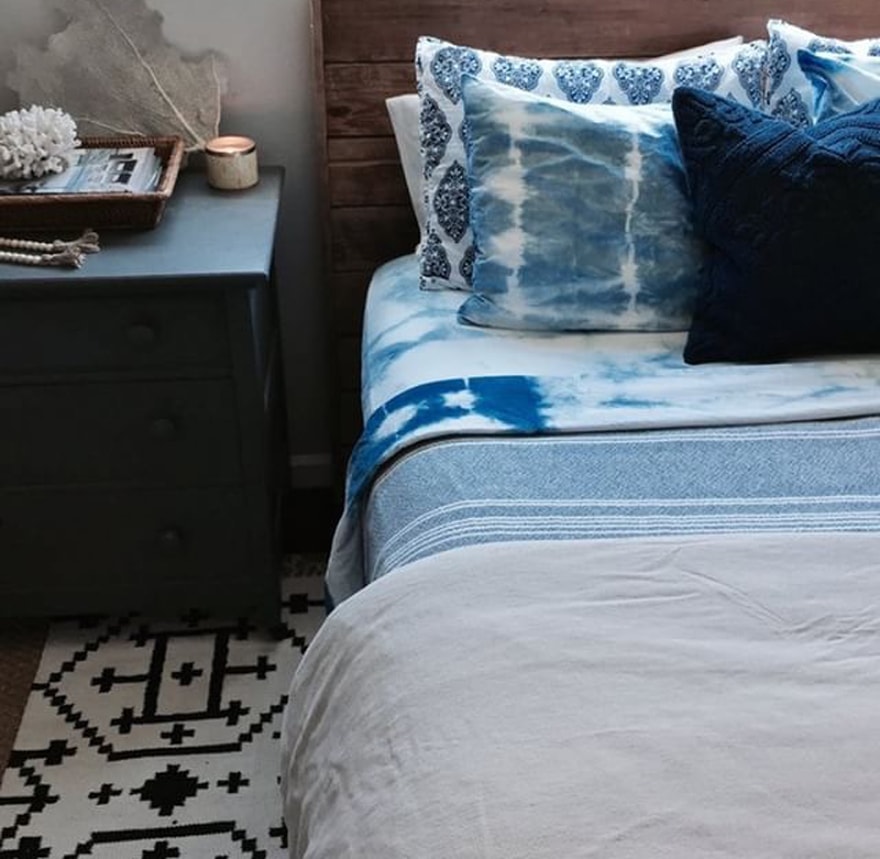
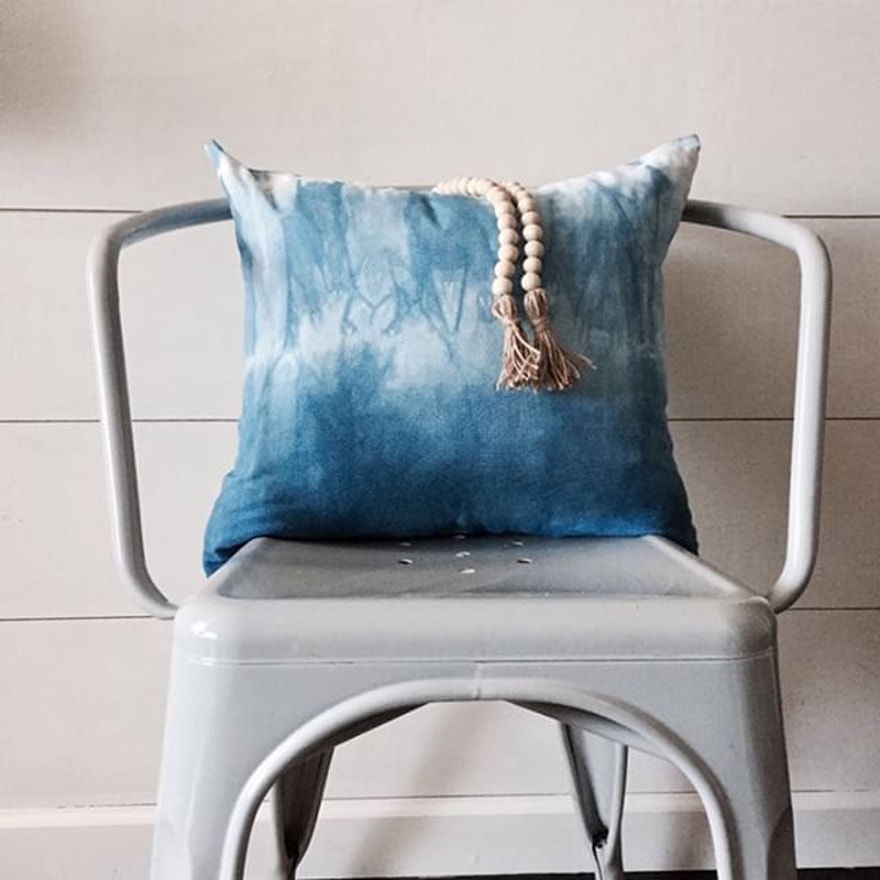
I’ve been loving everything indigo lately so when I saw a summertime tie-dye post on on Sonoma Cottage’s instagram I had to know more. Tara is a huge source of inspiration. I “met” Tara by way of her sister Terri who lives in the same town as me. They grew up in Santa Barbara and love gardening and making their homes beautiful with fresh flowers, candles, yummy food and a little DIY mixed in to all of this. Tara posts about her camping adventures with her family and friends where they create delicious and absolutely beautiful food and apparently craft together. Doesn’t that sound like fun? So today I’m sharing Tara’s beautiful photos and a few instructions. I’ll be giving this a try soon. I would love to host a little backyard DIY Shibori in my backyard for local bloggers early fall. So if you are in my area, give me a shout and let me know you are interested.

Now, meet the person responsible for all these gorgeous photos! Tara lives with her husband and two children in Northern California. She is a stay at home mom with a background in interior design. Tara loves cooking. gardening and all things crafty. Current favorite color: Indigo! Go say hello on her instagram and be inspired! Thank you Tara for sharing your beautiful craft with us! See below for a few directions and a list of items you’ll need.

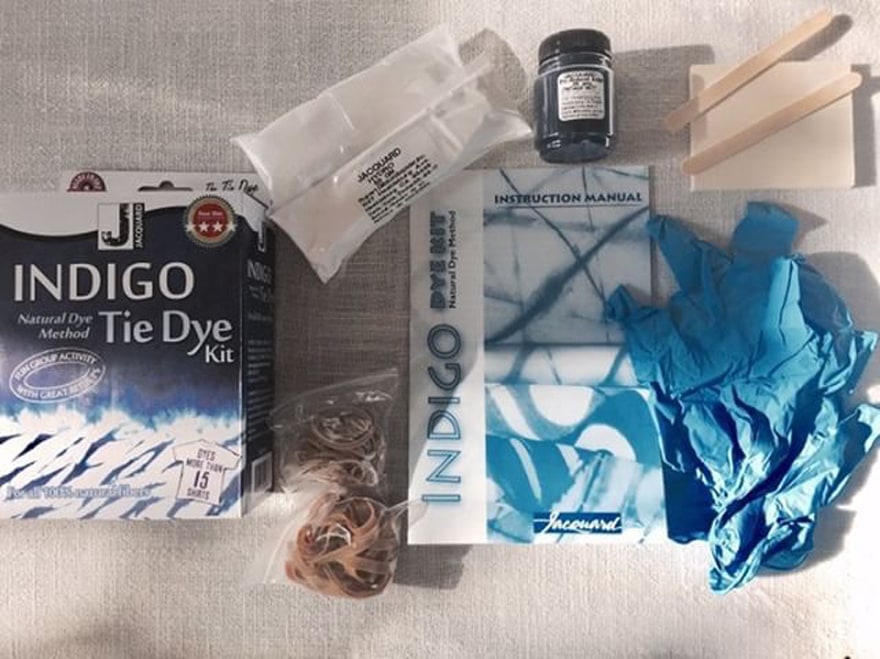
If you are thinking of doing this project, here’s a list of what Tara says you’ll need:
- Indigo Tie-Dye Kit
- Two 5 gallon buckets, one with a lid
- Something to stir, like a yard stick
- Thick rubber gloves
- plastic drop cloth (if necessary)
- Extra rubber-bands & binder clips
- 100% Cotton fabric or items you want to dye (see below for ideas)
- Four gallons warm water
- A clothesline and clothespins or drying rack

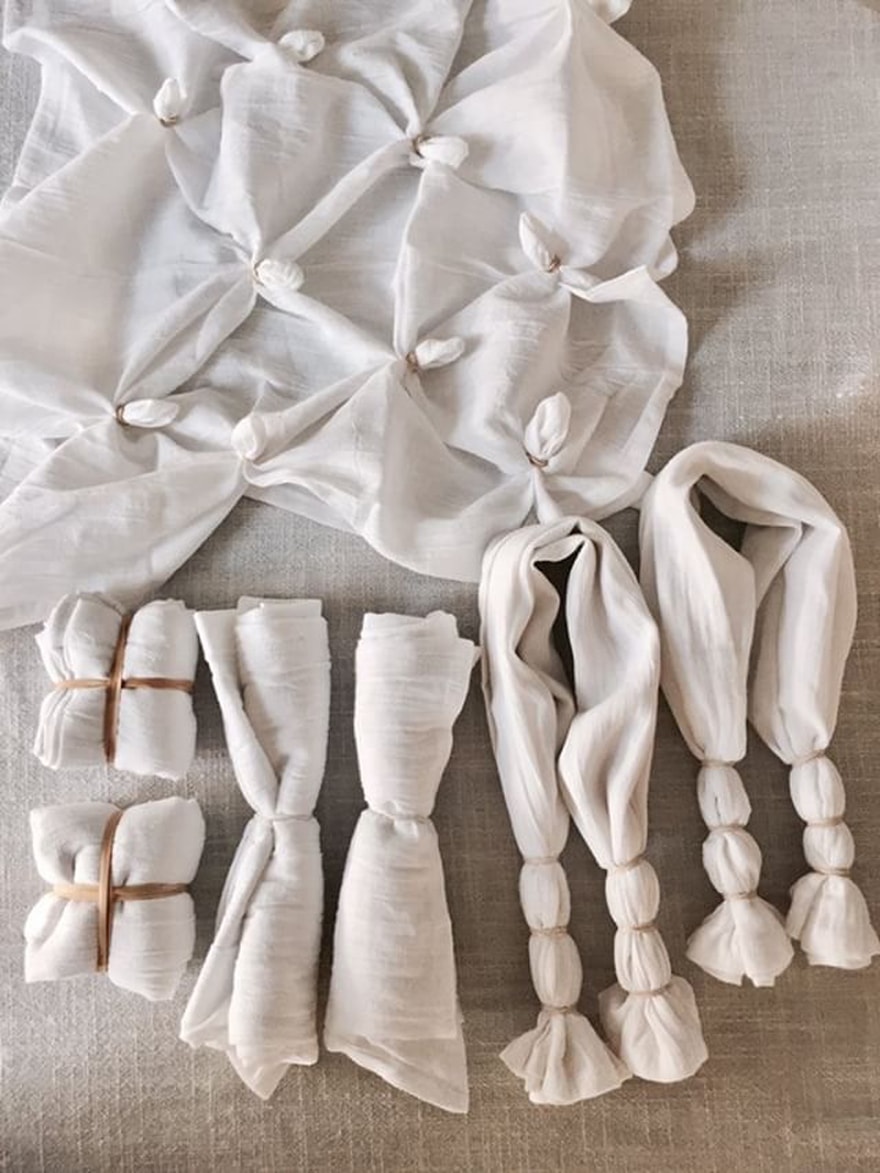
Here are a few step-by-step instructions from Tara. She said the instruction on the kit make it pretty easy.
- Choose items that you want to dye. They need to be 100% cotton to accept the dye. You can use inexpensive fabric or yardage or buy items like dish towels, sheets, tablecloths, napkins, t-shirts. Wash and dry before dying.
- Wrap fabric tight using rubber-bands or clips depending on the design you want.
- Mix your indigo dye according to package instructions. Try to keep the container covered as much as possible and stir gently to mix so that you do not introduce too much oxygen to the liquid.
- Once you have your folded or clipped fabric you are ready to begin.
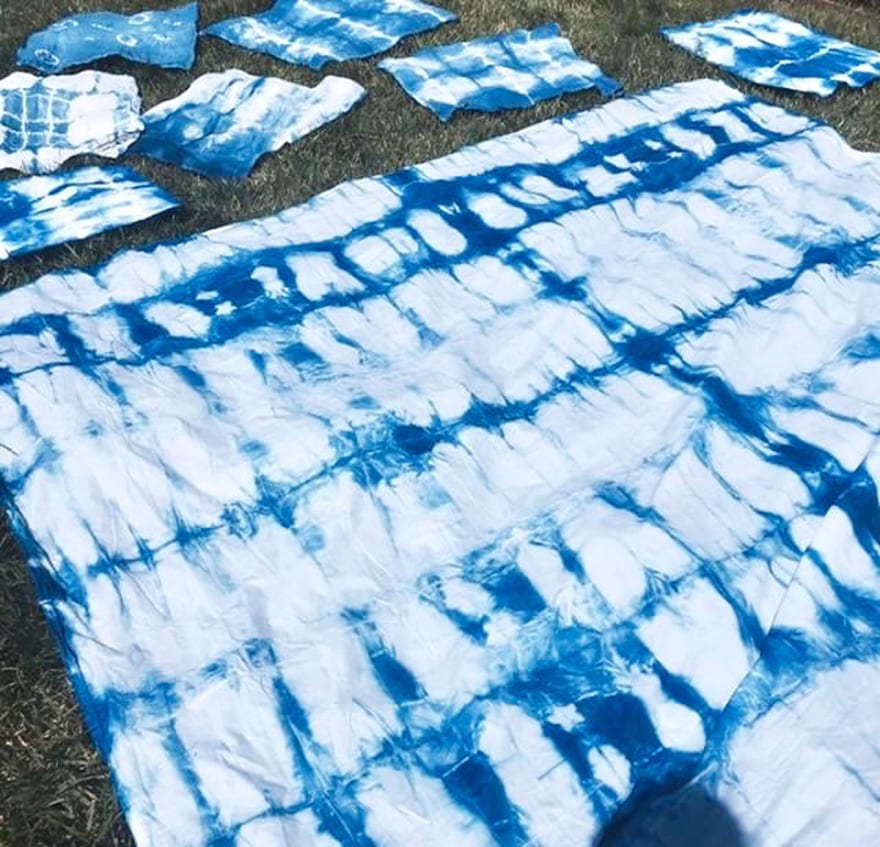
- GENTLY submerge your fabric into the dye. It will probably float, so gently hold it under the surface for about 10 minutes.
- It’s always a good idea to experiment first with a few small items or swatches.
- When you first remove your items from the dye they are green. Once the fabric is in the air it will begin to oxidize.
- It can take up to 20 minutes to fully oxidize. You will begin to see the designs emerge never really knowing what to expect.
- Rinse and hang to dry.
If you try this, let us know! Thanks again Tara for all your beautiful photos and the inspiration! xo annie
this is fab annie. i love anything indigo too. we were at the santa monica airport flea market on sunday and there was a dealer selling the most gorgeous indigo vintage fabrics. they are called african mud fabric or bali fabric. i bought 2 pieces and keep moving them around the house bc they are so beautiful! i’ll go to your party! 🙂
oh Janet…I wish you would come to my party!